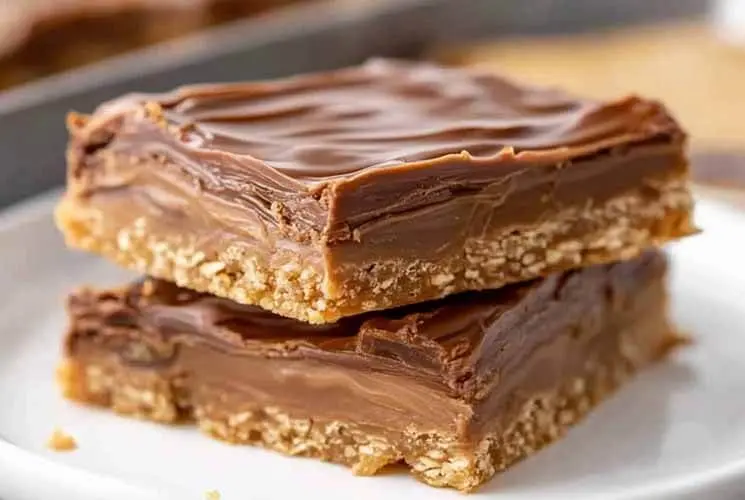
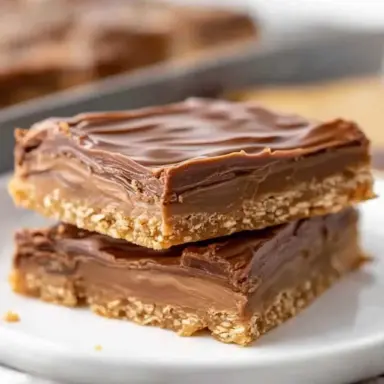
There’s just something magical about old-school cafeteria desserts, and Lunch Lady Peanut Butter Bars are no exception. If you grew up enjoying these rich, chewy bars during school lunch, you already know why they’re making a comeback. And if you didn’t? Well, get ready to fall in love with this peanut butter + chocolate dream.
These bars deliver the ultimate comfort: a soft, melt-in-your-mouth peanut butter base topped with a layer of smooth, fudgy chocolate frosting. They’re sweet but not cloying, rich but not overwhelming, and 100% crave-worthy.
Thanks to social media, food nostalgia, and the trend of revisiting retro recipes, these bars are popping up everywhere from bake sales to Pinterest boards. One bite and you’ll understand why. They’re quick to make, require no fancy tools, and bring a flood of memories with every square.
What Are Lunch Lady Peanut Butter Bars?
Lunch Lady Peanut Butter Bars were a staple in American school cafeterias, especially during the 1970s through early 2000s. Originally made in bulk on giant sheet pans by cafeteria cooks—aka the beloved “lunch ladies”—these bars were a favorite among students. And no wonder! With their rich peanut butter flavor and generous chocolate topping, they were the kind of dessert that made school lunch something to look forward to.
What makes them so special? It’s the combo of creamy peanut butter, a soft graham cracker or oat-based base, and a thick, glossy chocolate frosting. The texture is chewy, slightly crumbly, and oh-so-satisfying. Think: a homemade version of a Reese’s bar, but better.
Today, home bakers have added their own twists—using different nut butters, swapping in oat flour, or doubling the chocolate layer. But at its heart, the original recipe remains a classic: no-bake or lightly baked bars that are easy to slice, serve, and disappear from the tray in seconds.
Whether you’re baking them for a potluck, packing school lunches, or just craving a taste of childhood, these bars are guaranteed to hit the sweet spot.
Ingredients You’ll Need
The beauty of this recipe is that it’s made from simple, everyday ingredients—many of which you likely already have in your pantry. Here’s what you’ll need:
-
Creamy peanut butter – Stick to shelf-stable brands like Jif or Skippy for the best texture. Natural peanut butter can separate and make the bars oily.
-
Graham cracker crumbs or quick oats – These give structure and texture to the base.
-
Powdered sugar – Sweetens and firms up the peanut butter layer.
-
Butter – Adds richness and helps everything bind together.
-
Vanilla extract – Optional, but it enhances flavor beautifully.
-
Semi-sweet chocolate chips or baking chocolate – For that silky-smooth frosting.
-
More peanut butter (for the frosting) – Yep, it’s a double-peanut-butter situation.
Bold Tip: Use high-quality chocolate like Ghirardelli or Guittard for a richer, smoother frosting that sets beautifully and doesn’t taste waxy.
Step-by-Step: How to Make Lunch Lady Peanut Butter Bars
These bars are deceptively simple—you don’t need any fancy equipment, and the entire process takes under an hour start to finish.
Step 1: Make the Base
In a large mixing bowl, combine melted butter, creamy peanut butter, powdered sugar, and graham cracker crumbs (or oats). Stir until smooth and thick—you should end up with a playdough-like consistency. If it feels too soft, add a bit more dry base (crumbs or oats).
Step 2: Press Into Pan
Line a 9×13-inch baking dish with parchment paper for easy removal. Press the peanut butter mixture firmly into the pan using your hands or a spatula. Make sure it’s level and reaches all corners.
Step 3: Make the Chocolate Frosting
In a small saucepan or microwave-safe bowl, melt the chocolate chips and a few tablespoons of peanut butter together. Stir until completely smooth and glossy.
Step 4: Frost the Bars
Pour the warm chocolate mixture over the peanut butter base and spread evenly with a spatula. You can frost the bars while the base is still warm (for more of a melt-together effect) or wait until it cools to create a clear layer separation.
Step 5: Chill and Slice
Refrigerate the bars for at least 1 hour until the chocolate is set. Once firm, lift the bars out using the parchment paper and slice into squares.
Pro Tip: Run a sharp knife under hot water before slicing for ultra-clean cuts—and wipe the blade between each slice.
Easy Customizations and Fun Variations
Want to get creative? These bars are endlessly customizable. Here are some fun ways to make them your own:
-
Add-ins to the base: Mix in mini chocolate chips, chopped pretzels, or coconut flakes for added texture and flavor.
-
Swap the nut butter: Use almond butter, cashew butter, or sunflower seed butter for allergy-friendly or flavor variations.
-
Make it gluten-free: Substitute gluten-free graham cracker crumbs or certified GF oats. Be sure to check your chocolate and powdered sugar for GF certification if needed.
-
Add a crunch layer: After pressing the base, sprinkle in crushed Rice Krispies or a layer of marshmallow cream before frosting for a s’mores-inspired twist.
-
Gourmet finish: Once frosted, sprinkle sea salt flakes, drizzle with caramel, or dust with cocoa powder for a more refined dessert bar.
These bars are forgiving, fun, and practically foolproof. Whether you’re going classic or playing around with flavors, they’ll always deliver that irresistible peanut butter-chocolate combo we all love.
How to Store, Freeze & Make Ahead
Once your Lunch Lady Peanut Butter Bars are chilled and cut, you’ll want to store them properly to keep them fresh and delicious.
Fridge or Counter?
If your kitchen is on the cooler side, these bars can sit on the countertop for up to 3 days, especially if stored in an airtight container. But for best results, store them in the refrigerator, where they’ll stay firm and tasty for up to 7 days.
Avoid Sticky Chocolate
To keep the chocolate layer from getting tacky, lay a sheet of parchment or wax paper between layers when stacking. This prevents smudging and helps them stay picture-perfect.
Can You Freeze Them?
Yes—these bars freeze beautifully! After cutting, place them in a single layer on a baking sheet until frozen, then transfer to a freezer-safe container. Layer with parchment paper between rows to avoid sticking. They’ll keep for up to 2 months in the freezer.
Make-Ahead Tips
You can make these bars 2–3 days in advance of a party, bake sale, or holiday gathering. Just keep them chilled and covered until ready to serve—they’re a crowd-pleaser every time.
What to Serve With These Bars
These bars are rich, creamy, and chocolatey—so pairing them with something refreshing is a smart move. Here are a few easy serving ideas:
-
A cold glass of milk (the ultimate pairing!)
-
Iced coffee or cold brew for grown-ups
-
Fruit platter for balance on a dessert table
-
A scoop of vanilla ice cream if you’re feeling extra indulgent
They also work wonderfully in lunchboxes or as a fun surprise in kids’ snack packs. Need a dessert tray for a potluck? Slice these into bite-sized squares and arrange them with brownies, cookies, or lemon bars.
Whether you’re serving a crowd or enjoying them solo, Lunch Lady Peanut Butter Bars are just the right mix of nostalgic and decadent.
Why These Bars Are Still a Crowd Favorite
There’s a reason these bars have never gone out of style—they’re the perfect marriage of peanut butter and chocolate, wrapped up in a sweet, chewy bite.
They’re also incredibly easy to make—no electric mixer required, no long baking times, and no need for fancy ingredients. That’s why they’re a go-to for busy parents, teachers, and home bakers who want something foolproof but impressive.
Plus, these bars are easy to scale, making them perfect for events. Want a fun kitchen project with the kids? This recipe is a great way to get them involved—no hot oven required (if using a no-bake version), and they’ll love spreading the frosting.
Sometimes the simplest recipes are the ones we come back to again and again. These bars aren’t just dessert—they’re a memory, a tradition, and a guaranteed hit.
FAQs
What kind of peanut butter is best for peanut butter bars?
For best results, use creamy, shelf-stable peanut butter like Jif or Skippy. Natural peanut butter tends to separate and can make the bars oily or crumbly. If you do use natural, stir it thoroughly before adding.
Can I make these without chocolate?
Yes! While the chocolate layer is iconic, you can skip it entirely and just chill the peanut butter base. Or swap chocolate with white chocolate, butterscotch chips, or even a maple glaze for a fun twist.
Why are my peanut butter bars crumbly or oily?
This usually happens when the ratios are off or if you’re using natural peanut butter. Make sure to measure your dry ingredients carefully, and mix thoroughly. If the mix feels too dry, add a little extra melted butter or peanut butter to bring it together.
Can I use oats instead of graham crackers?
Absolutely. Quick oats are a great alternative and give a more hearty texture. If using old-fashioned oats, pulse them a bit in a food processor to soften them.
How long do peanut butter bars last in the fridge?
Stored in an airtight container, they’ll last up to 7 days in the fridge and 2 months in the freezer.
Are these bars gluten-free or vegan?
They can be! Use certified gluten-free oats or graham crackers and swap butter with vegan margarine or coconut oil, and you’ve got a vegan-friendly treat. Be sure your chocolate chips are vegan too.
Can I double the recipe for a crowd?
Yes, and it works beautifully! Just use a half-sheet baking pan and double each ingredient. Chill time may be slightly longer.
Tried This Recipe? Tell Us Your Twist!
Tried it already? Leave a comment below and tell us your favorite twist—or what you served it with! Did you go classic with graham crackers or try the oat version? Add a sprinkle of sea salt or swap in almond butter?
We love hearing how readers make this nostalgic dessert their own.
Want more retro desserts? Try these next:
These comforting bakes are perfect companions to your Lunch Lady Peanut Butter Bars for the ultimate throwback dessert spread!
Lunch Lady Peanut Butter Bars
Equipment
- 9x13 inch baking dish
- Parchment paper
- Mixing bowls
- Spatula or wooden spoon
- Saucepan or microwave-safe bowl
Ingredients
For the Peanut Butter Base:
- 1 cup unsalted butter melted
- 1 cup creamy peanut butter Jif or Skippy recommended
- 2 cups graham cracker crumbs or quick oats for variation
- 2 cups powdered sugar
- 1 tsp vanilla extract optional
For the Chocolate Frosting:
- 1½ cups semi-sweet chocolate chips
- ½ cup creamy peanut butter
Instructions
Prepare the Base:
- In a large bowl, mix melted butter, 1 cup peanut butter, graham cracker crumbs, powdered sugar, and vanilla until smooth.
Press Into Pan:
- Line a 9x13-inch pan with parchment. Press the mixture evenly into the pan using your hands or a spatula.
Make the Frosting:
- Melt chocolate chips and remaining peanut butter together in a saucepan over low heat or in 30-second intervals in the microwave. Stir until smooth.
Spread the Frosting:
- Pour chocolate over the base and smooth with a spatula.
Chill and Slice:
- Refrigerate for at least 1 hour or until firm. Slice into squares and enjoy!
Notes
- Use shelf-stable peanut butter for best results (natural kinds may separate).
- Add-ins like mini chocolate chips, crushed pretzels, or sea salt flakes make great upgrades.
- Gluten-free version: Use certified GF oats or graham crackers.
- Bars freeze well for up to 2 months—layer with parchment between rows.
Nutrition