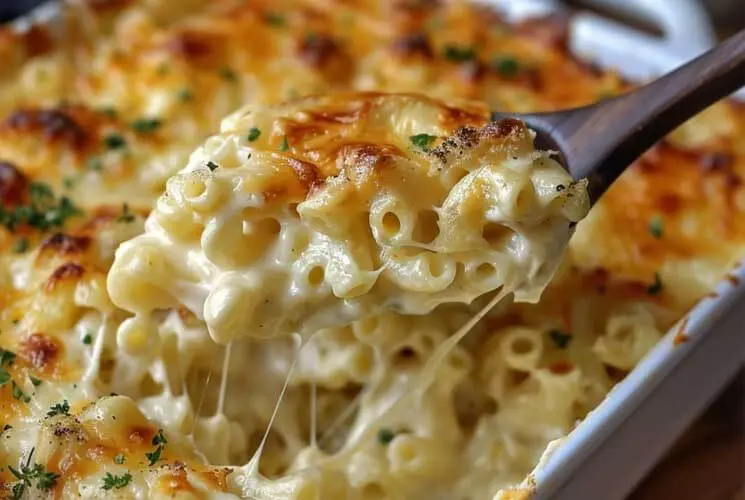
If there’s one dish that feels like a warm hug in a bowl, it’s creamy baked mac and cheese. This is the kind of recipe that instantly brings comfort—rich, gooey cheese tucked into tender pasta, all baked to golden perfection with a slightly crisp top and a bubbling center.
Whether you’re cozying up on a chilly night, preparing for a holiday dinner, or hosting a casual potluck with friends, this baked mac delivers every time. It’s nostalgic, indulgent, and a guaranteed crowd-pleaser. There’s something magical about the way the creamy cheese sauce wraps around every bite of pasta, especially when it’s been baked until the top is beautifully browned and just a little bit crispy.
And the best part? You don’t need a culinary degree or fancy equipment to pull it off. Just a few simple ingredients, a little love, and a good oven bake. This is comfort food at its finest—simple, satisfying, and absolutely irresistible.
What Makes Baked Mac and Cheese So Irresistible?
So, what’s the big deal about baking mac and cheese instead of just stirring it on the stovetop?
It comes down to texture and depth. Stovetop versions are creamy and quick, but baked mac and cheese takes it to the next level. The creamy sauce still coats the pasta, but when baked, it thickens slightly, becomes more velvety, and develops a golden, slightly crispy topping that’s pure magic.
That contrast—soft and creamy inside, golden and bubbly on top—is what makes it unforgettable. Plus, baking helps all those cheeses meld together and soak into the pasta, creating that “baked-in” flavor that just can’t be rushed. It’s comforting, flavorful, and adds just the right amount of indulgence.
Key Ingredients That Make It Extra Creamy
The secret to a truly creamy baked mac and cheese lies in the quality and balance of ingredients. Let’s break it down:
Cheeses: Sharp cheddar is a must—it adds bold flavor and excellent meltability. Mix it with smoother cheeses like mozzarella for stretchiness, gruyère for nuttiness, or a little parmesan for depth. A blend of 2–3 cheeses works best.
Cream base: Whole milk is classic, but for an ultra-rich result, use heavy cream or evaporated milk. These make the sauce thicker, silkier, and extra comforting.
Secret ingredients: Want to take it up a notch? Add a spoonful of cream cheese for extra creaminess, a dollop of sour cream for a slight tang, or a touch of mustard powder to cut through the richness and brighten the flavor.
Bold Tip: Always shred your cheese by hand. Pre-shredded cheese contains anti-caking agents that can prevent smooth melting and lead to grainy sauce.
When these ingredients come together, you get that dreamy, creamy texture that sets baked mac apart from all the rest.
Choosing the Right Pasta
Not all pasta shapes are created equal—especially when it comes to creamy baked mac.
Elbow macaroni is the traditional choice, and for good reason. It’s small, tubular, and perfect for holding onto cheese sauce. But don’t be afraid to switch things up.
Shells or cavatappi (those twisty, ridged noodles) are fantastic alternatives. Their curves and grooves trap more sauce in every bite, giving you a creamier, more flavorful experience.
Whatever you pick, aim for pasta with ridges or hollows. That’s where the cheesy goodness likes to hide.
Step-by-Step Overview: The Creamy Baked Mac Process
The process might sound fancy, but making creamy baked mac and cheese is refreshingly straightforward. Here’s a high-level breakdown:
-
Boil the pasta until just al dente—don’t overcook it, since it’ll keep cooking in the oven.
-
Make the roux-based cheese sauce: Melt butter, whisk in flour, then slowly add your milk or cream and melt in the cheeses.
-
Combine the sauce with the pasta and give it a good stir so everything’s coated.
-
Transfer to a baking dish, top with extra cheese or breadcrumbs if you like, and bake until golden and bubbling.
That’s it! The steps are simple, but the result is unforgettable. And once you’ve done it once, you’ll be tempted to make it again and again.
The Best Cheese Combinations for Flavor & Texture
Great mac and cheese starts with the right blend of cheeses. You want something that melts beautifully and delivers bold flavor.
Sharp cheeses—like aged cheddar or gruyère—bring punch and character. Mild cheeses—like mozzarella or Monterey Jack—add creaminess and stretch but need backup in the flavor department.
Here’s a winning trio:
Sharp cheddar for depth, gruyère for a nutty bite, and mozzarella for that satisfying melt. Parmesan can be sprinkled on top for an extra savory finish.
Want a little funk? Add a touch of blue cheese or smoked gouda. Want more creaminess? Cream cheese or fontina melts like a dream.
Pro Tip: Stick to 2–3 kinds of cheese max. Too many and the flavors can clash. A good rule: one for flavor, one for melt, and one for creaminess.
How to Make the Creamiest Cheese Sauce
A silky cheese sauce is the heart of creamy baked mac and cheese. It starts with a roux—a simple mix of butter and flour.
-
Melt butter in a saucepan over medium heat.
-
Whisk in flour and cook for a minute or two until it smells a little nutty (this step cooks off the raw flour taste).
-
Slowly whisk in warm milk or cream, stirring constantly to keep it smooth.
-
Once thickened, remove from heat and stir in your cheeses a handful at a time.
Avoid grainy sauce by lowering the heat before adding cheese and using freshly shredded varieties.
Want to jazz it up? Add a pinch of garlic powder, paprika, or dry mustard for a subtle kick. Even a dash of hot sauce can brighten the richness.
Take your time here—this sauce is what turns ordinary pasta into something unforgettable.
Baking It to Perfection
Once you’ve mixed your pasta and cheese sauce, it’s time for the magic touch—baking.
Pour everything into a greased baking dish and top with more cheese or a light breadcrumb sprinkle for texture. Bake uncovered to get that golden top and bubbly edges we all crave.
Ideal temp and time?
Bake at 350°F (175°C) for about 20–25 minutes. If you want a crispier topping, broil it for an extra 2–3 minutes—just watch it closely!
Avoid dryness by not overbaking. If your pasta was fully cooked earlier, less oven time is better.
Delicious Variations to Try
One of the best things about baked mac and cheese? You can make it your own. Here are a few crowd-pleasing variations:
-
Bacon Mac and Cheese: Crispy chopped bacon stirred in or sprinkled on top.
-
Lobster or Crab Mac: Fancy it up with buttery seafood for a holiday-worthy dish.
-
Spicy Mac: Add diced jalapeños, hot sauce, or pepper jack cheese.
-
Gluten-Free: Use gluten-free pasta and flour—just keep an eye on cook times.
-
Vegan Option: Try cashew-based cheese sauce and non-dairy milk. Nutritional yeast adds cheesy flavor.
-
Truffle Mac: Add a drizzle of truffle oil and use smoked gouda for an elevated twist.
These upgrades turn a classic into a signature dish—and they’re perfect for experimenting.
What to Serve with Creamy Baked Mac and Cheese
While mac and cheese can absolutely shine on its own, it pairs beautifully with a variety of sides and mains:
-
Roasted vegetables like broccoli, Brussels sprouts, or carrots balance the richness.
-
Fried chicken, meatloaf, or pork chops add heartiness for a full Southern-style meal.
-
A crisp green salad with vinaigrette brings freshness and lightens up the plate.
Serving it family-style? Add cornbread, coleslaw, or even baked beans to create a comfort-food spread worth remembering.
How to Store and Reheat Without Losing Creaminess
Leftovers? Lucky you!
To store: Transfer mac and cheese to an airtight container and refrigerate for up to 4 days. For longer storage, freeze it for up to 2 months.
To reheat:
-
Oven method (best for texture): Cover with foil and bake at 325°F until warmed through.
-
Microwave: Use short bursts and stir often to avoid drying out.
Pro Tip: Add a splash of milk or cream before reheating to bring the sauce back to life. A little butter helps too!
Avoid overheating—it can cause the cheese to separate and go oily.
FAQs About Creamy Baked Mac and Cheese
What’s the secret to creamy baked mac and cheese?
A great roux, a balanced cheese combo, and not overbaking. Plus, using freshly shredded cheese makes a huge difference.
Can I make baked mac and cheese ahead of time?
Yes! Assemble it, cover tightly, and refrigerate for up to 24 hours. Bake just before serving. If cold, add 5–10 minutes to the bake time.
Why is my baked mac and cheese dry?
Usually from overbaking or using low-fat dairy. Also, if your pasta is overcooked before baking, it can soak up too much sauce.
Should I cover mac and cheese when baking?
No—bake it uncovered. This gives you that beautiful golden top. Only cover it if you’re reheating or want to avoid too much browning.
Can I use pre-shredded cheese?
Technically yes, but it won’t melt as smoothly. Pre-shredded cheese has additives that can make your sauce gritty.
How do I fix grainy cheese sauce?
Remove from heat before adding cheese, and add it gradually. If it’s already grainy, blending it briefly can help smooth things out.
Final Thoughts: Why This Recipe Belongs in Your Comfort Food Hall of Fame
Creamy baked mac and cheese is everything comfort food should be—rich, gooey, crispy on top, and endlessly satisfying. It’s simple to make, easy to customize, and loved by kids and adults alike.
Whether you’re cooking for a weeknight dinner or a special gathering, this dish never fails. Bookmark it, tweak it, make it your own—and don’t forget to share your version!
Let’s keep the mac and cheese magic going—one melty, creamy bite at a time.

Creamy Baked Mac and Cheese Recipe
Equipment
- Large pot
- Saucepan
- Whisk
- 9x13” baking dish
- Cheese grater
- Wooden spoon or spatula
Ingredients
- 1 lb elbow macaroni or pasta of choice
- 4 tbsp unsalted butter
- 1/4 cup all-purpose flour
- 3 cups whole milk or 2 cups milk + 1 cup heavy cream
- 1/2 tsp garlic powder
- 1/2 tsp dry mustard optional
- 1/2 tsp salt
- 1/4 tsp black pepper
- 2 cups sharp cheddar shredded
- 1 cup mozzarella shredded
- 1 cup gruyère or gouda shredded
- 1/4 cup parmesan for topping
- Optional: 1/2 cup breadcrumbs for crispy topping
- Optional: pinch of paprika or cayenne for heat
Instructions
- Preheat oven to 350°F (175°C). Grease a 9x13 baking dish.
- Boil pasta in salted water until al dente. Drain and set aside.
- In a saucepan, melt butter over medium heat. Whisk in flour and cook for 1–2 minutes to make a roux.
- Slowly whisk in milk, stirring constantly until thickened (5–7 minutes).
- Remove from heat, stir in garlic powder, mustard, salt, and pepper.
- Gradually add cheeses, stirring until fully melted and smooth.
- Mix sauce with pasta in a large bowl until evenly coated.
- Pour into prepared baking dish. Top with parmesan and breadcrumbs if using.
- Bake uncovered for 20–25 minutes or until bubbly and golden brown.
- Let rest for 5 minutes before serving. Enjoy!
Notes
- Freshly shredded cheese melts better than pre-shredded (which contains anti-caking agents).
- Add cooked bacon, sautéed jalapeños, or lobster for tasty variations.
- For extra creaminess, stir in 2 oz of cream cheese with the sauce.
- Reheat with a splash of milk to restore the creamy texture.
- Can be assembled 1 day ahead—just refrigerate and bake before serving.