Introduction to Classic Pizza Dough
The Popularity of Homemade Pizza Dough
In recent years, homemade pizza dough has surged in popularity. This rise is fueled by the joy of crafting something delicious from scratch, combined with the allure of customizing flavors to personal tastes. The process of making pizza dough at home brings a sense of accomplishment and the promise of a fresh, tasty base for a variety of toppings.
Overview of the Article
This article is a deep dive into the world of classic pizza dough. We’ll explore the essential ingredients and their specific roles in creating the perfect dough. From the type of flour to use to the choice between instant and active dry yeast, each component is crucial. We’ll also discuss the importance of additional ingredients like sugar, salt, water, and oil, and how they contribute to the dough’s texture and flavor. Whether you’re a seasoned home chef or a beginner, this guide will provide you with the knowledge and confidence to create your own classic pizza dough.
Ingredients and Their Roles
Flour Types: All-Purpose vs. Bread Flour
Flour is the foundation of pizza dough, and the type you choose significantly affects the outcome. All-purpose flour is a versatile option, producing a dough that’s easy to handle and bakes into a soft, chewy crust. It’s ideal for those who prefer a more tender bite. On the other hand, bread flour has a higher protein content, which leads to a stronger gluten network. This results in a dough that’s a bit tougher to knead but yields a crust with a crispier texture and a more robust flavor. The choice between all-purpose and bread flour depends on your desired crust outcome.
Yeast: Instant vs. Active Dry
Yeast is the leavening agent that gives pizza dough its rise and airy texture. Instant yeast is a popular choice for its convenience; it can be mixed directly into the flour without prior activation. This yeast is fast-acting and reliable, making it a favorite for quick and easy dough preparation. Active dry yeast, while requiring activation in warm water, is cherished for its traditional approach and slightly richer flavor profile. The choice between the two often comes down to personal preference and the time available for dough preparation.
Additional Ingredients: Sugar, Salt, Water, and Oil
Beyond flour and yeast, other ingredients play vital roles in the dough’s development:
- Sugar: It not only adds a hint of sweetness but also feeds the yeast, aiding in fermentation and browning of the crust.
- Salt: Essential for flavor, salt also strengthens the gluten structure, providing elasticity and chewiness to the dough.
- Water: The hydrator of the mix, water activates the yeast and binds the ingredients. The temperature of the water is crucial; too hot, and it can kill the yeast; too cold, and it won’t activate it effectively.
- Oil: Typically olive oil, it enriches the dough, adding flavor and moisture, which contributes to a tender crust. It also helps in handling the dough by reducing stickiness.
The Dough Making Process
Mixing the Ingredients
The journey to perfect pizza dough begins with the careful mixing of ingredients. Start by combining your chosen flour with yeast, ensuring even distribution. If using active dry yeast, remember to activate it in warm water first. Next, incorporate the sugar and salt, followed by gradually adding water and oil. This gradual addition is key to achieving the right consistency. The goal is to create a mixture where the ingredients are evenly distributed, setting the stage for effective kneading. The consistency should be tacky, but not overly sticky, forming a cohesive ball that’s ready for kneading.
Kneading the Dough
Kneading is where the magic happens in dough development. This process involves folding and pressing the dough, which activates the gluten strands in the flour. These gluten strands are essential for giving the dough its elasticity and chewy texture. Spend about 8-10 minutes kneading, or until the dough becomes smooth and elastic. The dough should spring back slightly when poked. If it’s too sticky, add a bit more flour; if too dry, a touch more water. Proper kneading is crucial for a well-risen pizza with the perfect texture.
Proofing and Rising
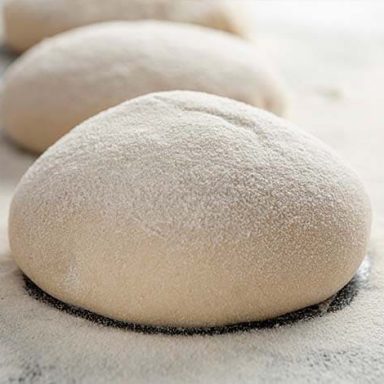
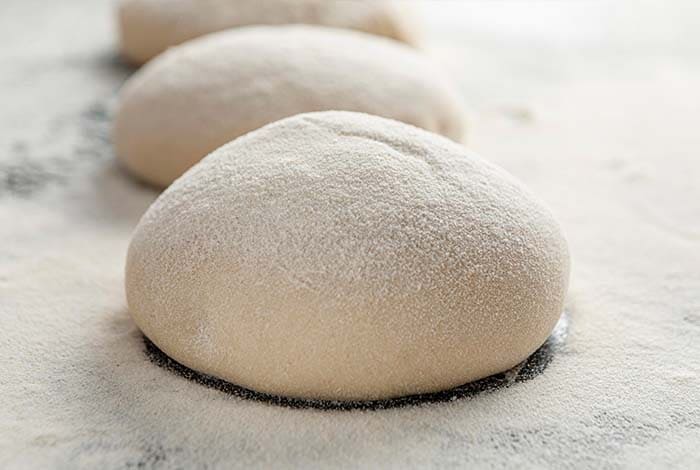
After kneading, the dough needs to rest and rise, a process known as proofing. Place the dough in a lightly oiled bowl, cover it with a damp cloth or plastic wrap, and let it sit in a warm, draft-free area. This environment is ideal for yeast to work, causing the dough to rise and double in size. This process usually takes about 1-2 hours, depending on the room temperature. Proofing is essential for developing flavor and texture, as it allows the formation of air pockets that will become the characteristic holes in the pizza crust.
Shaping and Flavoring the Dough
Rolling and Stretching Techniques
Once proofed, it’s time to shape the dough. Start by gently deflating it and then transferring it to a floured surface. For a traditional approach, use your hands to stretch the dough, starting from the center and working outwards, rotating as you go. This method allows more control over the thickness and results in a more rustic, artisanal crust. Alternatively, for a uniform thickness, use a rolling pin to roll out the dough to the desired size. Avoid rolling it too thin, as this could lead to tears or an overly crispy crust.
Flavor Enhancements: Garlic, Herbs, and Spices
Enhancing your dough with flavors can elevate your pizza to gourmet levels. Consider incorporating garlic powder, dried herbs like basil or oregano, or even a pinch of chili flakes into the dough for an aromatic and flavorful base. These additions should be mixed into the dry ingredients before adding the water and oil. The key is to balance the flavors without overpowering the natural taste of the dough. Experiment with different combinations to find your perfect blend, creating a unique and memorable pizza experience.
Baking Tips and Techniques
Oven Preparation and Temperature
A crucial step in pizza making is preparing your oven. Preheat your oven to the highest temperature, typically between 450°F to 500°F (230°C to 260°C), at least 30 minutes before baking. This high heat is essential for a crisp crust and evenly cooked toppings. If you have a pizza stone or steel, place it in the oven during preheating. These tools absorb and radiate intense heat, mimicking a traditional pizza oven. Ensure your oven reaches the desired temperature before sliding your pizza in for that perfect bake.
Baking Time and Texture
The baking time for pizza varies depending on the oven temperature and thickness of your crust. Typically, it takes about 10-15 minutes. Thin crusts cook faster and offer a crispier texture, while thicker crusts need more time and yield a chewier bite. Rotate the pizza halfway through baking for even cooking. The pizza is done when the crust is golden brown, and the cheese is bubbly and slightly browned. Remember, every oven is different, so keep an eye on your pizza to prevent overcooking.
FAQs
- Can I Make Pizza Dough in Advance? Yes, you can prepare pizza dough ahead of time. It can be refrigerated for up to 48 hours, allowing flavors to develop more fully.
- How to Store and Freeze Pizza Dough? For storage, wrap the dough in plastic wrap and place it in a sealed container. To freeze, wrap the dough tightly in plastic wrap and then in foil. It can be frozen for up to 3 months. Thaw in the refrigerator before use.
- Tips for a Crispy vs. Soft Crust For a crispy crust, use a thinner layer of dough and a hot oven. A pizza stone or steel also helps. For a softer crust, use a thicker dough and bake at a slightly lower temperature.
Conclusion and Final Thoughts
In conclusion, making classic pizza dough at home is an enjoyable and rewarding process. From selecting the right ingredients to mastering the baking techniques, each step contributes to the final delicious outcome. Remember, practice is key, and each attempt brings you closer to your perfect pizza. For first-time bakers, don’t be discouraged by initial challenges. Embrace the learning experience and enjoy the journey of becoming a skilled pizza maker. Happy baking!

Classic Pizza Dough Recipe
Equipment
- Large mixing bowl
- Measuring cups and spoons
- Mixing spoon or dough whisk
- Rolling pin (optional)
- Pizza cutter or sharp knife
- Pizza stone or baking sheet
- Oven
Ingredients
- 3 1/2 cups all-purpose flour
- 1 teaspoon active dry yeast
- 1 teaspoon granulated sugar
- 1 1/3 cups warm water
- 2 tablespoons olive oil
- 1 teaspoon salt
Instructions
- In a mixing bowl, combine the warm water, sugar, and active dry yeast. Let it sit for 5-10 minutes until the mixture becomes frothy.
- In another large mixing bowl, sift the all-purpose flour and salt together.
- Create a well in the center of the flour mixture and pour in the yeast mixture along with the olive oil.
- Using a wooden spoon or your hands, gradually incorporate the wet ingredients into the dry until a shaggy dough forms.
- Transfer the dough onto a floured surface and knead it for about 8-10 minutes until it becomes smooth and elastic.
- Place the dough in a lightly oiled bowl, cover it with a clean kitchen towel or plastic wrap, and let it rise in a warm place for about 1-2 hours until doubled in size.
- Once the dough has risen, punch it down to release the air bubbles and knead it briefly for a minute or two.
- Divide the dough into portions as needed for your pizza and roll each portion out into desired pizza crust thickness.
Notes
- Prep Time: 15 minutes (+1-2 hours for rising) | Cooking Time: Dependent on pizza recipe | Total Time: Varies
- Yield: Makes dough for approximately 2 medium-sized pizzas
- Flour: You can use either all-purpose flour for a softer crust or bread flour for a crispier crust.
- Yeast: Instant yeast is used for convenience, but active dry yeast can be substituted; just remember to activate it in warm water first.
- Water Temperature: Ensure the water is warm (about 110°F) to properly activate the yeast.
- Rising Time: Can vary depending on the room temperature. Dough is ready when it has doubled in size.
- Storage: Unused dough can be refrigerated for up to 48 hours or frozen for up to 3 months.
- Toppings: Add toppings of your choice but avoid overloading to prevent a soggy crust.

