There’s something undeniably comforting about cherry pie—but what if you could enjoy all that sweet, tangy flavor without the fuss of rolling out dough? Cherry Pie Bars offer the best of both worlds: the nostalgic taste of classic cherry pie baked into soft, buttery bars that are easy to make and even easier to share.
Whether you’re planning a weekend bake, a picnic dessert, or a holiday potluck contribution, these bars check every box. They’re quick to assemble, don’t require any special equipment, and are crowd-pleasers in every season.
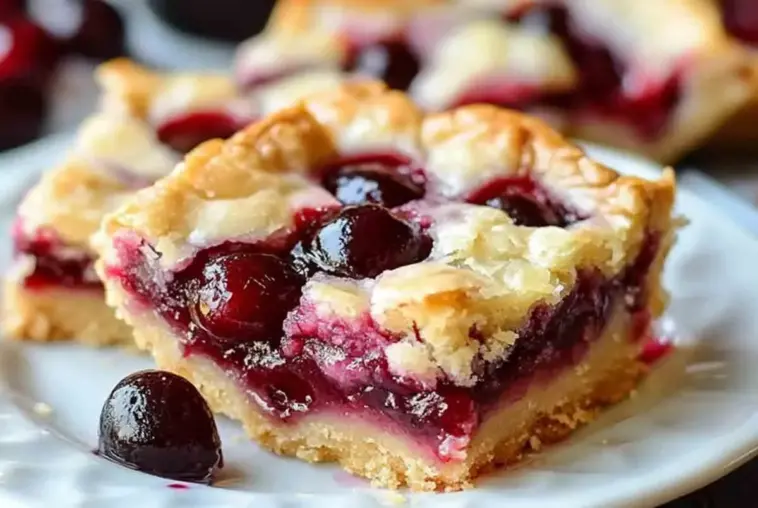
One of the best things about cherry pie bars is their versatility. You can use canned cherry pie filling for convenience, or take it up a notch with fresh or frozen cherries during peak season. Either way, you get the same satisfying layers: a rich shortbread crust, juicy cherry center, and a tender crumble top that melts in your mouth.
Ingredients Overview
Making cherry pie bars doesn’t require fancy ingredients—just pantry staples and a few delicious add-ons. At the heart of the recipe is a buttery shortbread-style crust, made from flour, sugar, butter, and eggs. These simple components create a rich base that supports the fruit filling beautifully.
For the cherry layer, store-bought cherry pie filling is a great shortcut, especially when you’re short on time. If you prefer to go the homemade route, a quick cherry compote made with pitted cherries, sugar, and cornstarch works wonderfully too. Fresh or frozen cherries both do the trick.
Optional extras can take your bars to the next level. Try adding a hint of almond extract to the crust or glaze for a subtle, bakery-style finish. A quick vanilla drizzle after baking adds sweetness and visual appeal.
Tip: Always use high-quality butter for a rich, melt-in-your-mouth base. It makes a noticeable difference in flavor and texture.
Step-by-Step Instructions: How to Make Cherry Pie Bars
Making cherry pie bars is surprisingly simple. Here’s a step-by-step guide to help you bake them to golden perfection.
Step 1: Prepare the crust and crumble
In a large mixing bowl, beat together softened butter and sugar until light and fluffy. Add eggs one at a time, then mix in vanilla or almond extract if using. Stir in all-purpose flour and a pinch of salt to form a thick dough.
Reserve about 1/3 of the dough for the topping, and press the remaining dough evenly into a parchment-lined 9×13-inch baking pan. This will form your bottom crust.
Step 2: Add the cherry filling
Spread cherry pie filling evenly over the crust layer. If you’re using homemade cherry compote, make sure it has cooled slightly before spreading. Try to avoid gaps, but don’t overload—about 1½ to 2 cups of filling is ideal.
Step 3: Crumble the top layer
Take the reserved dough and crumble it evenly over the cherry layer. You can pinch it into small pieces or use your fingers to scatter bits across the top. This will form a golden, tender topping once baked.
Step 4: Bake
Place the pan in a preheated 350°F (175°C) oven and bake for 35–40 minutes, or until the top is lightly golden and the cherry filling is bubbling slightly around the edges.
Step 5: Cool and glaze (optional)
Let the bars cool in the pan for at least 30–45 minutes before lifting them out using the parchment. This helps them firm up for easier cutting.
For a sweet finish, drizzle with a simple powdered sugar glaze made with milk and vanilla or almond extract.
Pro Tip: Line your pan with parchment paper for easy lifting and clean slicing—it’s a game-changer.
Expert Tips for Perfect Cherry Pie Bars
Even though this recipe is beginner-friendly, a few insider tips will help you bake like a pro:
-
Don’t overbake. The top should be golden, but the center can still look slightly soft—it firms up as it cools.
-
Use room temperature ingredients. Butter and eggs at room temp blend better and help create a smooth, even dough.
-
Choose a glass or light-colored metal baking pan. It promotes even browning and prevents the bottom from burning.
-
Cool completely before slicing. This ensures clean, neat bars that don’t fall apart. If you’re in a rush, pop the pan in the fridge for 20 minutes.
-
Almond extract = bakery magic. Just a splash in the dough or glaze adds a signature flavor that pairs beautifully with cherries.
-
Avoid overloading the filling. Too much cherry filling can make the bars soggy. Stick to the recommended amount for best results.
These little tweaks can turn good cherry pie bars into great ones—every time.
Cherry Pie Bar Variations to Try
Cherry pie bars are endlessly adaptable! Here are a few flavorful variations that will keep this recipe fresh and exciting:
Cream Cheese Swirl Cherry Bars
Add a swirl of sweetened cream cheese between the crust and cherry layer. Just mix cream cheese, sugar, and an egg yolk for a luscious cheesecake-style upgrade.
Almond Cherry Bars
Mix almond extract into the dough and sprinkle sliced almonds on top before baking. The nutty crunch pairs beautifully with the soft cherry layer.
Chocolate Cherry Bars
Drizzle melted dark or white chocolate over the cooled bars for a decadent finish. Or stir mini chocolate chips into the crust dough.
Cherry Lemon Bars
Zest a lemon into the crust mixture and add a touch of lemon juice to the glaze. The citrus cuts through the sweetness for a bright twist.
Berry Medley Bars
Substitute part of the cherry filling with raspberries, blackberries, or blueberries. This version is perfect in summer when berries are at their peak.
Variation Tip: Try adding crushed graham crackers or oat crumble to the topping for extra texture.
How to Serve Cherry Pie Bars
There’s no wrong way to enjoy cherry pie bars—they’re delicious straight from the pan or dressed up for a special occasion. Serve them warm with a scoop of vanilla ice cream for a cozy, indulgent dessert that feels just like homemade pie without the hassle.
Prefer them chilled? Let them firm up in the fridge and serve cold with a dollop of whipped cream. The contrast between the buttery crust and cool topping is incredibly satisfying.
For parties or potlucks, cut the bars into bite-sized squares and arrange them on a tray. Garnish with powdered sugar, mint leaves, or even a drizzle of chocolate for a beautiful presentation.
Serving Tip: Let the bars cool fully before plating for the cleanest, sharpest edges.
Make-Ahead, Storage, and Freezing Tips
Cherry pie bars are a dream when it comes to planning ahead—they hold up well and taste even better the next day.
-
Room Temperature: Store in an airtight container for 2 to 3 days. Keep in a cool spot away from direct sunlight.
-
Refrigerator: Bars with glaze or cream cheese filling should be stored in the fridge. They’ll stay fresh for up to 5 days. Let them sit at room temp for 15 minutes before serving for best texture.
-
Freezer: These bars freeze beautifully. After cooling completely, slice them into individual servings and wrap each piece tightly in plastic wrap, then place in a freezer-safe bag or container. They’ll keep for up to 2 months.
To thaw, place in the fridge overnight or microwave a slice for 10–15 seconds for a quick fix.
Freezing Tip: Slice before freezing so you can easily grab just one (or three!) whenever a craving hits.
Common Mistakes to Avoid
Even a simple recipe like cherry pie bars can trip you up if you’re not careful. Here’s how to sidestep the most common pitfalls:
-
Using cold butter: It doesn’t cream properly with sugar and can result in a tough crust. Always use softened butter.
-
Overloading the cherry filling: Too much can cause sogginess and make the bars hard to cut.
-
Skipping the cooling time: Cutting too soon results in gooey, falling-apart squares. Let them cool to set.
-
Baking at too high a temperature: This can brown the top too quickly while the center stays underdone. Stick to 350°F and check for golden edges.
-
Not lining the pan: Parchment paper makes all the difference for lifting and slicing cleanly. Don’t skip it!
Pro Tip: Read through the recipe once before starting so you’re not caught off guard midway.
Frequently Asked Questions
Can I use fresh cherries instead of canned cherry pie filling?
Absolutely! You can make a quick homemade filling using about 4 cups of pitted fresh cherries, ¾ cup sugar, 2 tablespoons cornstarch, and a splash of lemon juice. Simmer until thick and glossy, then cool before using.
How do I make cherry pie bars gluten-free?
Use a 1:1 gluten-free baking flour, such as King Arthur Measure for Measure or Bob’s Red Mill Gluten Free 1-to-1. These blends are designed to mimic regular flour without altering the texture.
Can I double this recipe for a crowd?
Yes! Just use a larger baking pan (such as an 11×17 sheet pan) and slightly increase baking time. Keep an eye on the edges and use the same cues for doneness.
Can I use other fruit fillings instead of cherry?
Definitely. Blueberry, raspberry, or peach fillings work beautifully. You can even mix and match for a berry medley.
Why did my cherry pie bars turn out soggy?
There are a few possible reasons:
-
Too much filling
-
Underbaking
-
Slicing while still warm
To fix this, use the correct filling amount, bake until golden, and let cool fully before cutting.
Final Thoughts: Why You’ll Keep Coming Back to This Recipe
Cherry pie bars are one of those recipes you’ll find yourself returning to again and again. They’re the perfect blend of tangy fruit and rich, buttery crust, and they’re ridiculously easy to customize or make ahead for any event.
Whether you’re whipping them up for a school bake sale, a holiday dessert tray, or just a cozy family night in, these bars always hit the spot. Plus, they travel well, freeze well, and look beautiful on a plate.
Once you bake them, don’t be surprised if your friends and family start asking for the recipe—it’s a keeper.
Cherry Pie Bars
Equipment
- 9x13 inch baking pan
- Mixing bowls
- Electric mixer or hand whisk
- Rubber spatula
- Parchment paper
- Wire cooling rack
Ingredients
For the Dough:
- 1 cup 2 sticks unsalted butter, softened
- 1 ¾ cups granulated sugar
- 4 large eggs
- 1 tsp vanilla extract or almond extract for variation
- 3 cups all-purpose flour
- ½ tsp salt
For the Filling:
- 1 can 21 oz cherry pie filling
- or
- Homemade cherry filling approx. 2 cups
Optional Glaze:
- 1 cup powdered sugar
- 2 –3 tbsp milk
- ½ tsp vanilla or almond extract
Instructions
- Preheat oven to 350°F (175°C). Line a 9x13-inch pan with parchment paper and lightly grease it.
- Cream butter and sugar in a large mixing bowl until light and fluffy.
- Add eggs one at a time, mixing well after each. Stir in vanilla or almond extract.
- Mix in flour and salt until fully combined and dough forms.
- Reserve 1/3 of the dough for topping. Press the remaining 2/3 evenly into the bottom of the prepared pan.
- Spread cherry pie filling evenly over the crust layer.
- Crumble reserved dough over the cherry layer.
- Bake for 35–40 minutes, until edges are golden and the top is lightly browned.
- Cool completely in the pan on a wire rack (at least 30–45 minutes).
- Optional glaze: Mix powdered sugar, milk, and extract until smooth. Drizzle over cooled bars.
- Slice into squares and serve!
Notes
- You can substitute fresh or frozen cherries cooked with sugar and cornstarch for the filling.
- For a citrus twist, add lemon zest to the crust or glaze.
- Bars are freezer-friendly. Slice and wrap individually before freezing for up to 2 months.
- Almond extract pairs wonderfully with cherries—use in both the crust and glaze for depth.
Nutrition