Why You’ll Love These Beef and Cheese Chimichangas
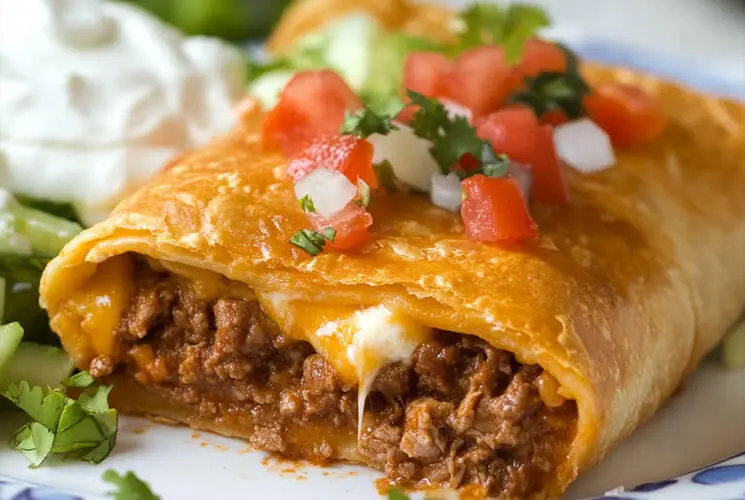
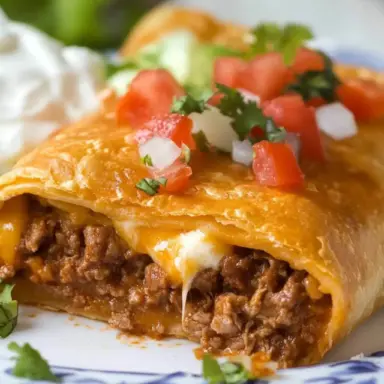
There’s something undeniably satisfying about biting into a golden, crispy beef and cheese chimichanga filled with seasoned meat and gooey melted cheese. The first time I made beef and cheese chimichangas at home, I remember thinking, “Why don’t I make these more often?” They’re easier than you’d expect, incredibly versatile, and always a crowd-pleaser.
These chimichangas strike the perfect balance between indulgent comfort food and customizable convenience. Whether you fry them to golden perfection or opt for a baked version, they deliver crunch on the outside and rich, savory flavor inside.
Wondering what sets chimichangas apart from burritos? It’s all about the texture. While both are wrapped in flour tortillas and often filled with similar ingredients, chimichangas are typically deep-fried or baked until crisp, creating that irresistible shell. Think of them as burrito’s bold, golden cousin.
These are perfect for weeknight dinners, game day spreads, or even make-ahead freezer meals. Just pair them with a few toppings and sides, and you’ve got a satisfying Tex-Mex experience that’ll rival your favorite takeout spot.
What Are Chimichangas? A Crispy Mexican-American Favorite
Chimichangas are a staple of Tex-Mex cuisine, believed to have originated in the Southwest U.S., particularly Arizona. While the exact origin story is debated, many agree they came about as a happy accident—a burrito that found its way into a deep fryer.
Traditionally, chimichangas are large flour tortillas stuffed with seasoned meat, cheese, and sometimes beans or rice. What makes them stand out is their crispy outer shell, achieved through deep frying or baking at high heat. That golden crunch offers a delicious contrast to the soft, savory filling inside.
While not an authentic Mexican dish, chimichangas have become a beloved fusion food. Over time, home cooks and restaurants have developed countless versions—from chicken and green chili to vegetarian black bean options.
This recipe sticks with a classic favorite: beef and cheese, wrapped, crisped, and ready to satisfy your Tex-Mex cravings in just one bite.
Key Ingredients for Flavor-Packed Chimichangas
The beauty of beef and cheese chimichangas lies in their simplicity. A few well-chosen ingredients come together to create something truly crave-worthy. Here’s what you’ll need for maximum flavor:
-
Ground Beef: Go for lean (around 85/15) to keep the filling hearty but not greasy. Lean beef also holds together well with seasonings and cheese.
-
Seasoning: A mix of taco seasoning or homemade spices like cumin, chili powder, paprika, garlic powder, and onion powder is key. These give the beef that bold, Tex-Mex flavor we all love.
-
Cheese: You’ll want something that melts smoothly and adds richness. Try shredded cheddar, Monterey Jack, or a pre-shredded Mexican cheese blend. Combine types for more flavor depth.
-
Flour Tortillas: Use large burrito-size tortillas (about 10-inch diameter) to make folding easier. They should be soft but sturdy enough to hold the filling and stay intact during cooking.
-
Optional Add-Ins: Customize to your heart’s content. Stir in refried beans, cooked rice, sautéed onions and bell peppers, or even corn for added texture and flavor.
Pro Tip: Warm your tortillas in the microwave or a skillet for a few seconds before rolling. This makes them more pliable and prevents cracking when folding.
How to Make Beef and Cheese Chimichangas Step-by-Step
Making chimichangas at home is easier than you think. Here’s a step-by-step guide to ensure they turn out perfectly crispy and flavorful every time.
Step 1: Cook the Beef
In a large skillet over medium heat, cook the ground beef until fully browned. Drain any excess grease. Add your seasoning blend or taco seasoning, a splash of water, and stir until well combined and the liquid is mostly absorbed.
Step 2: Stir in the Cheese
Turn off the heat and stir in your shredded cheese, or you can save it for later and sprinkle directly onto the filling when assembling. Either way, the heat will help it melt and mix beautifully into the beef.
Step 3: Fill and Fold the Tortillas
Lay a warmed tortilla flat. Add ½ to ¾ cup of the beef mixture to the center. If using extra fillings like beans or rice, layer them underneath. Fold in the sides, then roll tightly from the bottom up to form a burrito shape. Secure with toothpicks if needed.
Step 4: Fry or Bake
-
To Fry: Heat oil (about 1–2 inches deep) in a skillet to 350°F (175°C). Carefully place each chimichanga seam-side down and fry for 2–3 minutes per side, or until golden and crisp. Drain on a paper towel-lined plate.
-
To Bake: Preheat oven to 400°F (200°C). Brush each chimichanga with oil or melted butter and bake for 20–25 minutes, flipping halfway through, until crisp and golden.
Bold Tip: For extra crispness, broil the baked chimichangas for 1–2 minutes per side after baking. Watch closely so they don’t burn!
Tasty Variations You Can Try
One of the best things about chimichangas is how easily they can be customized. Here are a few delicious twists to try:
-
Add refried beans, black beans, or Spanish rice for extra heartiness.
-
Swap ground beef for shredded beef, steak strips, or rotisserie chicken.
-
Love heat? Add chipotle peppers, sliced jalapeños, or pepper jack cheese.
-
Make them mini! Use smaller tortillas and create party-sized chimichangas—great for game days or kids’ meals.
Play around with the filling ingredients and toppings to match your taste or use what you already have in the fridge.
Dipping Sauces and Toppings You’ll Want to Pile On
The right toppings can elevate your chimichangas from good to unforgettable. Here are some must-haves:
-
Sour cream for a cooling contrast
-
Guacamole or sliced avocado for creamy richness
-
Salsa fresca or pico de gallo for a fresh, zesty bite
-
Queso blanco or a drizzle of nacho cheese for extra indulgence
-
Chopped cilantro, green onions, and lime wedges for a bright finish
Serve your chimichangas with Mexican rice, street corn, or a simple green salad to round out the meal. And don’t forget a cold drink—horchata, soda, or a margarita pair perfectly!
Make-Ahead Tips & Freezing Instructions
Chimichangas are an ideal make-ahead meal—perfect for busy nights or meal prep Sundays. Whether you’re planning ahead for dinner or stocking your freezer, here’s how to get it done.
Make-Ahead (Fridge)
Prepare and assemble your chimichangas but don’t cook them yet. Place them seam-side down on a tray and cover with plastic wrap. Store in the fridge for up to 24 hours. When ready to cook, bake or fry as usual—no need to thaw.
Freezing Uncooked Chimichangas
To freeze before cooking, wrap each assembled chimichanga individually in foil or plastic wrap, then place in a freezer-safe bag or container. This helps prevent freezer burn and makes it easy to grab one at a time.
Freezing Cooked Chimichangas
Already fried or baked chimichangas can also be frozen. Let them cool completely, then wrap and store as above. Perfect for quick lunches!
Reheating for Crispiness
-
Oven: Bake at 375°F for 20–25 minutes straight from frozen (unwrap first).
-
Air Fryer: Cook at 350°F for 8–10 minutes, flipping halfway for even browning.
-
Microwave: Fast, but the tortilla won’t be crisp—use only if you’re in a hurry.
Freezer Tip: Label your wrapped chimichangas with the date so you don’t lose track!
How to Store Leftovers
Leftover chimichangas store well and make a great second-day meal!
-
In the Fridge: Place cooled chimichangas in an airtight container and store for up to 4 days.
-
In the Freezer: Wrap individually in foil or plastic wrap and freeze for up to 3 months.
Reheating Options
-
Oven: Best method for crispiness—bake at 375°F for about 15 minutes.
-
Skillet: Reheat in a dry skillet over medium heat, flipping until both sides are warmed through and crisp.
-
Microwave: Quick but softens the tortilla—best for convenience, not texture.
Common Mistakes to Avoid
Even though chimichangas are easy to make, a few slip-ups can affect the final result. Here’s how to avoid the most common issues:
-
Overstuffing the Tortillas: It’s tempting to pack them full, but this makes folding harder and increases the chance of bursting open during cooking. Stick to about ½ to ¾ cup of filling.
-
Not Sealing Properly: Make sure to fold the sides tightly and place the chimichangas seam-side down. For extra hold, secure with toothpicks if needed (just remember to remove them before serving!).
-
Using Too Much Oil: When frying, use enough oil to coat the pan—but not so much that the chimichangas absorb excess and turn greasy.
-
Skipping the Drain Step: After frying, always place chimichangas on a paper towel-lined plate to soak up extra oil. It keeps them crispy and lighter.
Avoid these and you’ll get restaurant-style results every time.
Perfect Pairings: What to Serve With Chimichangas
To turn your chimichangas into a full-on Tex-Mex feast, serve them with flavorful sides and fresh drinks. Here are some go-to pairings:
-
Cilantro-Lime Rice: Light and herby, it balances the richness of the chimichanga.
-
Mexican Street Corn (Elote): Sweet, tangy, and cheesy—an absolute crowd favorite.
-
Black Beans or Refried Beans: A hearty, protein-packed addition that complements the filling.
-
Fresh Green Salad: Keep it simple with romaine, cherry tomatoes, and a creamy avocado or ranch dressing to cut through the crunch.
-
Drinks: Pair with a cold glass of horchata, iced tea, or go all-in with a classic margarita.
Don’t forget a few lime wedges for squeezing over the top!
FAQs – People Also Ask
Here are the top questions people ask about beef and cheese chimichangas—answered with helpful, practical tips:
What’s the difference between a chimichanga and a burrito?
While they look similar, chimichangas are usually deep-fried or baked until crispy, whereas burritos are soft and not cooked after assembly. Both are rolled tortillas with fillings, but chimichangas offer that golden, crunchy bite.
Can I bake chimichangas instead of frying them?
Yes, and it’s a great lighter option! Brush your rolled chimichangas with olive oil or melted butter, then bake at 400°F (200°C) for 20–25 minutes, flipping halfway through. Finish under the broiler for extra crispiness.
What cheese is best for chimichangas?
Use a melty cheese that blends well with beef. Cheddar, Monterey Jack, and Mexican-style blends are all excellent. You can even mix a couple together for a bolder flavor.
Can I make these in an air fryer?
Absolutely! Place assembled chimichangas seam-side down in a preheated air fryer at 375°F for 8–10 minutes. Flip halfway through. They turn out wonderfully crispy with much less oil.
Are chimichangas authentic Mexican food?
Chimichangas are considered Tex-Mex, not traditional Mexican. Most food historians believe they originated in Arizona, making them more of a Southwestern U.S. creation with Mexican influence.
Final Thoughts: A Crunchy, Cheesy Classic Worth Making
If you’re craving something warm, crispy, cheesy, and loaded with flavor, these beef and cheese chimichangas hit the mark every single time. They’re easy to make, freeze beautifully, and can be dressed up or down with your favorite toppings.
Whether you’re feeding a hungry family or meal-prepping for the week, chimichangas deliver big flavor and satisfying crunch with minimal effort.
Don’t be afraid to get creative—swap the beef, add veggies, or try new sauces. And if you do, I’d love to hear about your version! Drop your tips or questions in the comments and let’s talk chimichangas.
Beef and Cheese Chimichangas
Equipment
- Large Skillet
- Spatula or wooden spoon
- Tongs
- Baking sheet (for oven)
- Deep skillet or air fryer (optional)
- Paper towels
- Foil or plastic wrap (for freezing)
Ingredients
- 1 lb ground beef 85/15 lean recommended
- 1 packet taco seasoning or homemade blend
- ⅓ cup water
- 1½ cups shredded cheddar or Mexican cheese blend
- 6 large 10-inch flour tortillas
- Optional: ½ cup refried beans or cooked rice
- Oil for frying or brushing vegetable or olive oil
- Toppings: sour cream guacamole, salsa, cilantro, lime wedges
Instructions
- Cook the Beef: In a skillet over medium heat, cook ground beef until browned. Drain excess fat.
- Season the Meat: Add taco seasoning and water. Stir and simmer until well combined and slightly thickened.
- Mix with Cheese: Remove from heat and stir in shredded cheese (or layer during rolling).
- Assemble Chimichangas: Warm tortillas slightly. Add ½ to ¾ cup of filling to each. Fold sides in, then roll tightly.
Cook Options:
- Fry: Heat oil to 350°F. Fry seam-side down for 2–3 minutes per side. Drain on paper towels.
- Bake: Brush with oil or butter. Bake at 400°F for 20–25 mins, flipping halfway.
- Air Fryer: Air fry at 375°F for 8–10 minutes, flipping once.
- Serve Hot: Top with sour cream, salsa, guacamole, and fresh herbs.
Notes
- Make-Ahead: Assemble and refrigerate for up to 24 hours or freeze before cooking.
- Freezing: Wrap uncooked chimichangas in foil or plastic and freeze up to 3 months.
- Reheating: Best results from oven or air fryer for crispiness.
- Variations: Try shredded beef, chicken, or veggie fillings. Add beans or rice for extra bulk.
- Spice Level: Add jalapeños or chipotle powder to kick up the heat.
Nutrition