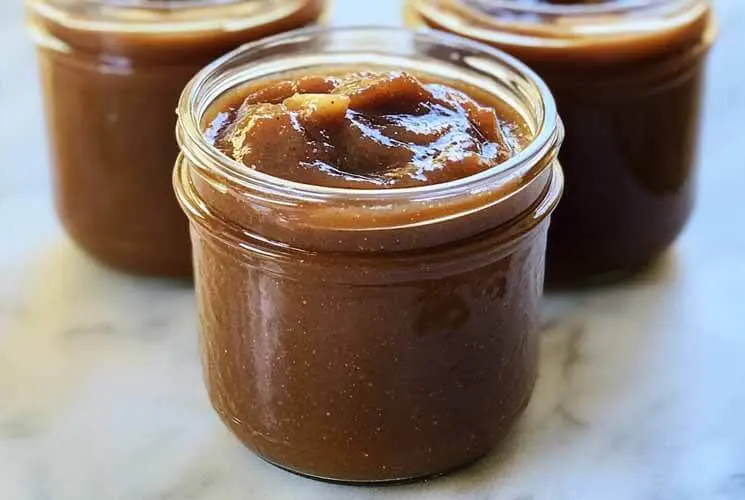
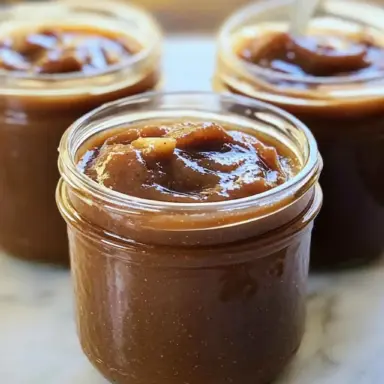
Apple butter is a thick, rich, and deeply spiced fruit spread made by slowly cooking down apples until they become smooth, dark, and intensely flavorful. Despite the name, there’s no actual butter involved. The word “butter” simply refers to its creamy, spreadable consistency.
Unlike applesauce, which is light-colored and lightly cooked, apple butter is slow-simmered for hours, allowing the natural sugars to caramelize. This gives it a dark amber-brown color and a luxurious texture that melts on warm toast or biscuits. The flavor? Think of autumn in a jar—sweet, tangy apples infused with cinnamon, nutmeg, and cloves.
Apple butter isn’t just a breakfast spread—it’s a kitchen workhorse. You can use it in marinades, desserts, sandwiches, and even savory dishes. And the best part? You can make it at home with minimal ingredients and zero fancy equipment.
A Brief History of Apple Butter
Apple butter has deep roots in European monastic kitchens, where monks would preserve apples by cooking them down into a thick paste. German settlers brought the technique to America in the 1700s, especially in Pennsylvania Dutch communities, where apple butter became a fall tradition.
Before refrigeration, families made apple butter in giant copper kettles over open fires, stirring for hours to concentrate the flavor and extend the shelf life. It was an essential way to preserve the autumn apple harvest for use through winter. Today, while the tools have changed, the cozy tradition lives on—one jar at a time.
Apple Butter vs. Applesauce: What’s the Difference?
While both are made from cooked apples, apple butter and applesauce are far from the same. Applesauce is lightly sweet, pale, and chunky or smooth. It’s usually cooked briefly and meant to complement savory dishes or be eaten as-is.
Apple butter, on the other hand, is cooked low and slow until it becomes dense, caramelized, and heavily spiced. The flavor is deeper and more complex—almost like dessert in itself.
Use applesauce when you want moisture in baked goods or a quick snack. Use apple butter when you crave bold flavor on toast, swirled into oatmeal, or folded into muffins.
Ingredients You’ll Need
To make the best apple butter, start with naturally sweet, soft-textured apples. Varieties like Fuji, Gala, Honeycrisp, and McIntosh are all great choices. A blend of apples can add even more depth.
For that classic warm flavor, use cozy spices like ground cinnamon, cloves, and nutmeg. A pinch of salt enhances everything.
Sweeteners are flexible—brown sugar adds richness, while maple syrup or honey gives a more delicate sweetness. Want a sugar-free version? Let the apples’ natural sugars shine on their own!
And don’t forget a splash of lemon juice—it balances the sweetness and helps preserve the color.
How to Make Apple Butter (Step-by-Step Guide)
Step 1: Prep the Apples
Wash, core, and chop the apples—no need to peel unless you want an ultra-smooth finish. The skins add flavor and color.
Step 2: Choose Your Cooking Method
You’ve got three easy options:
-
Slow Cooker (most hands-off): Toss everything in, set on low for 8–10 hours, stir occasionally.
-
Stovetop: Simmer apples and spices in a heavy pot for 1.5–2 hours, stirring regularly.
-
Instant Pot: Pressure cook for 15–20 minutes, then switch to sauté mode to reduce and thicken.
Step 3: Blend It Smooth
Once the apples are soft and darkened, it’s time to puree.
-
Use an immersion blender for a silky texture right in the pot.
-
Or transfer to a food processor or blender for ultra-smooth results (in batches if needed).
Step 4: Cook Down Further
Return the blended apple mixture to your pot (unless it’s already thick enough). Cook uncovered on low heat, stirring occasionally to prevent sticking. This step intensifies the flavor and thickens the butter.
How to Know It’s Done
Look for these signs:
-
It clings to a spoon and doesn’t run off
-
It darkens to a deep mahogany color
-
It leaves a “trail” when you drag a spatula through it
Bold Tip: The longer it cooks, the richer the taste. Just don’t rush it—low and slow wins the flavor game.
Step 5: Cool, Store, or Can It
Let your apple butter cool before spooning into jars. Store in the fridge for up to 3 weeks, or freeze for longer. Want to shelf-stabilize it? Try water bath canning (we’ll explain that in Part 2!).
Optional Flavor Add-Ins and Variations
Want to elevate your apple butter? Try these creative spins:
-
Vanilla extract or bourbon adds warmth and depth
-
A pinch of cayenne or fresh ginger for a spicy twist
-
Stir in orange zest or apple cider for citrusy notes
-
Use maple syrup instead of sugar for a woodsy aroma
Looking for a healthier version? You can omit added sugar entirely—just choose naturally sweet apples like Fuji or Gala, and let the slow cooking bring out their richness.
Homemade apple butter is endlessly customizable, so don’t be afraid to make it your own.
Why Homemade Apple Butter Beats Store-Bought
Making your own apple butter isn’t just satisfying—it’s seriously worth it.
You get full control over the flavor, spice level, and sweetness. Want a no-sugar version? Done. Prefer it extra cinnamon-y? You’ve got it. Plus, no preservatives or weird additives.
Store-bought jars can be pricey, but homemade versions are budget-friendly and yield way more. One batch can fill several jars—perfect for gifting, stocking your fridge, or freezing for later.
And let’s be honest: the smell of apple butter simmering in your kitchen is reason enough to give it a go.
Best Ways to Use Apple Butter
Once you have a jar of homemade apple butter, the fun really begins. This deeply flavored spread is incredibly versatile—way beyond just toast.
Start simple: slather it on warm biscuits, pancakes, waffles, or even toasted sourdough for a cozy breakfast treat. Stir a spoonful into oatmeal or Greek yogurt for a naturally sweet, spiced boost.
Feeling creative? Apple butter makes a phenomenal glaze for pork chops or roast chicken—just brush it on during the last few minutes of cooking for a caramelized finish. You can also mix it into BBQ sauce for a smoky-sweet twist.
Don’t forget baked goods! Fold it into muffin or cake batter to add moisture and flavor without extra fat. It’s especially tasty in spice cakes, thumbprint cookies, or even as a surprise swirl in cheesecake.
Unexpected but amazing idea: try it in a grilled cheese sandwich with sharp cheddar. The salty-sweet contrast is unforgettable.
Apple butter is one of those pantry staples that upgrades anything it touches—so don’t be afraid to experiment!
How to Store Apple Butter (Fridge, Freezer, or Pantry)
Once your apple butter is done, you’ll want to store it properly to keep that rich flavor and smooth texture.
Fridge Storage:
If you’re planning to use it within a few weeks, spoon it into clean, airtight jars and store in the refrigerator for up to 3 weeks. Always use a clean spoon to avoid contamination.
Freezer Storage:
Apple butter freezes beautifully! Let it cool completely, then portion into freezer-safe containers or jars, leaving a little space at the top for expansion. Label with the date and freeze for up to 6 months. Thaw overnight in the fridge before using.
Canning for Pantry Storage:
Want to make it shelf-stable? Use the water bath canning method:
-
Sterilize jars and lids.
-
Fill with hot apple butter, leaving ¼ inch headspace.
-
Wipe rims, seal, and process in a boiling water bath for 10–15 minutes (adjust for altitude).
Once sealed, your canned apple butter will last up to a year in a cool, dark pantry—perfect for holiday prep or gift giving.
Make-Ahead & Gift Ideas
Apple butter is the ultimate make-ahead recipe—in fact, it tastes even better after sitting for a day or two as the flavors deepen.
You can prep it up to a week in advance for a brunch spread or dinner party. It’s also a heartfelt homemade gift, especially in the fall or during the holidays.
Pour it into small glass jars, add a cute label or handwritten tag, and tie with rustic twine or ribbon. Pair with a loaf of homemade bread or scones for a gift basket that feels personal and thoughtful.
Your kitchen will smell amazing, and your friends will thank you.
Nutritional Info & Health Benefits
Apple butter is a naturally low-fat spread with a surprising number of perks. Made mostly from apples, it contains fiber, vitamin C, potassium, and antioxidants—especially when you leave the skins on during cooking.
Most recipes use minimal added sugar, and you can even make it sugar-free if using sweet apple varieties.
It’s much healthier than sugary jams or syrups, and you get that comforting apple pie flavor in every spoonful—with fewer calories and no fat.
Of course, moderation is key—but when made at home, apple butter can be a sweet addition to a balanced diet.
Common Mistakes to Avoid When Making Apple Butter
Apple butter is easy to make, but a few common mistakes can affect the final result:
-
Undercooking: If you don’t simmer it long enough, it’ll be thin and pale. Low and slow cooking is the secret to deep flavor.
-
Choosing the wrong apples: Tart apples alone may result in a bland or overly sour butter. Use a mix of sweet and tart varieties.
-
Over-sweetening too early: Add sugar toward the middle or end of cooking, once the apples have broken down. This lets you taste and adjust as needed.
Patience pays off—trust the process and your apple butter will shine.
FAQs
How long does homemade apple butter last?
In the fridge, it lasts about 3 weeks. Frozen apple butter is good for up to 6 months, and properly canned jars can keep for 12 months in a cool pantry.
Can I freeze apple butter?
Absolutely! Just cool it down, pour into freezer-safe containers (leave space at the top), and freeze for up to 6 months. Thaw in the fridge overnight before using.
What’s the best apple for apple butter?
A mix is best—combine sweet apples like Fuji or Gala with tart ones like Granny Smith for balanced flavor and natural sweetness.
Is apple butter healthy?
Yes—especially when homemade. It’s fat-free, naturally sweetened, and contains fiber, vitamins, and antioxidants from the apples.
Does apple butter need to be refrigerated after opening?
Yes. Once opened, store in the fridge and use within 2–3 weeks for best flavor and safety.
Why is my apple butter runny or too thick?
Runny butter may need more time to cook. Too thick? Add a splash of water or apple cider and stir well.
Can I make it without sugar?
Yes! Choose naturally sweet apples and let them cook slowly to release their sugars—no added sweeteners needed.
Tried It Already? What’s Your Favorite Twist?
Tried this apple butter recipe? We’d love to hear how you used it! Whether you spread it on your favorite toast or stirred it into a fall dessert, drop a comment below with your favorite twist.
Here are some fun ideas to spark creativity:
-
Add a dash of chili flakes for heat
-
Mix in molasses for deeper sweetness
-
Stir in a bit of orange zest for brightness
Homemade apple butter is as flexible as it is flavorful. So go ahead—get creative and make it your own!
Apple Butter
Equipment
- Slow cooker or heavy-bottomed pot
- Immersion blender or food processor
- Mason jars or freezer containers
- Wooden spoon or spatula
- Knife and cutting board
Ingredients
- 3 pounds apples Fuji, Gala, Honeycrisp, or a mix
- ½ cup brown sugar adjust to taste
- 1 tablespoon lemon juice
- 1½ teaspoons ground cinnamon
- ¼ teaspoon ground nutmeg
- ¼ teaspoon ground cloves
- ¼ teaspoon salt
- 1 teaspoon vanilla extract optional
- 1 –2 tablespoons maple syrup or honey optional for extra sweetness
Instructions
Prep the Apples:
- Wash, core, and chop apples. No need to peel unless desired.
Combine Ingredients:
- Add apples, sugar, lemon juice, spices, and salt to a slow cooker or pot. Stir to combine.
Cook Low and Slow:
- Slow Cooker: Cook on LOW for 8–10 hours, stirring occasionally.
- Stovetop: Simmer covered on low heat for 1.5–2 hours, stirring more frequently to avoid scorching.
Blend Smooth:
- Use an immersion blender or transfer in batches to a food processor. Puree until completely smooth.
Reduce & Thicken:
- Return to pot if needed and cook uncovered on low until thickened to your liking.
Finish with Flavor:
- Stir in vanilla extract or maple syrup (optional).
Cool & Store:
- Let cool. Transfer to clean jars. Store in fridge up to 3 weeks, freeze up to 6 months, or water bath can for shelf-stable storage.
Notes
- Apple Variety Tip: For best flavor, use a mix of sweet and tart apples like Fuji + Granny Smith.
- Sugar-Free Version: Omit added sugar completely if your apples are sweet enough.
- Spice It Up: Add ginger or cayenne for a bolder twist.
- Freezer Friendly: Leave ½ inch space at the top of containers to prevent cracking.
- Canning Tip: Use proper sterilized jars and a water bath process for long-term pantry storage.
Nutrition