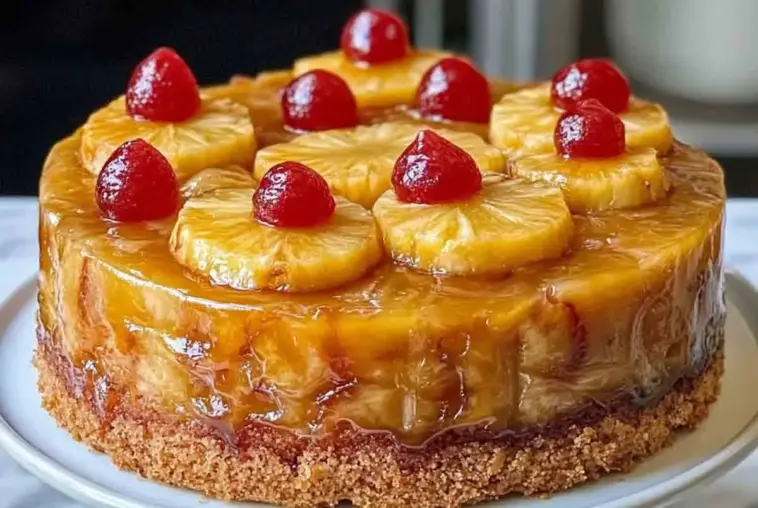
There’s something magically nostalgic about a pineapple upside down cake. One glance at that golden, caramelized pineapple top dotted with bright red cherries, and you’re instantly transported to family gatherings or Grandma’s kitchen.
This classic pineapple dessert isn’t just a visual showstopper—it’s a flavor celebration too. The brown sugar and butter create a glaze that seeps into the cake, making it irresistibly moist.
Perfect for potlucks, holidays, or whenever you’re craving a comforting slice of retro pineapple cake, this guide walks you through its history, baking techniques, and flavor twists to inspire your next bake.
A Brief History of Pineapple Upside Down Cake
The roots of the pineapple upside down cake trace back to the early 1900s when skillet cakes were common. In 1925, the Dole company popularized canned pineapple, encouraging home bakers to create fruit-based upside-down cakes.
More than 2,500 recipes were submitted to their contest, and the winning version—with pineapple rings and cherries—became iconic. The ease of using canned fruit combined with sweet caramel topping made it a household favorite.
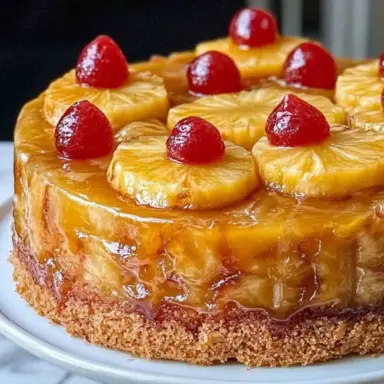
Today, the retro pineapple dessert is still celebrated as a timeless classic—especially for those who love old-school flavor with a dramatic, glossy presentation.
What Makes the Perfect Pineapple Upside Down Cake?
A perfect pineapple upside down cake checks three boxes:
-
A caramelized fruit top that’s glossy, not soggy
-
A buttery, moist crumb underneath
-
And a smooth, clean flip that reveals a showstopping surface
Traditional versions use canned fruit and yellow cake, while modern spins experiment with fresh fruit, alternative sweeteners, or spices. Both work beautifully with the right technique.
Avoid common issues like:
-
Soggy bottoms, from too much juice or underbaking
-
Cake sticking to the pan—a killer for your presentation
-
Dry texture, often from overbaking or overmixing
With the right approach, this easy pineapple cake transforms into a centerpiece worthy of any celebration.
Ingredients Spotlight: What You’ll Need & Why It Matters
Let’s break down the essentials for a pineapple upside down cake that’s both delicious and foolproof:
-
Pineapple: You can use canned pineapple rings for that classic look and ease, or opt for fresh pineapple if you want a more natural, tart flavor. If using fresh, slice it thinly and core the center to mimic the ring shape.
-
Maraschino cherries: These add a pop of color and retro charm. Not a fan? Try fresh pitted cherries, cranberries, or even pecans for a grown-up twist.
-
Brown sugar + butter: This combo creates the signature sticky-sweet topping. Use dark brown sugar for deeper caramel flavor, and melt it with unsalted butter for the perfect glaze.
-
Cake base: A homemade yellow cake is ideal for full control and richer flavor. But if you’re short on time, a high-quality yellow cake mix works well too—just doctor it up with extra vanilla or sour cream for moisture.
-
Flavor boosters:
-
Vanilla extract for warmth
-
Cinnamon or nutmeg for subtle spice
-
A splash of dark rum or pineapple juice in the topping for depth
-
-
Dietary swaps:
-
For gluten-free: Use a 1:1 GF flour blend
-
For vegan: Sub in vegan butter and use flax eggs or applesauce
-
Each of these ingredients plays a role in delivering that perfect balance of sweet, tangy, buttery, and moist.
How to Make a Pineapple Upside Down Cake Like a Pro
Ready to bake? Here’s a high-level walkthrough of the process:
Step 1: Prepare the topping
Melt your butter and stir in the brown sugar. Pour it into the bottom of a greased cake pan. Arrange pineapple rings neatly over the caramel, adding cherries to the center of each ring.
Step 2: Make the batter
Cream together butter and sugar, then add eggs, vanilla, and your dry ingredients. You want a smooth, fluffy batter—don’t overmix! Add a touch of sour cream or buttermilk for extra moisture.
Step 3: Pour & bake
Spread the batter gently over the pineapple layer. Bake in a preheated oven (usually 350°F/175°C) for 40–50 minutes. It’s done when a toothpick inserted into the center comes out clean.
Step 4: The flip!
Let the cake cool for 10–15 minutes—this is crucial. If it’s too hot, the topping will slide. Too cold, and it may stick. Invert onto a plate with one smooth motion.
Step 5: Serve & impress
Let the cake sit a few minutes to allow the caramel topping to settle. Serve warm or at room temperature, possibly with a dollop of whipped cream.
Pro Tip: Place your serving plate upside down over the cake pan before flipping—it helps keep everything centered and steady.
Best Pans to Use & How to Prep Them
The pan you choose makes a difference. Each has its pros:
-
9-inch round pan: The classic choice for even layers and perfect ring placement.
-
Cast iron skillet: Heats evenly and gives a rustic look, but needs thorough greasing.
-
Bundt pan: For a fun twist—just be mindful of getting the topping to release cleanly.
No matter what you use, grease thoroughly with butter or nonstick spray. Some bakers like to add a parchment circle to the bottom to guarantee a clean release, especially with intricate pans.
Just don’t skip the prep—no one wants a cake that won’t come out of the pan!
Tips for Getting It Just Right Every Time
A few expert tricks can make all the difference:
-
Use room temperature ingredients. Cold butter or eggs can cause uneven texture.
-
Don’t overmix the batter. Overworking the flour can make your cake dense.
-
Test doneness with a toothpick inserted into the center—it should come out clean.
-
Use an oven thermometer. Many ovens run hot or cold without you knowing it.
-
Don’t rush the flip. Let the cake cool just enough to hold its shape, but not so much that the caramel sticks to the pan.
Bonus Tip: Want that glossy look? Brush the top with a bit of warm apricot jam right after flipping.
Flavor Variations to Try
Want to put your own spin on this classic? Here are some delicious ways to mix it up while keeping the heart of the dessert intact:
Tropical Twist
Bring the beach to your baking! Add shredded coconut to the batter or sprinkle on top before baking. Swap the maraschino cherries for mango chunks or passionfruit pulp for a fun, fruity surprise.
Boozy Bliss
For grown-up gatherings, soak your pineapple rings in dark rum or bourbon before arranging them in the pan. You can also add a splash to the caramel mixture for an extra flavor kick.
Chocolate Swirl
Add 2 tablespoons of cocoa powder to half your batter and swirl it in for a marble effect. Pineapple and chocolate? Unexpected—and surprisingly good.
Mini Cakes or Cupcakes
Use a muffin tin or mini cake pans to make individually portioned upside down cakes. Great for parties and easy serving.
Spiced Base
Warm things up with cinnamon, nutmeg, or ginger in the cake batter. Perfect for fall or holiday versions of this sunny dessert.
Tip: Just don’t overload the batter—balance is key to letting the pineapple shine.
How to Store, Freeze, and Reheat
Leftovers? No problem. Pineapple upside down cake stores beautifully when handled right.
-
Fridge: Store in an airtight container for up to 4 days. Let it come to room temperature before serving, or warm gently.
-
Freezer: Wrap individual slices in plastic wrap and foil, or place parchment between layers. Freeze for up to 2 months. Thaw overnight in the fridge.
-
Reheating:
-
Microwave: Fast but may make the bottom too soft.
-
Oven: Wrap loosely in foil and warm at 300°F for 10–15 minutes.
-
Skillet (Pro move!): Reheat a slice in a nonstick skillet on low for a crisp, caramelized base.
-
Bonus Tip: Drizzle with a touch of honey or maple syrup before reheating to freshen the glaze.
Serving Suggestions: What Goes With Pineapple Upside Down Cake?
This cake is flavorful on its own, but here are some perfect pairings to elevate the experience:
-
A dollop of lightly sweetened whipped cream for contrast
-
Vanilla ice cream or coconut gelato for a tropical dessert plate
-
Drinks like spiced chai, espresso, or dessert wine complement the sweet-and-buttery notes
-
Garnish with fresh berries or mint sprigs for a burst of freshness and visual flair
Whether you serve it warm or chilled, it’s a guaranteed crowd-pleaser.
Common Questions Answered (FAQs)
Can I use fresh pineapple instead of canned?
Yes! Fresh pineapple gives a slightly more tart and vibrant flavor. Just be sure to slice it thinly and core it to mimic the classic ring shape.
Why does my pineapple upside down cake get soggy?
This usually happens from using too much syrup or not draining canned fruit well. Also, underbaking the cake can cause excess moisture to linger.
How do I stop the topping from sticking to the pan?
Make sure the pan is well-greased and the caramel mixture is spread evenly. Let the cake cool for 10–15 minutes before flipping—it helps everything release cleanly.
Can I make pineapple upside down cake ahead of time?
Yes, and it actually improves with time! Make it up to a day in advance, cover loosely, and refrigerate. Bring to room temp before serving or reheat gently.
Why is my cake dense or dry?
This could be from overmixing the batter or overbaking. Use room temperature ingredients, check doneness early, and consider adding sour cream for moisture.
Can I use boxed cake mix? How do I make it better?
Absolutely. To enhance it:
-
Replace water with pineapple juice
-
Add an extra egg
-
Stir in vanilla extract or sour cream
You’ll get a richer, more bakery-style cake.
Final Thoughts & Encouragement
Pineapple upside down cake is more than just a dessert—it’s a joyful slice of retro comfort. Whether you stick to the classic or try a fun variation, the beauty lies in its simplicity and charm.
So grab that can of pineapple (or slice one fresh!), get your oven preheated, and bake a little sunshine. Don’t forget to share your favorite twist in the comments or tag your creations online—we’d love to see your delicious results!
Pineapple Upside cake
Equipment
- 9-inch round cake pan or cast iron skillet
- Mixing bowls
- Electric mixer or whisk
- Measuring cups and spoons
- Rubber spatula
- Cooling rack
- Toothpick (for doneness test)
Ingredients
Topping:
- 1/4 cup unsalted butter melted
- 1/2 cup packed brown sugar
- 6 –8 canned pineapple rings or fresh, thinly sliced
- 6 –8 maraschino cherries
Cake Batter:
- 1/2 cup unsalted butter softened
- 3/4 cup granulated sugar
- 2 large eggs
- 1 tsp vanilla extract
- 1 1/2 cups all-purpose flour
- 1 1/2 tsp baking powder
- 1/4 tsp salt
- 1/2 cup milk or buttermilk for extra moisture
Instructions
- Preheat oven to 350°F (175°C). Grease a 9-inch round pan or cast iron skillet generously.
- Make the topping: Pour melted butter into the pan and sprinkle brown sugar evenly over it. Arrange pineapple slices over the sugar and place a cherry in the center of each ring.
Make the cake batter:
- In a large bowl, cream butter and sugar until light and fluffy.
- Add eggs one at a time, beating well. Stir in vanilla.
- In a separate bowl, whisk together flour, baking powder, and salt.
- Add dry ingredients to the wet mixture alternately with milk, mixing until just combined.
- Assemble and bake: Carefully spread the batter over the fruit layer in the pan. Bake for 40–50 minutes or until a toothpick inserted in the center comes out clean.
- Cool and flip: Let the cake cool in the pan for 10–15 minutes. Run a knife around the edges, then place a plate over the pan and invert. Let it sit for 2 minutes before lifting the pan.
- Serve: Slice and serve warm or at room temperature. Optional: top with whipped cream or ice cream.
Notes
- Fresh pineapple can be used but slice thinly and core properly.
- To enhance flavor, replace part of the milk with pineapple juice.
- Add spices like cinnamon or nutmeg for a warm, cozy twist.
- For a boozy version, soak the pineapple rings in rum before baking.
- Can be made 1 day ahead—just cool completely and cover loosely with foil.
Nutrition