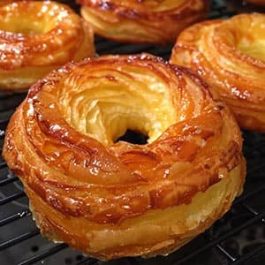
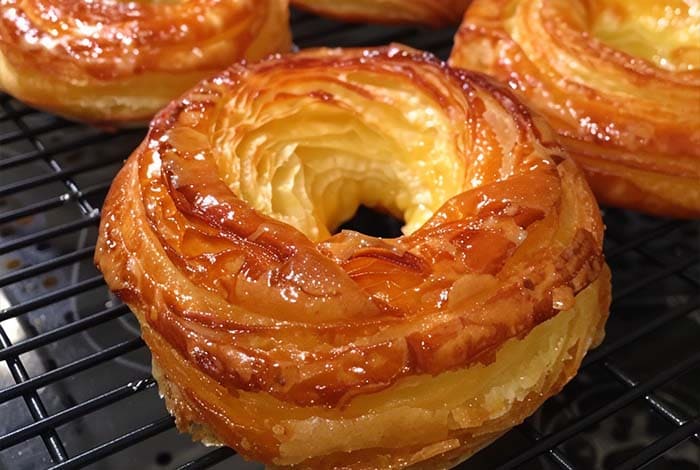
French Crullers are a distinguished member of the doughnut family, celebrated for their unique texture and elegant form. Unlike their denser, yeast-raised counterparts, French Crullers offer a light, airy bite that has enchanted pastry lovers for generations. Their distinctiveness lies not only in their taste and texture but also in their intricate preparation process, which involves the classic French dough, pâte à choux.
History and Origin
The origins of the French Cruller can be traced back to France, where the mastery of pastry is a revered art form. The term “cruller” comes from the Dutch word ‘krullen,’ meaning to curl, which is apt given the cruller’s beautifully twisted shape. However, it was the French innovation of using pâte à choux that gave the cruller its distinctive lightness. This pastry dough, also used for éclairs and cream puffs, was adapted to create a doughnut that is both crispy on the outside and tender on the inside.
What Makes French Crullers Unique?
What sets French Crullers apart from other doughnuts is their texture and method of preparation. Instead of being rolled and cut like traditional doughnuts, the batter for crullers is piped into hot oil using a star-shaped nozzle. This not only imparts the doughnut’s characteristic ridged appearance but also contributes to its incredibly light, airy interior. The cruller’s texture is so distinctive that it almost melts in your mouth, offering a contrast between its crisp exterior and soft, almost custard-like interior.
The Role of Pâte à Choux in Cruller Making
At the heart of every French Cruller is pâte à choux, a light pastry dough that is the cornerstone of many French desserts. This dough is unique because it is cooked twice—first on the stove to dry out the dough and then baked or fried to puff up into its final form. In the case of French Crullers, the dough is fried, which allows it to expand rapidly in the hot oil, creating the cruller’s signature airy texture. The use of pâte à choux distinguishes French Crullers from other types of doughnuts, making them a refined treat that showcases the elegance and complexity of French baking techniques.
The Art of Making French Crullers
Creating French Crullers is a delightful journey into the world of delicate pastry making. This process, while intricate, rewards the baker with light, airy, and elegant treats that are as pleasing to the eye as they are to the palate. Understanding the components and steps involved is crucial for anyone looking to master this exquisite pastry.
Ingredients Overview
The foundation of French Crullers lies in their simple yet precise list of ingredients, each playing a vital role in achieving the perfect texture and flavor:
- Water: Acts as the primary liquid medium, essential for creating the dough.
- Unsalted Butter: Adds richness and flavor, contributing to the dough’s tender crumb.
- Granulated Sugar: Provides sweetness and helps in browning and crisping the exterior.
- Salt: Balances the sweetness and enhances the overall flavor profile.
- All-Purpose Flour: The main structure-building ingredient, it absorbs the liquid and expands when fried, creating the cruller’s airy interior.
- Eggs: Introduce air into the dough and add richness, contributing to the light, puffy texture.
Each ingredient must be measured accurately to ensure the dough’s consistency is perfect for piping and frying.
Step-by-Step Guide to Making the Dough
Preparing the Pâte à Choux
- Combine the Basics: Start by heating water, butter, sugar, and salt in a saucepan until the butter melts and the mixture comes to a boil.
- Incorporate the Flour: Add the flour all at once, stirring vigorously. The mixture will form a dough that pulls away from the sides of the pan.
- Cool and Add Eggs: Allow the dough to cool slightly before adding eggs one at a time, fully incorporating each before adding the next. This step is crucial for achieving the glossy, sticky dough characteristic of pâte à choux.
Tips for Perfect Dough Consistency
- Ensure the dough is cool enough before adding eggs to prevent them from cooking prematurely.
- The dough should be smooth, shiny, and thick enough to hold its shape when piped but not so stiff that it doesn’t expand when fried.
Piping and Shaping Techniques
Choosing the Right Piping Tips
Select a large star-shaped piping tip to create the cruller’s signature ridged appearance. This not only adds to the aesthetic but also increases the surface area, allowing for more crispy edges.
Achieving the Signature Cruller Shape
- Pipe the dough onto parchment paper, using a template or freehand to form circles. Ensure the ends overlap slightly to maintain the shape during frying.
- Practice piping to ensure uniformity in size and shape, which will lead to even frying.
Frying to Perfection
Oil Temperature and Frying Time
- Heat oil to 375°F (190°C) in a deep fryer or a deep pan. Maintaining this temperature is crucial for ensuring the crullers cook through without absorbing excess oil.
- Fry the crullers in batches to avoid overcrowding, which can lower the oil’s temperature and result in soggy pastries.
How to Achieve the Crisp Exterior and Soft Interior
- Carefully place the crullers in the hot oil, parchment paper side up. The paper will detach as the cruller begins to fry; remove it with tongs.
- Fry each side until golden brown, about 2-3 minutes per side, adjusting the time based on size. The right combination of oil temperature and frying time is key to achieving a crisp exterior while maintaining a soft, airy interior.
Mastering the art of making French Crullers requires patience, precision, and a bit of practice. However, the result is a beautifully crafted pastry that’s a testament to the elegance and sophistication of French baking. Whether enjoyed as a luxurious breakfast treat or a refined dessert, French Crullers are sure to delight anyone who takes a bite.
Customizing Your French Crullers
French Crullers, with their delicate texture and elegant appearance, offer a canvas for a variety of flavors and decorations. Customizing these pastries with glazes and toppings can transform them into personalized treats that cater to any preference or occasion.
Glazing and Topping Ideas
The versatility of French Crullers lies in their ability to pair wonderfully with different glazes and toppings. Here are some classic glaze recipes and creative topping suggestions:
- Classic Glaze Recipes:
- Fruit Glaze: Mix confectioners’ sugar with a bit of fruit juice (lemon, orange, or raspberry) for a tangy finish.
- Apple Cider Glaze: Combine confectioners’ sugar with reduced apple cider for a glaze that’s perfect for fall.
- Chocolate Glaze: Melt chocolate with a touch of cream and dip the crullers for a decadent treat.
- Maple Glaze: A mix of confectioners’ sugar and pure maple syrup offers a sweet and aromatic topping.
- Creative Topping Suggestions:
- Sprinkle finely chopped nuts, shredded coconut, or even crispy bacon bits on top of the glaze for added texture.
- Use edible flowers or fruit slices for a decorative and fresh look.
- A dusting of powdered sugar or cocoa powder can add a simple yet sophisticated touch.
Serving and Storage Tips
- Best Practices for Serving French Crullers:
- Serve crullers fresh, ideally within a few hours of frying, to enjoy their characteristic crisp exterior and soft interior.
- If glazing, allow the crullers to cool slightly but apply glazes while they are still warm for the best adherence.
- How to Store Leftovers:
- Store any leftover crullers in an airtight container at room temperature for up to 24 hours.
- For longer storage, freeze unglazed crullers and reheat in an oven to recapture some of their original texture before glazing.
FAQs
- What is the difference between a French cruller and a regular donut? French Crullers are made from pâte à choux, which gives them a light and airy texture, distinct from the denser, yeast-raised or cake-like texture of regular doughnuts.
- Can I make French crullers without a piping bag? Yes, in a pinch, you can cut the corner off a sturdy plastic bag and use it as a makeshift piping bag. While a piping bag with a star tip is ideal for creating the cruller’s signature ridges, the plastic bag method can work for those who do not have piping tools.
- How do I prevent my crullers from becoming oily? Ensuring the oil is at the correct temperature (375°F) and not overcrowding the pan are key factors. Overcrowded crullers cool the oil down too much, and too low a temperature causes the crullers to absorb excess oil instead of instantly sealing and puffing up.
French Crullers stand out in the world of pastries for their delicate texture, elegant appearance, and versatile flavors. Whether you’re a seasoned baker or new to the kitchen, mastering the art of the French Cruller promises a rewarding and delicious experience.

French Crullers Recipe
Equipment
- Large saucepan
- Wooden spoon or spatula
- Piping bag with a large star tip
- Deep fryer or large, deep pan
- Slotted spoon or tongs
- Wire rack for cooling
Ingredients
- 1 cup water
- 4 tablespoons unsalted butter
- 2 tablespoons granulated sugar
- ½ teaspoon salt
- 1 cup all-purpose flour
- 4 large eggs
- Oil for frying vegetable or canola
- Glaze of choice fruit, chocolate, maple, or apple cider
Instructions
- Prepare the Dough: In a large saucepan, combine water, butter, sugar, and salt. Bring to a boil over medium heat. Add flour all at once, stirring vigorously until the mixture forms a dough that pulls away from the sides of the pan.
- Cool and Add Eggs: Remove from heat and let cool for a few minutes. Add eggs one at a time, fully incorporating each before adding the next, until the dough is smooth and glossy.
- Pipe the Crullers: Fill a piping bag fitted with a large star tip with the dough. Pipe onto parchment paper in 3-inch circles, ensuring the ends overlap.
- Fry the Crullers: Heat oil to 375°F in a deep fryer or pan. Fry the crullers until golden brown, about 2-3 minutes per side. Remove with a slotted spoon and drain on a wire rack.
- Glaze and Serve: Dip each cruller in your chosen glaze while still warm. Allow to set before serving.
Notes
- Ensure the oil is at the correct temperature before frying to prevent the crullers from absorbing excess oil.
- Crullers are best enjoyed the day they are made but can be stored in an airtight container for up to 24 hours.
- Experiment with different glazes and toppings to customize your crullers to your taste preferences.

