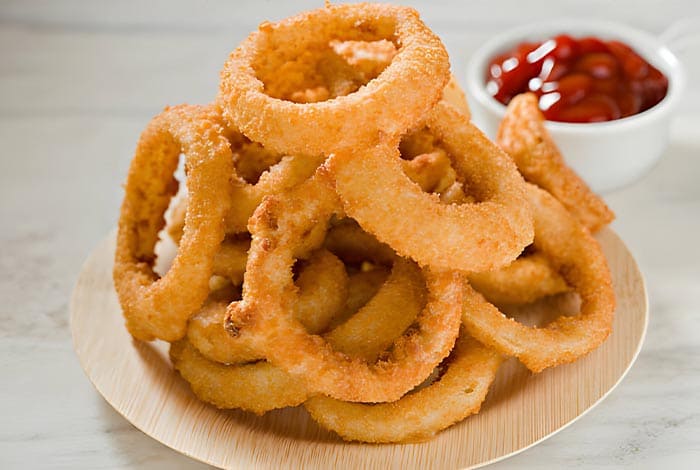
Homemade onion rings have a special place in the hearts of food enthusiasts. These crispy, golden delights are not just a side dish; they’re a celebration of flavor and texture. Unlike their fast-food counterparts, homemade onion rings offer a freshness and quality that can’t be matched. They are perfect for gatherings, as a comfort food treat, or even as a creative addition to gourmet dishes. In this article, we’ll explore the journey of making crispy homemade onion rings, from selecting the right ingredients to mastering the cooking techniques. Whether you’re a seasoned cook or a beginner in the kitchen, this guide will help you create onion rings that are sure to impress. Get ready to transform simple onions into a crunchy, savory masterpiece.
Selecting the Right Ingredients
The journey to perfect onion rings begins with selecting the right ingredients:
- Onions: The star of the dish. Sweet onions are often preferred for their mild flavor.
- Buttermilk: This ingredient is crucial for the batter. It helps in adhering the flour and breadcrumbs to the onions. An alternative to buttermilk can be a mixture of milk and vinegar or lemon juice.
- Breadcrumbs: Panko breadcrumbs are recommended for that extra crunch. They are larger and airier compared to regular breadcrumbs, which means they absorb less oil and stay crispier.
For more on choosing the right type of onions for your onion rings, check out this comprehensive guide.
Preparing the Onion Rings
Preparing your onion rings involves a few simple steps:
- Slicing the Onions: Cut them into ½-inch thick rings for the perfect balance of onion and coating.
- Dredging Stations: Set up three stations – one for flour, one for buttermilk, and one for breadcrumbs.
- The Dredging Process: Coat the onion rings in flour, dip them in buttermilk, and then cover them in breadcrumbs.
Discover various cooking techniques and tips for achieving the perfect crispiness in this detailed recipe.
Cooking Techniques
The cooking technique is vital in achieving the perfect crispy homemade onion rings. For deep frying, heat oil in a deep fryer or a deep skillet to between 350°F and 375°F. This temperature range is ideal for cooking the onion rings evenly without absorbing too much oil. Gently place the coated onion rings in the oil, being careful not to overcrowd the pan. Fry until they turn a beautiful golden brown, usually taking about 2-3 minutes. Then, transfer them to a paper towel-lined plate to drain excess oil.
For a healthier alternative, air frying is an excellent option. Preheat your air fryer to the same temperature range and place the coated onion rings in a single layer. Spray them lightly with cooking oil and air fry until crispy. This method significantly reduces the oil content while still delivering a satisfying crunch.
In both methods, the key to crispiness is not overloading the cooking surface and maintaining a consistent temperature. Enjoy your homemade onion rings fresh and hot for the best experience.
Serving and Accompaniments
- Serve with a variety of dipping sauces like ketchup, ranch, or a special Outback Blooming Onion Sauce.
- Onion rings are perfect alongside burgers, sandwiches, or as a standalone snack.
FAQs
Why do my onion rings get soggy?
- Sogginess often occurs if the oil isn’t hot enough. Ensure your oil is at the correct temperature (350°F to 375°F) for optimal crispiness.
Can I make onion rings in advance?
- While best served fresh, you can prepare the coated onion rings and refrigerate them for a few hours before frying.
What’s the best onion for onion rings?
- Sweet onions like Vidalia or Walla Walla are ideal due to their mild flavor, which complements the crispy coating.
Can I bake onion rings instead of frying?
- Yes, baking is a healthier alternative. Coat the rings as usual and bake them on a wire rack at 450°F until crispy.
How can I make gluten-free onion rings?
- Use gluten-free flour and breadcrumbs for a gluten-free version without compromising on taste or texture.
Tips for Success
- Use a thermometer to monitor oil temperature.
- Don’t slice the onions too thick to ensure they cook evenly.
- Adjust seasoning to taste after frying.
Storage and Reheating
- Store in an airtight container in the fridge for up to 3-4 days.
- Reheat in the air fryer or oven to retain crispiness.
Conclusion
Store leftover onion rings in an airtight container in the refrigerator for up to 3 days. To reheat, preheat your oven or air fryer to 350°F. Place the onion rings on a baking sheet or in the air fryer basket and heat for 5-10 minutes until they are hot and crispy again. This method helps restore their original crunchiness, making them almost as good as freshly made.
Crispy Homemade Onion Rings
Equipment
- Deep fryer or large skillet
- Three shallow bowls for dredging
- Tongs
- Paper towels
- Cutting board and knife
Ingredients
- 2 large sweet onions sliced into ½-inch thick rings
- 1 cup buttermilk
- 1 cup all-purpose flour
- 1 tablespoon cornstarch
- 1 teaspoon smoked paprika
- 1 teaspoon salt
- ½ teaspoon black pepper
- ½ teaspoon garlic powder
- 1 cup Panko breadcrumbs
- Oil for frying vegetable, canola, or peanut oil
Instructions
Prepare the Onions:
- Peel the onions and slice them into ½-inch thick rings. Carefully separate the rings.
Set Up Dredging Stations:
- In a shallow bowl, mix together the flour, cornstarch, smoked paprika, salt, pepper, and garlic powder.
- Pour the buttermilk into another shallow bowl.
- Place the Panko breadcrumbs in a third shallow bowl.
Dredge the Onion Rings:
- First, coat each onion ring in the flour mixture.
- Dip the floured rings into the buttermilk, ensuring they are fully coated.
- Finally, coat the rings in Panko breadcrumbs, pressing gently to adhere.
Rest the Onion Rings:
- Allow the breaded onion rings to rest for 10-15 minutes. This helps the coating to set and stick better during frying.
Fry the Onion Rings:
- Heat oil in a deep fryer or a large skillet to 350°F to 375°F.
- Fry the onion rings in batches, being careful not to overcrowd the pan. Cook each batch for 2-3 minutes or until they are golden brown and crispy.
- Use tongs to transfer the fried onion rings to a paper towel-lined plate to drain excess oil.
Serve:
- Serve the onion rings hot with your favorite dipping sauces like ketchup, ranch dressing, or a spicy remoulade.
Notes
- For a lighter version, try air frying or baking the onion rings.
- Adjust the seasoning in the flour mixture according to taste preferences.
- Store any leftovers in an airtight container and reheat in the oven or air fryer for best results.