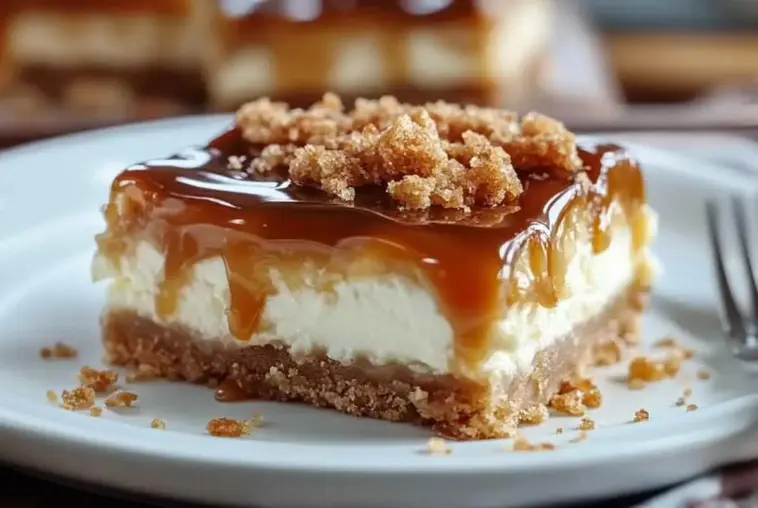
Few desserts strike the perfect balance between indulgent and approachable quite like Caramel Cheesecake Bars. These dreamy little squares combine a buttery graham cracker crust, a luxuriously creamy cheesecake center, and a rich, golden caramel topping that brings it all together in one irresistible bite.
What makes them extra special? They’re everything you want in a dessert: simple to make, incredibly satisfying, and perfect for prepping ahead. Whether you’re hosting a holiday gathering, contributing to a potluck, or just craving something sweet on a cozy weekend, these bars deliver major wow-factor without the fuss of a traditional cheesecake.
Plus, they’re endlessly adaptable—easy to dress up with nuts, chocolate, or sea salt, yet elegant enough on their own to steal the dessert table spotlight. Once you try them, they just might earn a permanent spot in your baking rotation.
Why You’ll Love These Bars
There’s a lot to love about Caramel Cheesecake Bars, and it starts with the fact that they’re surprisingly easy to put together. No springform pan, no water bath—just simple ingredients layered into a square baking dish and chilled to perfection.
Cleanup is a breeze, especially if you line your pan with foil or parchment. They’re ideal for make-ahead planning, too. You can bake them the night before a party, chill them overnight, and slice them the next day for stress-free serving.
But the best part? The flavor and texture combo is unbeatable. The buttery graham cracker crust gives way to silky-smooth cheesecake, topped with a rich caramel that sinks just slightly into the surface for gooey goodness in every bite. You can even get creative with add-ins like toasted pecans, chocolate drizzle, or a sprinkle of flaky sea salt.
It’s comfort food, elevated—exactly what dessert should be.
Key Ingredients and What Makes Them Special
The magic of Caramel Cheesecake Bars lies in just a few well-chosen ingredients, each playing a crucial role:
-
Graham Cracker Crumbs: These form the classic buttery base. You can also use digestive biscuits or vanilla wafers for a twist in texture or flavor.
-
Butter: Melted butter binds the crust and adds rich, golden flavor.
-
Cream Cheese: The heart of any cheesecake. Go for full-fat, brick-style cream cheese—it yields the creamiest texture and richest taste. Avoid whipped or low-fat varieties for best results.
-
Eggs: These provide structure to the cheesecake layer, ensuring it sets properly during baking.
-
Sugar: A touch of sweetness to balance the tang of the cream cheese.
-
Caramel Sauce: Here’s where you can customize. Store-bought caramel makes this recipe ultra convenient, but a homemade caramel sauce offers deeper, buttery flavor. A spoonful of salted caramel takes things to the next level.
-
Optional Add-ins: Swirl in melted chocolate, sprinkle on chopped pecans or toffee bits, or finish with a pinch of sea salt for a gourmet touch.
Together, these ingredients create a bar that’s rich, balanced, and totally crave-worthy.
Step-by-Step Overview of How to Make Caramel Cheesecake Bars
While these bars look impressive, the process is delightfully straightforward:
Step 1: Prep the crust
Combine graham cracker crumbs and melted butter until you have a sandy texture. Press it firmly into a lined 8×8 or 9×9 pan and bake briefly to set the base.
Step 2: Make the cheesecake layer
Beat room-temperature cream cheese until smooth, then blend in sugar, eggs, and a splash of vanilla. You want a creamy, lump-free batter that’s pourable but thick.
Step 3: Pour and bake
Pour the cheesecake mixture over your baked crust and smooth the top. Bake until the edges are set and the center jiggles slightly when nudged—this usually takes around 30–35 minutes.
Step 4: Cool, chill, and drizzle
Let the bars cool completely at room temperature, then refrigerate for at least 4 hours (overnight is even better). Once fully chilled, drizzle generously with caramel sauce. You can warm the caramel slightly to make drizzling easier, but don’t pour it on while the bars are still hot.
Step 5: Slice and serve
Use a sharp knife to cut clean squares. Wipe the blade between slices for neat edges.
Pro Tip: Always chill overnight if you want perfect cuts and the best flavor development.
Optional Tip: Line your pan with foil or parchment with overhang on the sides—this makes lifting and cutting a breeze.
Tools You’ll Need
You don’t need fancy gear to make these bars, but a few reliable kitchen tools help make the process smooth:
-
8×8 or 9×9 Baking Pan – metal or glass both work
-
Parchment Paper or Foil – for easy removal
-
Hand Mixer or Stand Mixer – for smooth cheesecake texture
-
Rubber Spatula – for scraping down the bowl and smoothing layers
-
Sharp Knife – essential for clean, professional-looking cuts
-
Optional: An offset spatula can help with even spreading
That’s it—just the basics, and you’re ready to go!
Texture & Flavor: What to Expect
Caramel Cheesecake Bars are a textural masterpiece. The crust is firm yet buttery, giving a satisfying bite beneath the smooth cheesecake. The filling is rich, dense, and creamy—but not too heavy. And the caramel? It pools luxuriously on top, sometimes sinking in just enough to create that classic, gooey-meets-silky moment.
Flavor-wise, they strike a perfect harmony: slightly tangy from the cream cheese, sweet from the caramel, and balanced by the toasty crust. If you opt for salted caramel or finish with sea salt, you’ll get that irresistible sweet-salty combo that makes people reach for seconds (and thirds).
Flavorful Variations to Try
One of the best things about Caramel Cheesecake Bars is how customizable they are. Here are a few mouthwatering variations to inspire your next batch:
Salted Caramel Cheesecake Bars
After drizzling caramel, sprinkle a pinch of flaky sea salt over the top. The salt balances the sweetness and adds a satisfying crunch.
Chocolate Swirl Caramel Cheesecake Bars
Drop spoonfuls of melted chocolate into the cheesecake layer before baking, then gently swirl with a toothpick or knife. It adds rich, fudgy flavor in every bite.
Apple Caramel Cheesecake Bars
Layer thin slices of spiced apple (tossed with cinnamon and brown sugar) on top of the cheesecake layer before baking. Think caramel apple meets cheesecake.
Nutty Caramel Bars
Add toasted pecans or walnuts on top of the caramel layer for crunch and depth. Pecans pair especially well with the buttery notes of caramel.
Pumpkin Caramel Version
Mix a little pumpkin puree and pumpkin pie spice into the cheesecake layer for a fall-inspired twist. Top with caramel and a dusting of cinnamon sugar.
Make-Ahead, Storage & Freezing Tips
Caramel Cheesecake Bars are a dream to make ahead, and they store beautifully when done right.
Refrigerating
Store them in an airtight container in the fridge for up to 5 days. For best texture and flavor, let them sit at room temperature for 10 minutes before serving.
Freezing
Yes, you can freeze them! Chill them fully first, then:
-
Wrap individual bars in plastic wrap, then foil
-
Place wrapped bars in a freezer-safe bag or container
-
Label with date; use within 2 months for best quality
You can also freeze the whole slab, tightly double-wrapped, and slice after thawing.
Thawing Tips
To thaw, leave the bars in the fridge overnight or at room temp for about an hour. Avoid microwaving—they’ll lose that signature creamy texture.
Important Tip: Always chill the bars completely before slicing. It helps the cheesecake set properly and gives you clean, beautiful edges when cutting.
How to Cut Clean Cheesecake Bars
Want those crisp, bakery-style edges? Here’s how:
-
Chill completely before slicing—ideally overnight
-
Use a sharp knife dipped in hot water, then wiped dry
-
Clean the knife between each cut
-
Use a ruler or guides to measure even squares
If you lined your pan with foil or parchment, simply lift the slab out first. This makes cutting easier and neater. Take your time, and you’ll get picture-perfect bars every time!
What to Serve with Caramel Cheesecake Bars
These bars are rich and indulgent, so pairing them with light and fresh sides can enhance the overall experience:
-
Beverages: Pair with coffee, espresso, chai tea, or even a glass of dessert wine
-
Dessert companions: Serve alongside lemon bars, brownies, or bite-sized cupcakes on a party platter
-
Toppings: Add a dollop of whipped cream, a scoop of vanilla bean ice cream, or a sprinkle of cinnamon
-
Fruits: Fresh berries or apple slices can balance the richness beautifully
These combos make your dessert table shine without stealing the spotlight from your cheesecake bars.
Common Mistakes to Avoid
Even simple recipes like this have a few sneaky pitfalls. Watch out for these:
-
Overbaking: Don’t rely on color. The edges should be set, but the center should still jiggle slightly. It’ll firm up as it chills.
-
Using low-fat cream cheese: It can cause a watery, less flavorful filling. Always go full-fat for that classic rich texture.
-
Cutting too soon: Slicing warm cheesecake will lead to a gooey mess. Chill thoroughly for clean results.
-
Skipping parchment or foil lining: It makes removal and cutting easier. Don’t skip this step!
-
Pouring caramel too soon: Hot caramel on warm cheesecake can create a slippery mess. Let everything cool first, then drizzle away.
Avoiding these mistakes ensures smooth, beautiful bars every time.
Frequently Asked Questions
Can I use store-bought caramel for cheesecake bars?
Absolutely! Look for a thick, high-quality caramel sauce or dulce de leche. For a more “homemade” feel, warm it slightly before drizzling so it spreads evenly—but don’t let it get too hot.
How do I know when the cheesecake is done baking?
Check the center—it should jiggle slightly like Jell-O. If the edges are set and only the middle moves a bit, it’s ready. Overbaking can lead to cracking or a dry texture.
Can I freeze caramel cheesecake bars?
Yes! They freeze very well. Chill them first, wrap individually, and store in an airtight container. Thaw in the fridge overnight or at room temp for 30–60 minutes.
Can I make caramel cheesecake bars without eggs?
Yes—you can replace eggs with Greek yogurt or sour cream (about 1/4 cup per egg). The result is slightly softer but still delicious.
Can I use a different crust than graham crackers?
Definitely. Try crushed Oreos, vanilla wafers, or gingersnap cookies. Just make sure the ratio of crumbs to butter keeps the base firm and not too greasy.
Caramel Cheesecake Bars
Equipment
- 8x8 or 9x9 square baking pan
- Mixing bowls
- Hand mixer or stand mixer
- Rubber spatula
- Measuring cups and spoons
- Parchment paper or foil
- Sharp knife
- Optional: offset spatula
Ingredients
For the Crust:
- 1 ½ cups graham cracker crumbs
- ¼ cup granulated sugar
- 6 tablespoons unsalted butter melted
For the Cheesecake Filling:
- 16 oz 2 bricks cream cheese, softened
- ½ cup granulated sugar
- 2 large eggs
- 1 tsp vanilla extract
For the Topping:
- ½ cup thick caramel sauce store-bought or homemade
- Optional: flaky sea salt chopped pecans, or chocolate drizzle
Instructions
- Preheat oven to 325°F (160°C). Line an 8x8 baking pan with parchment or foil, leaving overhang on the sides.
- Make the crust: Mix graham cracker crumbs, sugar, and melted butter until evenly combined. Press firmly into the bottom of the pan. Bake for 8–10 minutes. Let cool slightly.
- Prepare the filling: Beat cream cheese until smooth. Add sugar and mix until combined. Add eggs, one at a time, beating well after each. Mix in vanilla.
- Bake: Pour cheesecake mixture over the crust and smooth the top. Bake for 30–35 minutes, or until edges are set and the center slightly jiggles.
- Cool and chill: Let bars cool at room temperature, then refrigerate for at least 4 hours or overnight.
- Top and serve: Drizzle caramel over the chilled cheesecake. Add flaky sea salt or chopped nuts if desired. Slice into squares using a hot knife for clean cuts.
Notes
- Cream cheese tip: Always use full-fat brick-style cream cheese for the best texture.
- Caramel: Use a thick sauce that won’t run when sliced. Dulce de leche also works beautifully.
- Freezer-friendly: Wrap individual bars and freeze for up to 2 months. Thaw in the fridge.
- Clean cuts: Chill thoroughly and use a hot, dry knife for bakery-style slices.