Why Everyone Loves Chicken Parmesan
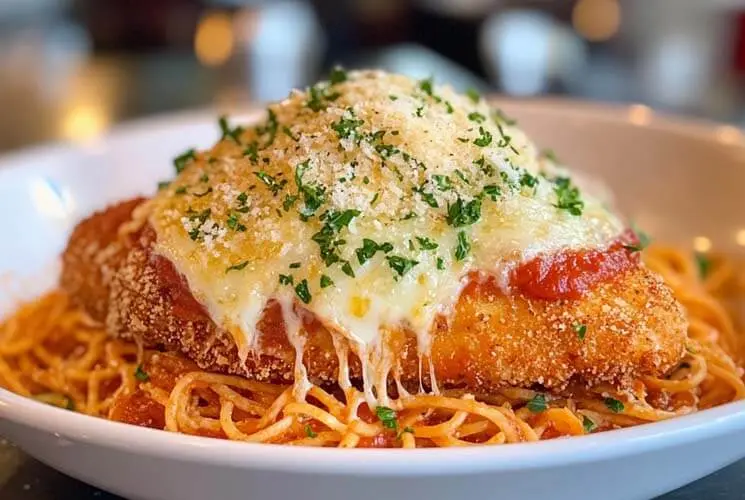
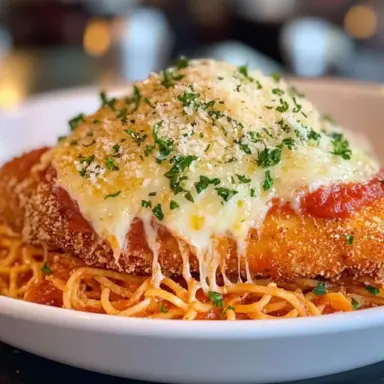
Few dishes hit the comfort food sweet spot like Chicken Parmesan. Crispy on the outside, juicy on the inside, smothered in a tangy marinara sauce and melty mozzarella—it’s the kind of dinner that makes you pause for a satisfied “mmm.”
Whether you’re new to making it from scratch or trying to perfect your technique, this guide will walk you through each step. We’ll cover everything from choosing the right cut of chicken to mastering the crispy golden crust and achieving the ultimate melty cheese finish.
In this warm, kitchen-tested guide, you’ll learn all the tips and tricks to make the best Chicken Parmesan at home—no soggy breading, no bland sauce, just restaurant-worthy results. Let’s dig into this beloved Italian-American classic and turn it into your new go-to dinner hero.
What Is Chicken Parmesan? A Delicious Italian-American Classic
Chicken Parmesan, often lovingly shortened to Chicken Parm, is a dish with roots in Italian-American cuisine. Inspired by traditional eggplant parmigiana from southern Italy, it was adapted by immigrants in the United States who swapped in tender chicken cutlets for the eggplant.
Unlike its Italian cousin, Chicken Parmesan became known for its generous layers of breaded chicken, rich tomato sauce, mozzarella cheese, and a final sprinkle of sharp Parmesan—all baked until bubbling and golden. It’s hearty, flavorful, and satisfying in every bite.
You might hear Chicken Parmigiana used interchangeably with Chicken Parmesan, and that’s totally okay. The terms refer to the same dish, though the former leans more Italian in name, and the latter is the Americanized version that shows up on most menus.
Today, you’ll find Chicken Parmesan everywhere: family kitchens, Italian-American diners, and upscale restaurants. And while it looks impressive, it’s incredibly approachable to make at home—especially when you know a few smart tricks for getting that unbeatable crispy crust.
Ingredients Breakdown: What You’ll Need for the Crispiest Chicken Parmesan
Before diving into cooking, let’s talk ingredients. The beauty of Chicken Parmesan lies in its simplicity—but the quality of your ingredients makes all the difference.
Key Ingredients:
-
Chicken breasts – Boneless and skinless, sliced in half or pounded thin for quick, even cooking. Thin chicken equals crispier bites.
-
Breadcrumbs – Panko gives the crispiest texture, but Italian-style works if that’s what you have on hand.
-
Parmesan cheese – Freshly grated, not the stuff in the green can. Adds a salty, umami-rich bite.
-
Mozzarella – Use whole milk mozzarella for melty, stretchy goodness. Fresh mozzarella gives a creamier finish but releases more moisture—drain if needed.
-
Marinara or tomato sauce – Go for a thick, flavorful sauce. Too watery and your crisp crust will turn soggy.
-
Eggs and flour – Essential for the classic breading process.
-
Garlic and herbs – Think dried oregano, basil, maybe a pinch of crushed red pepper for heat.
Ingredient Tips:
-
Season your breadcrumb mixture with garlic powder, Italian seasoning, or a little grated Parm to amp up the flavor.
-
Use a neutral, high-smoke point oil like canola or vegetable oil for frying. Olive oil burns too quickly.
-
For extra melt and flavor, try combining mozzarella with a touch of provolone or fontina.
These ingredients create the foundation of a crispy, cheesy masterpiece—and each one deserves your attention.
Prepping the Chicken: Pound, Season, Coat
Start with boneless, skinless chicken breasts and cut them horizontally to make thinner cutlets. Then, use a meat mallet or rolling pin to gently pound them to an even thickness—around ½ inch is ideal. This ensures they cook evenly and quickly without drying out.
Next, give your chicken a light seasoning with salt, pepper, and garlic powder. This step adds base flavor before the breading even starts.
Set up your breading station:
-
Flour – for a dry surface to help the egg stick.
-
Beaten eggs – to help the breadcrumbs adhere.
-
Breadcrumb mix – seasoned panko and Parmesan, ready for coating.
Dip each chicken piece through the flour, then the egg, then press it firmly into the breadcrumb mix until fully coated.
Pro Tip: Let the breaded chicken sit on a rack or plate for 10–15 minutes before frying. This helps the coating stick better during cooking and prevents it from sliding off.
How to Pan-Fry for Extra Crispiness
To get that crave-worthy golden crunch, pan-frying is key. Heat a thin layer of canola, vegetable, or peanut oil in a cast iron skillet or heavy-bottomed pan over medium heat. You want the oil temperature to reach around 350°F (175°C)—hot enough to sizzle, not smoke.
Add your breaded chicken, a few pieces at a time, without overcrowding the pan. Fry for about 3–4 minutes per side, or until deeply golden and cooked through.
While deep frying works too, shallow frying is easier, less messy, and gives you plenty of crispiness.
When finished, transfer the cutlets to a wire rack set over a baking sheet. Avoid paper towels, which trap steam and can make the bottom soggy.
If you’re craving lighter prep, you can air fry or oven bake, but nothing quite matches that pan-fried crunch paired with soft, melted cheese on top.
Assembling & Baking for Melty Perfection
Once your cutlets are fried and golden, it’s time to layer up.
Place the chicken in a baking dish or on a sheet pan. Spoon a bit of marinara over each cutlet—not too much, or you’ll lose the crisp. Then top with slices of mozzarella and a sprinkle of Parmesan.
Bake in a preheated oven at 400°F (200°C) for about 10–12 minutes, or until the cheese is melted, bubbly, and slightly golden on the edges.
For an extra finish, broil for 1–2 minutes. Keep an eye on it—those cheesy edges can go from golden to burnt fast!
Tips for the Best-Ever Crispy Chicken Parmesan
Want to take your Chicken Parmesan from good to unforgettable? These pro tips will help you lock in flavor, texture, and that crave-worthy crunch:
-
Use panko breadcrumbs instead of standard ones. Panko is lighter and creates a superior crispy crust that holds up under the sauce and cheese.
-
Try the double breading technique if you want an ultra-crunchy coating. Dip in flour, egg, then breadcrumbs—then repeat the egg and breadcrumb step one more time.
-
Let your breaded chicken rest on a rack or tray before frying. This simple pause helps the coating stick better and fry up evenly.
-
Avoid watery sauces. A thin, runny marinara will ruin your crisp. Simmer it to reduce excess moisture before layering.
Advertisement -
Use freshly grated mozzarella and Parmesan. Pre-shredded cheese often contains anti-caking agents that prevent proper melting. Fresh cheese melts smoother and browns beautifully.
Bonus Tip: For even more flavor, stir some grated Parmesan into the breadcrumb mixture. Every bite will taste richer and cheesier.
Little changes make a big difference—and these tips are the secret to restaurant-style results right in your own kitchen.
Delicious Variations You’ll Love
Chicken Parmesan is a versatile dish that welcomes creative twists. Here are a few fun and flavorful variations to try:
-
Gluten-Free Chicken Parmesan
Swap out regular breadcrumbs for gluten-free panko or crushed gluten-free crackers. Make sure your flour and sauce are gluten-free too. -
Spicy Chicken Parmesan
Add crushed red pepper flakes or a touch of cayenne to the breadcrumb mix for a subtle kick. You can also drizzle with spicy arrabbiata sauce instead of marinara. -
Air Fryer Chicken Parmesan
Skip the oil and air fry at 375°F for 10–12 minutes per side, flipping once. It comes out crispy and golden without the mess of frying. -
Chicken Parmesan Sliders
Perfect for parties—cut cooked chicken into smaller portions and serve on slider buns with a spoonful of sauce and melted cheese. Easy and crowd-pleasing!
Try one tonight and see how a little twist can keep dinner exciting.
What to Serve with Chicken Parmesan: Side Dishes That Shine
The beauty of Chicken Parmesan is how well it plays with classic sides. Whether you want comfort or something lighter, here are a few top picks:
-
Garlic bread or a crusty baguette
Use it to soak up all that rich marinara and melted cheese. -
Caesar salad or a simple green salad
The crisp, cool crunch balances the warm richness of the chicken. -
Pasta
Spaghetti, fettuccine, or even penne are all traditional favorites. Toss with extra marinara or drizzle with olive oil and garlic. -
Roasted vegetables or zucchini noodles
Want to lighten things up? Go low-carb with zoodles or pair with roasted broccoli, asparagus, or green beans.
You can even go all out and serve Chicken Parmesan as a hero sandwich—just add a soft hoagie roll and call it a night!
How to Make Chicken Parmesan Ahead of Time (Meal Prep Tips)
Meal prepping Chicken Parmesan is easier than you might think—and a real time-saver.
To prep ahead, complete the breading and frying step, then let the chicken cool. Store the crispy cutlets in an airtight container in the fridge for up to 24 hours. When you’re ready to serve, simply assemble with sauce and cheese and bake until bubbly.
Freezing? Yes, it works! Freeze the cooked, breaded chicken (without sauce) in a single layer, then transfer to a freezer bag once solid. When ready, bake straight from frozen at 375°F until heated through, then top with sauce and cheese.
To reheat leftovers, use the oven or air fryer—not the microwave. This keeps the crust crisp and prevents sogginess. Try 375°F for 8–10 minutes in the oven, or 5–6 minutes in the air fryer.
With a little planning, you can enjoy this dish anytime with minimal effort.
Storing & Reheating Leftovers the Right Way
Leftover Chicken Parmesan stores well when handled right.
-
In the fridge, keep it in an airtight container for 3 to 4 days.
-
For longer storage, freeze for up to 2 months—just be sure to wrap it tightly in foil or use freezer-safe containers.
When reheating, skip the microwave. Instead, warm in a preheated oven at 375°F or use an air fryer to restore the crisp texture. If frozen, let it thaw overnight in the fridge before reheating for best results.
Done right, leftovers taste just as good—maybe even better—on day two.
Common Mistakes to Avoid
Even seasoned cooks make a few missteps with Chicken Parmesan. Here’s what to steer clear of:
-
Overcrowding the pan while frying—this lowers the oil temp and leads to soggy chicken.
-
Using a watery sauce—it seeps into the crust and ruins that golden crisp.
-
Skipping the resting step after breading—this makes the coating more likely to fall off during cooking.
-
Not pounding the chicken evenly—uneven thickness means uneven cooking.
Avoid these traps, and you’ll be on your way to a crispy, melty masterpiece every time.
FAQs: Chicken Parmesan Answered
Can I bake instead of fry Chicken Parmesan?
Yes! For a lighter option, bake the breaded chicken at 400°F for 20–25 minutes, flipping halfway through, before assembling with sauce and cheese.
Is Chicken Parmesan the same as Chicken Parmigiana?
They’re essentially the same! Parmigiana is the Italian name; Parmesan is the Americanized version.
Can I make Chicken Parmesan in the air fryer?
Absolutely. Air fry at 375°F for 10–12 minutes per side, then add sauce and cheese and cook for 2–3 minutes more.
What kind of pasta goes best with Chicken Parmesan?
Spaghetti, linguine, or penne are all great picks. Serve with marinara or garlic oil for extra flavor.
Final Thoughts: Your New Favorite Comfort Food
Chicken Parmesan is one of those dishes that’s surprisingly easy to master—and endlessly satisfying. With its crispy coating, rich sauce, and gooey cheese, it hits all the right comfort food notes.
Whether you stick with the classic or try a spicy, air-fried, or gluten-free variation, the magic is in the details: fresh cheese, seasoned crumbs, and good technique.
Now that you’ve got the full how-to, it’s time to bring this Italian-American favorite to your own table. Try it tonight—and if you love it, don’t forget to leave a comment or share it with someone who needs a cozy meal idea!
The Best Crispy Chicken Parmesan
Equipment
- Meat mallet (or rolling pin)
- 3 shallow bowls (for breading station)
- Large skillet or cast-iron pan
- Baking sheet
- Wire rack (for draining and baking)
- Oven
Ingredients
For the Chicken:
- 2 large boneless skinless chicken breasts (sliced horizontally to make 4 cutlets)
- Salt and black pepper to taste
- ½ cup all-purpose flour
- 2 large eggs beaten
- 1 ½ cups panko breadcrumbs
- ½ cup grated Parmesan cheese
- 1 tsp garlic powder
- 1 tsp dried Italian herbs basil, oregano
- Neutral oil for frying canola or vegetable
For Assembly:
- 1 ½ cups marinara sauce thick, not watery
- 1 cup shredded mozzarella or fresh mozzarella slices
- ¼ cup grated Parmesan cheese for topping
- Fresh basil or parsley for garnish optional
Instructions
- Prep the Chicken: Slice the chicken breasts in half horizontally. Pound to even thickness (about ½ inch). Season both sides with salt and pepper.
- Set up the Breading Station: Place flour in one shallow bowl, beaten eggs in the second, and mix panko, Parmesan, garlic powder, and herbs in the third.
- Bread the Chicken: Dip each piece in flour, then egg, then breadcrumb mixture. Press firmly. Let sit for 10–15 minutes.
- Fry Until Golden: Heat ¼ inch oil in a skillet over medium heat. Fry chicken 3–4 minutes per side until golden and cooked through. Drain on a wire rack.
- Assemble: Place fried cutlets on a baking sheet. Spoon marinara over the top (not too much). Add mozzarella and extra Parmesan.
- Bake: Bake at 400°F (200°C) for 10–12 minutes, or until cheese is melted and bubbly. Optional: broil for 1–2 minutes to brown the top.
- Serve: Garnish with fresh basil or parsley and serve hot with your favorite side.
Notes
- Mozzarella: Fresh mozzarella works great but releases moisture—drain slices before use to keep the crust crisp.
- Breadcrumb tip: Add extra Parmesan or crushed red pepper to the breadcrumb mix for extra flavor.
- Make-ahead: Fry the chicken in advance and refrigerate. Assemble and bake just before serving.
- Reheat tip: Use an oven or air fryer to bring back the crisp texture—avoid microwaving.
Nutrition