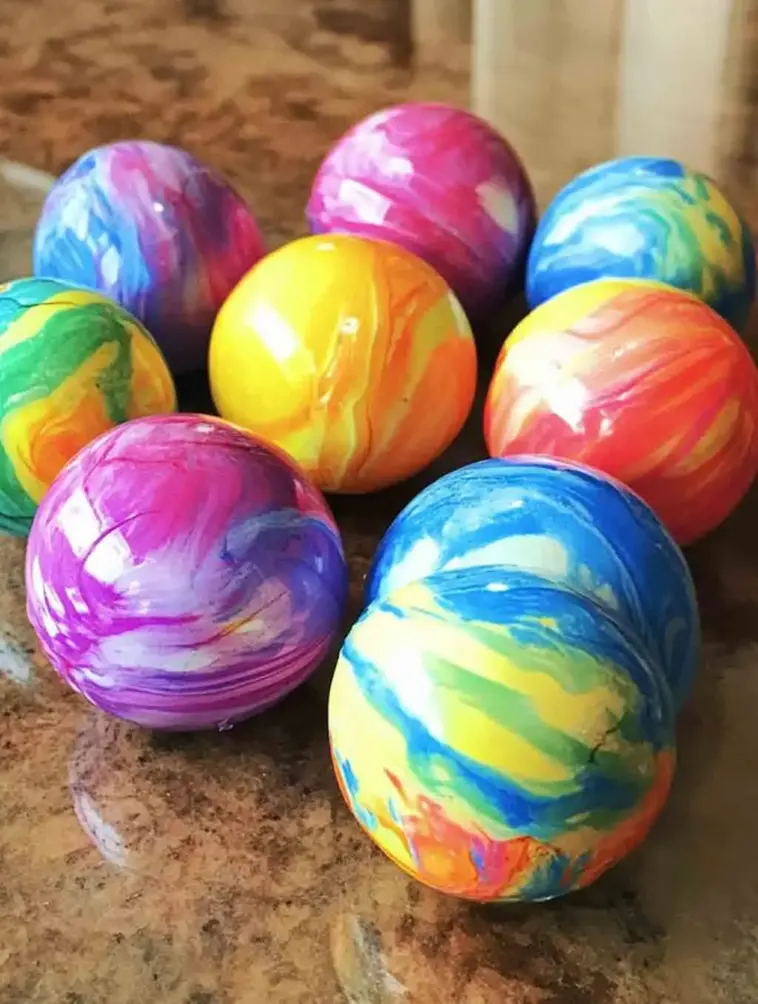
Ever wonder how to create your very own rainbow bouncy balls at home? These colorful, squishy, and springy DIY creations are not only fun to play with—they’re also a fantastic way to introduce kids to basic science.
Crafted from simple ingredients like glue, borax, and cornstarch, these homemade toys are perfect for weekend projects, rainy-day fun, or educational classroom activities. Kids love customizing their own designs with glitter, swirls, or bright neon colors, making each ball a one-of-a-kind creation.
In this article, you’ll discover a step-by-step recipe for making bouncy balls at home, learn about the science behind their bounce, explore creative variations, and get tips on storage and safety. Get ready to mix, roll, and bounce your way into colorful crafting!
Why Make Bouncy Balls at Home?
Creating DIY bouncy balls is an engaging and affordable project for kids of all ages. Here’s why it’s worth trying:
-
Educational value: Learn about basic chemistry through hands-on experience.
-
Budget-friendly: Uses inexpensive household materials.
-
Safe ingredients: Non-toxic glue and food-safe coloring.
-
Creative freedom: Choose your own colors, textures, and shapes.
-
STEAM-approved: Blends science with creativity for a well-rounded activity.
Whether you’re a parent, teacher, or crafty kid, this project offers a mix of learning and fun.
The Science Behind the Bounce
Bouncy balls work thanks to the chemistry of polymers. When glue—which contains polyvinyl acetate (a polymer)—mixes with borax, a cross-linking reaction occurs. This transforms the liquid into a more solid, stretchy, and elastic form.
Cornstarch adds thickness and helps control texture. As the ingredients combine, they form a rubbery mass that’s firm enough to hold shape, yet flexible enough to bounce. The better the ratio and kneading, the more energy your ball will store and release when it hits a surface.
It’s a simplified version of how rubber or silicone is made in industrial settings—fun and educational for all ages!
Essential Materials and Ingredients
To get started with your homemade rainbow bouncy ball recipe, gather the following supplies:
-
1 tablespoon white glue (PVA)
-
½ tablespoon cornstarch
-
½ teaspoon borax powder
-
2 tablespoons warm water
-
Food coloring or glitter (for customization)
-
Small mixing bowls or disposable cups
-
Plastic spoons or stirrers
-
Gloves (optional for sensitive skin)
-
Molds or cookie cutters (optional for shaping)
All of these are easy to find at home or at a local craft store—no fancy tools needed!
Step-by-Step Instructions to Make Rainbow Bouncy Balls
Follow these simple steps to create your very own rainbow bouncy balls:
-
Prepare the borax solution
-
In a small cup, stir ½ teaspoon borax into 2 tablespoons warm water until fully dissolved.
-
-
Mix the colorful base
-
In a separate cup, combine 1 tablespoon white glue with ½ tablespoon cornstarch.
-
Add a few drops of food coloring or glitter and stir well.
-
-
Combine and react
-
Slowly pour the borax solution into the glue mixture while stirring.
-
A clump will begin to form almost immediately.
-
-
Knead and shape the ball
-
Remove the mixture from the cup and knead it with your hands until it becomes smooth and rubbery.
-
Roll it between your palms to form a sphere.
-
-
Let it set
-
Let the ball rest for 1–2 minutes before testing its bounce.
-
Want a swirled effect? Use multiple glue batches with different colors and merge them gently before shaping.
Advertisement
Notes on Texture
-
If the ball is too sticky, add a little more cornstarch.
-
If it’s too firm, try reducing borax in the next batch.
-
Proper kneading is key to achieving a satisfying bounce.
Safety Tips for Kids and Storage Advice
While this recipe uses mostly kid-friendly materials, it’s important to follow safety guidelines:
-
Always supervise young children, especially when handling borax.
-
Avoid contact with the eyes or mouth.
-
Use gloves if children have sensitive skin.
-
Keep the finished bouncy balls in airtight ziplock bags or small containers to prevent drying out.
Stored properly, the balls can remain soft and bouncy for several days.
Fun Variations & Creative Add-Ins
Once you’ve mastered the basic homemade rainbow bouncy ball recipe, try spicing it up with these creative and colorful ideas:
-
Glitter balls – Add sparkle with glitter glue or loose craft glitter.
-
Glow-in-the-dark balls – Use glow-in-the-dark paint or pigment to make nighttime-friendly toys.
-
Scented bouncy balls – Add a drop or two of essential oil (like lavender or lemon) to the glue for a scented sensory experience.
-
Swirled or layered effects – Mix multiple colored glue batches and gently twist or layer them for a tie-dye or rainbow stripe look.
These variations are perfect for themed parties, classroom activities, or just extra fun on a rainy afternoon.
Troubleshooting Common Issues
Sometimes your DIY bouncy balls might not turn out exactly right on the first try. Here are some quick fixes for common problems:
-
Too sticky?
Add a small amount of cornstarch and knead again. -
Too hard or crumbly?
You may have used too much borax. Reduce the amount next time for a softer texture. -
Not bouncing?
This usually means the ball was overmixed or not kneaded enough. Try remolding it with clean hands and let it rest before bouncing.
Don’t toss it! You can often rescue failed batches by adjusting the glue or cornstarch ratio and re-kneading.
How to Store and Keep Your Bouncy Balls Fresh
To keep your homemade bouncy balls bouncy and soft:
-
Use airtight containers – Ziplock bags, mason jars, or small plastic tubs work great.
-
Store in a cool, dry place – Avoid heat or direct sunlight, which can cause hardening.
-
Re-softening tip – If your ball becomes too firm, try kneading in a drop of warm water or microwaving for 5 seconds to slightly soften before re-rolling.
With proper care, your colorful creations can stay fresh and functional for up to a week.
Educational Uses & STEAM Learning
This bouncy ball recipe is more than just play—it’s a powerful learning tool too! It fits perfectly into:
-
Homeschool and classroom science lessons
-
STEAM activities combining art and chemistry
-
Hands-on polymer experiments for curious minds
Kids can observe real-time chemical reactions, learn about polymers, and understand texture changes while having fun. It’s a memorable way to bring science to life!
Frequently Asked Questions (FAQs)
Can you make bouncy balls without borax?
Yes! There are borax-free alternatives using baking soda and contact lens solution or liquid starch. These methods still create stretchy polymers but may result in softer, less bouncy textures.
Are homemade bouncy balls safe for toddlers?
Generally, yes—with supervision. Use non-toxic glue, avoid essential oils or glitter for very young children, and never allow the balls to be put in the mouth. Always supervise toddlers during play.
How long do DIY bouncy balls last?
When stored in an airtight container, they typically last 3 to 7 days before hardening. You can often re-soften them by kneading in a bit of water.
Why is my homemade bouncy ball not bouncing?
This may be due to:
-
Too much borax making it brittle
-
Undermixing or overmixing the ingredients
-
Skipping the kneading step
Letting it sit for a few minutes before bouncing can also help.
Can I make bouncy balls with clear glue?
Absolutely! Clear glue gives a translucent, jelly-like appearance that works great with glitter or neon pigments. It’s a fun way to make your balls look more like crystal marbles.
Rainbow Bouncy Balls Recipe
Equipment
- 2 small mixing bowls or disposable cups
- Measuring spoons
- Plastic spoon or popsicle stick (for stirring)
- Gloves (optional)
- Ziplock bags or airtight containers (for storage)
Ingredients
- ½ teaspoon borax powder
- 2 tablespoons warm water
- 1 tablespoon white school glue PVA
- ½ tablespoon cornstarch
- 2 –3 drops food coloring or glitter
- Optional: essential oil 1 drop, for scented version
Instructions
Prepare the Borax Solution
- In one cup, mix ½ teaspoon borax with 2 tablespoons of warm water. Stir until fully dissolved.
Mix the Glue Base
- In another cup, combine 1 tablespoon of white glue and ½ tablespoon cornstarch. Add food coloring or glitter and stir.
Combine and React
- Slowly pour the borax solution into the glue mixture while stirring continuously. A blob will form as the materials react.
Knead and Shape
- Remove the mixture and knead it with your hands until it becomes smooth and rubbery. Roll into a ball shape.
Let It Set and Bounce!
- Let the ball rest for 1–2 minutes, then test its bounce. Store any extras in ziplock bags to keep them soft.
Notes
- Add more cornstarch if the mixture is too sticky.
- Reduce borax slightly for a softer ball.
- Clear glue can be used for a translucent, glassy effect.
- Always supervise young children and ensure materials are not ingested.
- For swirl effects, mix two glue colors and gently combine before shaping.
Nutrition
My kids had so much fun making these rainbow bouncy balls! It was a great weekend activity — super easy to follow and kept them entertained for hours. Love that it’s educational and creative. Can’t wait to try more DIY recipes from your site!
Can’t wait to try these. Thank you