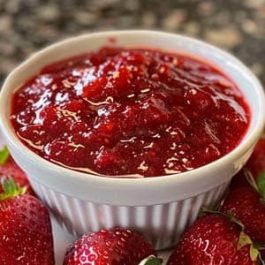
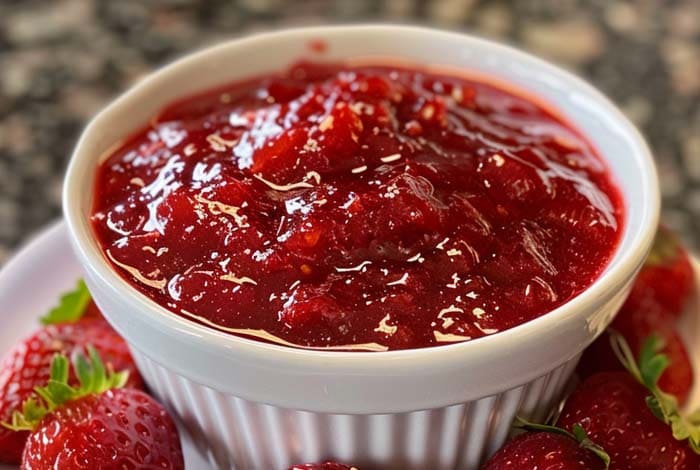
Introduction to Quick and Easy Strawberry Jam
The allure of homemade strawberry jam cannot be overstated. There’s something inherently comforting and satisfying about spreading a layer of glossy, ruby-red jam over your morning toast, knowing it was crafted in your own kitchen. This simple pleasure is not just about the taste; it’s about creating something from scratch, with love and care. The process of making strawberry jam is surprisingly straightforward, requiring just a few basic ingredients: ripe strawberries, sugar, and lemon juice. The beauty of this recipe lies in its simplicity and the way it allows the natural flavors of the strawberries to shine through. Unlike store-bought versions, homemade jam is free of artificial preservatives and pectin, offering a purer, more robust flavor. Whether you’re a seasoned jam-maker or a novice looking to try your hand at this timeless culinary craft, quick and easy strawberry jam is a delightful way to start.
The Basics of Strawberry Jam
The journey to creating the perfect batch of strawberry jam begins with selecting the right strawberries. The quality of your fruit directly influences the taste and texture of your jam. Look for strawberries that are bright red, firm, and fragrant—a sign of ripeness and sweetness. The role of sugar in jam-making extends beyond just sweetening; it acts as a preservative, helping to extend the shelf life of your jam. Sugar also works with the natural pectin found in strawberries to thicken the jam as it cooks.
Lemon juice plays a crucial role as well, adding a bright, tangy flavor that balances the sweetness of the strawberries. Moreover, the acidity of the lemon juice enhances the gelling process, ensuring your jam sets properly without the need for added pectin. This is why no pectin is needed in this recipe. The pectin naturally present in the fruit, combined with the sugar and acid, is sufficient to achieve the desired consistency and set. This not only simplifies the recipe but also preserves the natural flavor of the strawberries, making for a more delicious and wholesome final product.
Detailed Recipe for Quick and Easy Strawberry Jam
Creating a batch of homemade strawberry jam is a rewarding experience, filled with the sweet aroma of simmering strawberries. This recipe simplifies the process, ensuring anyone can make delicious jam with just a few ingredients.
Ingredients List:
- 4 cups of fresh strawberries, hulled and halved
- 2 cups of granulated sugar
- 1/4 cup of fresh lemon juice
Step-by-Step Cooking Instructions:
- Prepare the Strawberries: In a large bowl, mash the strawberries using a potato masher or a fork until you have a mixture of both juice and chunks of berries.
- Cook the Mixture: Transfer the mashed strawberries to a heavy-bottomed pot. Add the sugar and lemon juice, stirring to combine. Heat the mixture over medium heat, stirring frequently to dissolve the sugar.
- Boil: Increase the heat to bring the mixture to a full rolling boil. A rolling boil is one that cannot be stirred down. At this point, continue to boil for about 10-15 minutes, stirring often to prevent sticking and burning.
- Test the Jam: To check if the jam is ready, place a small spoonful on a cold plate. If it wrinkles when you push it with your finger, it’s done. If not, continue cooking for a few more minutes and test again.
- Jar the Jam: Once the jam has reached its setting point, remove it from the heat. Skim off any foam with a spoon. Ladle the jam into sterilized jars, leaving a 1/4 inch headspace. Seal the jars while they’re still hot.
- Cool and Store: Let the jars cool to room temperature. Check the seals, then store the jam in a cool, dark place or refrigerate.
Tips for Perfect Jam Every Time:
- Use Ripe Fruit: The best jam comes from strawberries that are ripe and flavorful.
- Sterilize Your Jars: To prevent bacteria growth, ensure your jars and lids are sterilized before use.
- Adjust Sugar: You can adjust the amount of sugar based on the sweetness of your strawberries and your preference. However, remember that sugar helps in the preservation and setting of the jam.
- Stir Frequently: This prevents the jam from sticking to the bottom of the pot and burning.
FAQs
- How to know when the jam is done?
The “wrinkle test” is a reliable method. Chill a plate in the freezer, then drop a small amount of jam onto it. If it wrinkles when pushed, it’s ready. - Can I double the recipe?
Yes, but keep in mind that larger batches may take longer to reach the setting point. - Sugar-free alternatives?
You can use sugar substitutes like stevia or erythritol, but the jam may not set as firmly. Adding a natural thickener like chia seeds can help. - Freezing and canning strawberry jam?
Jam can be frozen for up to a year or canned using a water bath method for longer shelf life. - Shelf life of homemade jam?
Properly sealed and stored, homemade jam can last up to two years in a cool, dark place. Once opened, keep it in the refrigerator and use within a month. - Using frozen strawberries?
Yes, but thaw and drain them first, as they may contain extra water. - Adapting the recipe for other fruits?
Feel free to experiment with other fruits, adjusting sugar and lemon juice as needed based on the fruit’s sweetness and acidity. - Troubleshooting: What if my jam doesn’t set?
If your jam is too runny after cooling, you can re-cook it. Add a little more lemon juice for acidity, which helps with setting, and boil again.
Advanced Tips and Variations
Adjusting Sweetness and Texture
The beauty of making your own strawberry jam is the ability to tailor it to your taste. If you prefer a less sweet jam, you can reduce the sugar, but keep in mind that sugar helps with preservation. For a thicker texture, cook the jam a bit longer, allowing more water to evaporate. Conversely, for a softer set, shorten the cooking time. Pectin from apples or a little bit of commercial pectin can also be added if you’re looking for a firmer set without extra cooking.
Mixing in Other Fruits for Flavor Variety
Strawberry jam doesn’t have to be monoflavored. You can create delightful combinations by adding other fruits. Try mixing strawberries with raspberries, blackberries, or even peaches for a unique twist. Each fruit brings its own set of flavors and pectin levels, so you might need to adjust the cooking time and sugar accordingly.
Lemon Zest for Extra Brightness
Adding the zest of a lemon can enhance the brightness and complexity of your jam. The oils in the zest add a fresh, citrusy aroma that complements the sweetness of the strawberries. Just be sure to add it towards the end of the cooking process to preserve its vibrant flavor.
Creative Uses for Strawberry Jam
Breakfast Delights: Toast, Pancakes, and Yogurt
Strawberry jam is a versatile condiment that can transform a simple breakfast into something special. Spread it on toast for a classic start to the day, swirl it into yogurt for a fruity twist, or dollop it on pancakes and waffles. Its sweet and tangy flavor pairs wonderfully with creamy or bland bases, adding a burst of flavor to your morning routine.
Desserts: Ice Cream, Cheesecake, and Muffins
Beyond breakfast, strawberry jam can be a star ingredient in various desserts. Use it as a topping for ice cream or cheesecake, offering a fruity contrast to these rich treats. It can also be stirred into muffin or cake batters for pockets of strawberry flavor, or used as a filling for thumbprint cookies and pastries.
Gifts and Holiday Ideas
Homemade strawberry jam makes a thoughtful and delicious gift for friends and family. Package it in decorative jars tied with ribbons, and include a personalized label for a touch of charm. It’s perfect for holidays, hostess gifts, or as a way to share the bounty of your kitchen with loved ones. Additionally, consider creating a gift basket with a variety of homemade jams, fresh bread, and a spreader for a complete breakfast-themed present.
Whether you’re a seasoned jam maker or trying it for the first time, these advanced tips and creative uses for strawberry jam will help you make the most of this delightful preserve.

Quick and Easy Strawberry Jam Recipe
Equipment
- Large heavy-bottomed pot
- Potato masher or fork
- Sterilized jars and lids
- Candy thermometer (optional)
Ingredients
- 4 cups fresh strawberries hulled and halved
- 2 cups granulated sugar
- 1/4 cup fresh lemon juice
Instructions
- In a large bowl, mash the strawberries to your desired consistency.
- Transfer the mashed strawberries to a heavy-bottomed pot. Add sugar and lemon juice, stirring to combine.
- Cook over medium heat, stirring frequently until the sugar dissolves.
- Increase the heat to bring the mixture to a full rolling boil. Continue boiling for 10-15 minutes, stirring often, until the jam thickens.
- Perform the wrinkle test to check if the jam is set. If set, remove from heat.
- Skim off any foam and ladle the jam into sterilized jars, leaving a 1/4 inch headspace. Seal the jars.
- Allow the jars to cool to room temperature. Check seals before storing.
Notes
- Adjusting Sweetness: You can reduce the sugar if you prefer a less sweet jam, but this may affect the jam's preservation ability.
- Texture: For a thicker jam, cook for a longer time. For a softer set, reduce the cooking time.
- Adding Other Fruits: Feel free to add other fruits like raspberries or peaches for a mixed fruit jam.
- Lemon Zest: For an extra burst of flavor, add the zest of one lemon towards the end of the cooking process.
- Storage: Store the sealed jam in a cool, dark place for up to two years. Once opened, refrigerate and use within a month.

