Welcome to the Coziest Pecan Tarts Recipe Ever
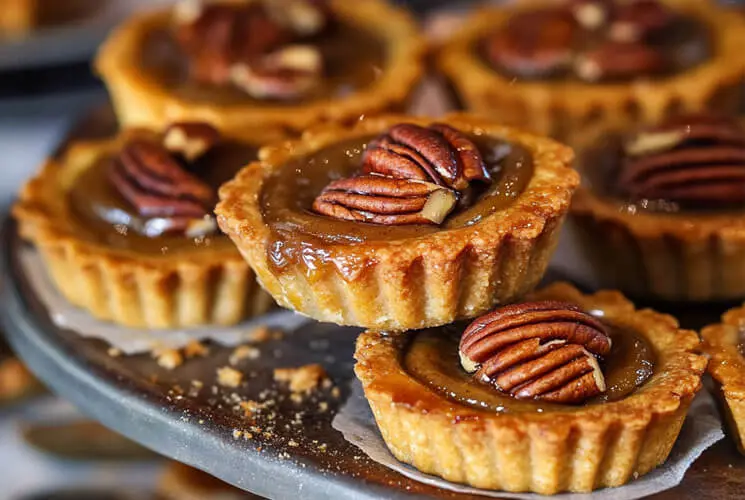
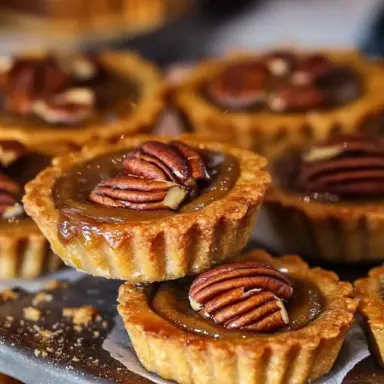
There’s something magical about the smell of buttery pecan tarts baking in the oven—it’s warm, nostalgic, and just downright cozy. Whether you’re hosting a holiday dinner, bringing a treat to a fall potluck, or simply craving something sweet and nutty, these little tarts deliver all the flavor of pecan pie in an irresistibly mini, handheld form.
What makes these tarts extra special? Unlike a full pie, pecan tarts are bite-sized, beautifully portioned, and have the perfect ratio of flaky crust to gooey filling. No slicing required—just grab one and go. They’re ideal for entertaining or treating yourself to a quiet moment with a hot cup of coffee.
Let’s bake something memorable! These tarts are simple enough for beginners but impressive enough for any dessert table. By the end of this recipe, you’ll have golden, glossy, nut-studded treats that are impossible to resist.
What Makes This Mini Pecan Tarts Recipe So Special?
If you’ve never had a pecan tart, imagine everything you love about pecan pie—the buttery nuts, sweet custardy filling, and crisp pastry—all packed into a tiny tart shell. They’re essentially individual pecan pies, often made in mini muffin tins or tartlet pans, making them a favorite at parties and bake sales.
These sweet little gems have Southern roots, much like traditional pecan pie, but they’re also hugely popular in Canadian baking, where they resemble a cousin to butter tarts (often with or without raisins).
One key difference between pecan pie vs. pecan tart? The crust. While pie crusts tend to be rolled and flaky, tart crusts are often pressed-in and slightly sweeter, more like a shortbread. This gives each bite a lovely crumbly contrast to the rich filling.
From rustic versions to dressed-up ones with chocolate or bourbon, pecan tarts come in delicious variations you’ll love experimenting with.
Essential Ingredients for a Southern Pecan Tarts Recipe
Before diving into the baking process, let’s take a look at the core ingredients that bring these pecan tarts to life. The magic is in the balance of buttery crust and sweet, nutty filling.
For the Crust:
-
All-purpose flour – the base for structure
-
Unsalted butter – cold and cubed for tenderness
-
Granulated sugar – a hint of sweetness
-
Salt – to balance flavors
-
Optional: cream cheese – adds richness and tenderness
For the Filling:
-
Pecans – chopped or halved, and best when toasted
-
Eggs – for structure and custardy texture
-
Brown sugar – deep caramel flavor
-
Light corn syrup or maple syrup – the classic sweetener
-
Butter – melted for richness
-
Vanilla extract – for aroma
Optional Add-Ins:
-
Chocolate chips – for a sweet twist
-
Bourbon – a warm, adult-friendly flavor note
-
Sea salt – for a salty-sweet contrast
Quick Tip: Toast your pecans in a dry skillet or 350°F oven for 5–7 minutes. This deepens their flavor and adds a lovely crunch to the filling.
How to Make the Perfect Crust for Homemade Pecan Tarts
A tart is only as good as its crust, and with pecan tarts, the crust should be tender, buttery, and hold its shape beautifully in a muffin tin or tartlet pan.
Here’s how to master it:
Step-by-Step: Pressed-In Tart Crust
-
In a large bowl, mix 1 ½ cups flour, 2 tablespoons sugar, and ¼ teaspoon salt.
-
Add ½ cup cold cubed butter (and cream cheese if using) and cut it in with a pastry cutter or your fingertips until the mixture resembles coarse crumbs.
-
Add 1–2 tablespoons cold water gradually, mixing just until the dough holds together.
-
Divide the dough into small balls and press into greased mini muffin tins to form tart shells. Chill before baking.
Crust Options:
-
Cream cheese crust: soft, rich, and perfect for holiday flair
-
Shortbread-style base: sweet, crumbly, and sturdy
Can I Use Store-Bought Crust?
Yes! Pre-made pie dough works in a pinch. Just cut it into circles and press into tart pans. While homemade offers more flavor, store-bought crust is great for speed and convenience.
Troubleshooting Crust Issues:
-
Shrinkage? Dough was too warm—chill it for at least 30 minutes
-
Soggy bottoms? Pre-bake the crusts for 5–7 minutes before adding filling
Pro Tip: Always chill your dough before baking. This helps prevent shrinking and creates a tender, flaky bite.
Step-by-Step: Pecan Tarts Filling Recipe That’s Gooey & Buttery
The heart of any pecan tart is its rich, sweet, gooey filling—and making it is easier than you think. The key is balance: creamy texture, sweet depth, and nutty crunch.
Step-by-Step Filling Method:
-
In a saucepan over low heat, melt ¼ cup unsalted butter.
-
Stir in ½ cup brown sugar and ½ cup light corn syrup (or preferred sweetener).
-
Let the mixture cool slightly before whisking in 2 large eggs. Tip: Cool first to avoid scrambled eggs!
-
Mix in 1 teaspoon vanilla extract and a pinch of salt.
-
Fold in ¾ cup chopped toasted pecans.
Avoid Curdling the Eggs:
Never add eggs to hot syrup directly—temper them. Beat eggs in a bowl, then slowly drizzle in the warm syrup, whisking constantly.
Sweetener Swaps:
Not a fan of corn syrup? Try:
-
Maple syrup – rich and earthy
-
Golden syrup – smooth and buttery
-
Honey – floral and sweet
Flavor Boosters (Optional but Delicious):
-
A splash of bourbon for warmth
-
A dash of cinnamon or nutmeg
-
A bit of orange zest for brightness
Pro Tip: Toasting your pecans brings out their natural oils and enhances the flavor beautifully.
Baking and Assembling This Easy Pecan Tarts Recipe
Once your crusts are chilled and your filling is prepped, it’s time to bring it all together.
Filling Your Tart Shells:
-
Use a small measuring cup or a spoon with a spout to carefully pour the filling into each shell.
-
Fill them about ¾ full—don’t overfill, as the filling puffs slightly when baked.
Baking Time and Visual Cues:
-
Bake at 350°F (175°C) for 20–25 minutes, or until:
-
The crust is light golden
-
The filling is set and slightly puffed
Advertisement -
You see a gentle bubble at the edges
-
Mini muffin tins bake faster than tart pans—adjust accordingly.
Tart Pans vs. Mini Muffin Tins:
-
Mini muffin tins: easiest for bite-size treats
-
Tartlet pans: elegant presentation with fluted edges
Tip: Place the pan on a baking sheet to catch spills and ensure even baking.
How to Cool, Unmold & Serve Your Mini Pecan Tarts
After baking, patience is key. Let the tarts cool completely in the pan—this helps the filling set and the crust firm up.
Unmolding Tips:
-
Gently twist each tart in the pan or use a thin knife to loosen the edges.
-
Silicone pans can make unmolding easier.
How to Serve:
-
Serve warm for a gooier center or chilled for a firmer texture
-
Top with:
-
A dollop of whipped cream
-
A scoop of vanilla ice cream
-
A drizzle of chocolate or salted caramel
-
Presentation Ideas:
-
Arrange on a tiered dessert stand for parties
-
Serve in festive paper cups for a rustic, portable treat
These tarts look fancy but are simple enough for weekday indulgence!
Flavor Variations for This Bite-Size Pecan Tarts Recipe
Once you master the base recipe, get creative! Here are some reader-favorite twists:
Chocolate Chip Pecan Tarts:
-
Add ½ cup mini chocolate chips to the filling
-
The chocolate melts into the gooey center—absolutely decadent
Bourbon Pecan Tartlets:
-
Stir 1 tablespoon bourbon into the filling for a rich, oaky flavor
-
Perfect for adult gatherings and holiday tables
Maple Pecan Tarts (No Corn Syrup):
-
Replace corn syrup with 100% maple syrup
-
Adds a deep, earthy sweetness with no artificial taste
Vegan & Gluten-Free Options:
-
Use vegan butter and a flax egg
-
Swap crust for a gluten-free shortbread base
Mini Tart Hack:
-
Use pre-baked phyllo shells for quick, crunchy appetizers
-
Spoon in filling and bake just 10–12 minutes
Tip: Always adjust baking times slightly for variation sizes or crust types.
Storage and Freezing Tips for Pecan Tartlets
Pecan tarts are perfect make-ahead desserts, especially for holidays or big gatherings.
Storage:
-
Store in an airtight container at room temp for up to 2 days
-
Refrigerate up to 4–5 days if needed
Freezing:
-
Wrap each tart in plastic wrap and store in a freezer bag
-
Freeze up to 3 months
-
Thaw overnight in the fridge, then rewarm gently before serving
Reheating:
-
Warm in the oven at 300°F for 5–8 minutes
-
Avoid the microwave—it may soften the crust
These little treats hold up beautifully and are a dream for batch baking!
Avoid These Mistakes When Making Pecan Tarts
Even the easiest recipes can go sideways. Watch out for these common pitfalls:
Overmixing the Filling:
-
Stir gently—too much mixing = too much air = weird texture
Skipping the Toast:
-
Raw pecans = flat flavor
-
Toasting enhances taste and crunch
Overbaking:
-
Results in dry or rubbery filling
-
Pull them when just set and slightly puffed
Overfilling:
-
Filling expands while baking—too much = overflow mess
-
Fill only ¾ full
Bonus Tip: Always use room temp eggs for a smoother, creamier filling.
FAQs – All About This Pecan Tarts Recipe
Can I use maple syrup instead of corn syrup?
Yes! Maple syrup is a great natural alternative. It adds a deeper, richer flavor and works beautifully in most pecan tart recipes.
Why did my pecan tart filling turn out runny?
Most likely, it was underbaked or had too much liquid. Ensure the filling sets in the oven and avoid over-measuring sweeteners.
Can you freeze pecan tarts?
Absolutely. Wrap tightly and freeze up to 3 months. Thaw in the fridge and reheat in the oven for best results.
Are pecan tarts the same as butter tarts?
They’re similar, especially in Canada. Butter tarts are typically runnier and may include raisins, while pecan tarts focus more on nuts.
How long do mini pecan tarts last?
At room temperature, about 2 days. Refrigerated, they last up to 5 days. Frozen, they stay fresh for up to 3 months.
Final Thoughts on the Best Homemade Pecan Tarts
Pecan tarts are the ultimate cozy treat—nutty, gooey, buttery, and just the right size. Whether you’re baking a batch for Thanksgiving, gifting them at Christmas, or sneaking one for a weekday dessert, they never disappoint.
What makes them so lovable? They’re easy to customize, freezer-friendly, and downright delicious. Once you try them, you’ll keep this recipe in your regular rotation.
Don’t forget to share your version in the comments—bourbon twist? chocolate chip? maple-only? I’d love to hear it!
Because sometimes, the best baking comes in tiny, golden bites.
Pecan Tarts Recipe
Equipment
- Mini muffin tin or tartlet pans
- Mixing bowls
- Saucepan
- Whisk
- Measuring cups/spoons
- Cooling rack
- Spoon with spout or pourable cup
Ingredients
For the Tart Crust:
- 1 ½ cups all-purpose flour
- 2 tablespoons granulated sugar
- ¼ teaspoon salt
- ½ cup unsalted butter cold and cubed
- 2 –3 tablespoons cold water as needed
For the Pecan Filling:
- ¼ cup unsalted butter melted
- ½ cup packed brown sugar
- ½ cup light corn syrup or maple syrup
- 2 large eggs
- 1 teaspoon vanilla extract
- ¾ cup chopped toasted pecans
- Pinch of salt
- Optional: 1 tablespoon bourbon ½ teaspoon cinnamon
Instructions
- Make the crust: In a bowl, whisk flour, sugar, and salt. Cut in cold butter until crumbly. Add water gradually until dough forms. Roll into 24 small balls and press into mini muffin tin wells. Chill 30 minutes.
- Prepare filling: Melt butter and mix with brown sugar and syrup. Let cool slightly, then whisk in eggs, vanilla, and salt. Stir in chopped pecans.
- Assemble: Preheat oven to 350°F (175°C). Fill each crust ¾ full with pecan mixture using a spouted spoon or measuring cup.
- Bake: Bake for 20–25 minutes, until crust is golden and filling is set.
- Cool: Let tarts cool completely in the pan before removing to avoid breaking. Serve plain or topped with whipped cream or caramel.
Notes
- To toast pecans, place them on a baking sheet at 350°F for 6–8 minutes until fragrant.
- Maple syrup or golden syrup can replace corn syrup 1:1.
- Store leftovers in an airtight container for up to 5 days or freeze up to 3 months.
- For vegan crust: use plant-based butter and egg substitute like flax eggs.
- Great for make-ahead: freeze unbaked tarts and bake fresh when needed.