- Introduction to Crockpot Apple Butter
- The Recipe: Crockpot Apple Butter
- Cooking Process: Crockpot Apple Butter
- Flavor and Spice Variations: Crockpot Apple Butter
- Tips and Tricks for Crockpot Apple Butter
- Texture and Consistency in Crockpot Apple Butter
- Preservation and Storage of Crockpot Apple Butter
- Canning Process for Crockpot Apple Butter
- Serving Suggestions for Crockpot Apple Butter
- FAQs:
Introduction to Crockpot Apple Butter
What is Apple Butter?
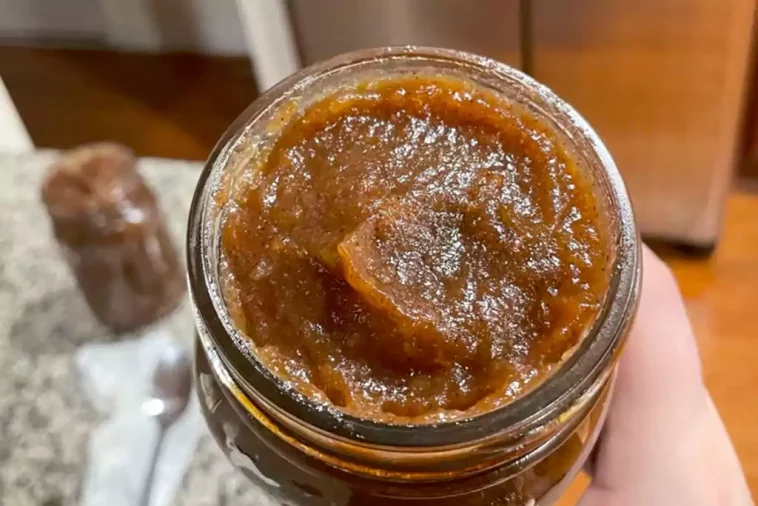
Apple butter is a thick, rich spread made from slow-cooked apples. Despite its name, there’s no actual butter in apple butter. Instead, it’s a concentrated form of applesauce, where apples are cooked down until they caramelize, turning into a deep, amber spread with a texture similar to butter. This process intensifies the apple flavor, creating a sweet and tangy treat that’s perfect for spreading on toast, swirling into oatmeal, or using in various baking recipes.
The Appeal of Homemade Apple Butter
Homemade apple butter, especially when made in a crockpot, has a charm that store-bought versions can’t match. The slow cooking process allows the flavors to develop fully, resulting in a more nuanced and satisfying taste. Preparing apple butter in a crockpot is not only convenient but also fills your home with a delightful aroma that’s reminiscent of cozy autumn days. It’s a simple, yet deeply satisfying project that yields a versatile and delicious product. Whether you’re a seasoned cook or a beginner in the kitchen, making apple butter in a crockpot is an enjoyable and rewarding experience, offering a taste of autumn any time of the year.
The Recipe: Crockpot Apple Butter
Ingredients and Preparation
List of Ingredients
Creating the perfect batch of crockpot apple butter starts with gathering the right ingredients. Here’s what you’ll need:
- Apples: 6 1/2 pounds, peeled, cored, and sliced. The type of apple you choose can vary, but softer, sweeter varieties often yield the best results.
- Granulated Sugar: 1 cup, to add sweetness.
- Light Brown Sugar: 1 cup, lightly packed, for a deeper, molasses-like sweetness.
- Ground Cinnamon: 1 tablespoon, for that quintessential apple-spice flavor.
- Freshly Grated Nutmeg: 1/2 teaspoon, adding warmth and complexity.
- Ground Cloves: 1/4 teaspoon, for a hint of rich, spicy flavor.
- Salt: 1/4 teaspoon, to balance and enhance the overall taste.
- Pure Vanilla Extract: 1 tablespoon, added towards the end of cooking to infuse a sweet, aromatic flavor.
Preparing the Apples: Peeling and Coring
The first step in making apple butter is preparing your apples. This involves peeling, coring, and slicing them. While this might seem like a daunting task, especially with over six pounds of apples, it can be quite manageable with the right approach.
- Choosing the Right Apples: Start by selecting the best apples for your butter. Softer varieties like Fuji, Golden Delicious, McIntosh, or Jonagold are excellent choices as they cook down faster and blend into a smooth consistency. You can also mix different types to create a unique flavor profile.
- Peeling the Apples: Using a vegetable peeler or a paring knife, peel the apples. Be sure to remove all the skin as it can affect the texture of your apple butter.
- Coring and Slicing: After peeling, core the apples to remove any seeds and hard parts. Then, slice them into even pieces. The size of your slices doesn’t have to be precise, but smaller slices will cook down faster.
- Quick Peeling Tip: If you have a lot of apples to prepare, consider using an apple peeler and corer. This tool can significantly speed up the process, peeling, coring, and slicing the apples all at once.
- Prepping for Cooking: Once all your apples are peeled, cored, and sliced, they’re ready to go into the crockpot. This is where the magic begins, as the slow cooking process will transform these simple ingredients into a delicious apple butter.
In the next steps, you’ll combine these prepared apples with the rest of your ingredients and let your crockpot do the work. The result will be a delectably smooth, richly flavored apple butter that’s perfect for spreading on toast, adding to recipes, or just enjoying by the spoonful. The process of making apple butter is not only about the delicious outcome but also about the joy of creating something from scratch, filling your home with the sweet aroma of cooked apples and spices.
Preparing the apples might seem daunting, but with the right kitchen tools, it’s a breeze. An apple peeler can significantly reduce the prep time.
Cooking Process: Crockpot Apple Butter
Step-by-Step Cooking Instructions
Once you have your apples prepared, the cooking process is straightforward but requires patience to allow the flavors to fully develop. Here’s how to turn your prepared apples into delicious apple butter:
- Combine Sugars and Spices: In a medium-sized bowl, mix together the granulated sugar, light brown sugar, ground cinnamon, freshly grated nutmeg, ground cloves, and salt. This blend of sugars and spices will infuse the apples with a rich, warm flavor.
- Toss Apples with Sugar Mixture: Place your peeled, cored, and sliced apples in the crockpot. Sprinkle the sugar and spice mixture over the apples and toss them gently to ensure they are evenly coated. This step is crucial for achieving a consistent flavor throughout the apple butter.
- Begin the Slow Cooking Process: Cover the crockpot and set it to cook on low. The low and slow cooking process is key to developing the deep, caramelized flavor characteristic of apple butter.
- Cooking Duration: Let the apples cook for about 10 hours. During this time, the apples will break down, and the mixture will thicken and darken. The long cooking time allows the flavors to meld together and intensifies the apple essence.
- Stir and Add Vanilla: After 10 hours, uncover the crockpot and stir in the pure vanilla extract. The vanilla should be added at this later stage to preserve its flavor, which can diminish with prolonged cooking.
- Final Cooking Stage: Continue cooking the apple mixture uncovered on low for an additional 2 hours. This final cooking stage helps to thicken the apple butter to its desired consistency.
- Blend to Smoothness: Once the cooking is complete, use an immersion blender to puree the apple butter directly in the crockpot. Blend until the apple butter reaches a smooth, spreadable consistency. If you don’t have an immersion blender, you can transfer the mixture to a standard blender, but be cautious as the mixture will be hot.
- Taste and Adjust: Taste your apple butter and adjust the seasoning if necessary. Depending on the sweetness of your apples, you might want to add a bit more sugar or spice.
Cooking Time and Temperature Settings
- Temperature Setting: The ideal temperature setting for making apple butter in a crockpot is low. This gentle cooking process allows the flavors to develop without burning the sugars.
- Total Cooking Time: The total cooking time for crockpot apple butter is approximately 12 hours. This includes 10 hours of covered cooking and 2 hours of uncovered cooking to thicken the mixture.
- Checking Consistency: The final consistency of apple butter should be thick and spreadable. If it’s too thin after the initial cooking time, continue cooking uncovered for a bit longer, checking every 30 minutes until the desired thickness is achieved.
By following these steps, you’ll create a batch of apple butter that’s not only delicious but also imbued with the care and attention only homemade treats can offer. The slow cooking process might test your patience, but the result is a wonderfully aromatic, flavorful spread that’s perfect for a variety of uses.
For those looking for a quicker method, consider trying an Instant Pot Apple Butter recipe.
Flavor and Spice Variations: Crockpot Apple Butter
Recommended Apple Varieties
The choice of apple variety can significantly influence the flavor profile of your apple butter. Here are some recommendations:
- Fuji and Honeycrisp: Known for their natural sweetness, these varieties reduce the need for added sugar and give a fresh, fruity flavor.
- Granny Smith: Their tartness provides a nice balance to the sweetness and adds complexity.
- McIntosh and Golden Delicious: These softer apples break down easily and offer a traditional apple butter taste.
- Mix of Varieties: For a more complex and nuanced flavor, consider using a mix of different apple types. This approach can balance sweetness, tartness, and depth of flavor.
Spice Adjustments and Variations
The traditional spices in apple butter are cinnamon, nutmeg, and cloves. However, there’s room for creativity:
- Cinnamon: The quintessential spice for apple butter, you can adjust the amount to suit your taste. For a stronger cinnamon flavor, add a bit more than the recipe suggests.
- Nutmeg and Cloves: These spices add depth. Freshly grated nutmeg can make a significant difference in flavor.
- Allspice: This is a warm spice that complements the apple flavor well.
- Ginger: For a bit of a kick, a small amount of ground ginger can be a great addition.
- Vanilla Extract: Adding vanilla towards the end of cooking gives a sweet, aromatic flavor. Experiment with different types of vanilla, like Madagascar or Tahitian, for subtle flavor differences.
- Apple Pie Spice: This ready-made spice mix can be used as a convenient all-in-one spice solution. It typically includes a blend of cinnamon, nutmeg, and allspice.
- Pumpkin Pie Spice: For a twist on the traditional flavor, try using pumpkin pie spice, which includes a blend of cinnamon, nutmeg, ginger, and cloves.
Remember, the key to perfect apple butter is balancing the sweetness of the apples with the warmth of the spices. Don’t be afraid to taste as you go and adjust the spices to your liking. The beauty of homemade apple butter is that you can tailor it to your personal taste preferences, creating a unique and personal spread that can be enjoyed in countless ways.
Tips and Tricks for Crockpot Apple Butter
Kitchen Tools for Easier Preparation
Making apple butter is a delightful autumn activity, but having the right tools can transform it from a labor-intensive process to a joyous and easy kitchen project. Here are some recommended tools to streamline your apple butter preparation:
Recommended Apple Peelers
- Rotary Apple Peeler: This tool is a game-changer for peeling large quantities of apples. It peels, cores, and even slices apples in one swift motion. It’s particularly useful if you’re making a big batch of apple butter.
- Y-Peeler: For those who prefer a more hands-on approach, a sharp Y-peeler offers control and precision. It’s especially handy for peeling apples of irregular shapes.
- Paring Knife: A good paring knife is essential for quick touch-ups or for those who prefer traditional methods. It’s also useful for coring apples if you don’t have a rotary peeler.
Recommended Slow Cookers
- Large Capacity Slow Cooker: Since apple butter requires a long cooking time, a slow cooker with a large capacity (around 6 quarts) is ideal. This size allows for enough space for the apples to cook down and for easy stirring.
- Programmable Slow Cooker: A programmable model can be very convenient, allowing you to set the cooking time and forget about it until it’s done. This is particularly useful for apple butter, which requires several hours of cooking.
- Slow Cooker with a “Keep Warm” Feature: After the apple butter is cooked, a “keep warm” feature can be handy, especially if you’re not planning to can or freeze it immediately.
By investing in these tools, you can make the process of preparing apple butter more efficient and enjoyable. The right peeler can drastically reduce prep time, while a reliable slow cooker ensures that your apple butter cooks to perfection with minimal supervision. With these tools at your disposal, making homemade apple butter becomes a simple and satisfying autumn tradition.
Texture and Consistency in Crockpot Apple Butter
Achieving the Perfect Consistency
The hallmark of great apple butter is its smooth, spreadable consistency. Achieving this perfect texture involves both the cooking process and the blending technique. Here’s how to ensure your apple butter has just the right consistency:
- Cook Down the Apples: The apples should be cooked until they are completely soft and break down easily. This usually takes about 10 to 12 hours on a low setting in a crockpot. The longer cooking time allows the apples to caramelize and thicken naturally.
- Monitor the Thickness: As the apple butter nears the end of its cooking time, check its thickness. If it appears too runny, continue cooking with the lid off to allow excess moisture to evaporate. This will help thicken the apple butter.
- Stir Regularly: During the uncovered cooking phase, stir the mixture regularly to prevent burning and to promote even thickening.
Blending and Smoothing Techniques
Once your apple butter has cooked down and thickened, the next step is to blend it to achieve a smooth texture:
- Use an Immersion Blender: An immersion blender is ideal for this task as it allows you to blend the apple butter directly in the crockpot. Blend until there are no lumps, and the apple butter is completely smooth.
- Alternative Blending Options: If you don’t have an immersion blender, you can use a regular blender or a food processor. Be cautious when transferring the hot mixture and blend it in batches if necessary.
- Straining for Extra Smoothness: For an ultra-smooth texture, you can strain the blended apple butter through a fine-mesh sieve. This step is optional but can make a difference if you prefer a very refined consistency.
- Adjusting Thickness Post-Blending: If the apple butter is still not as thick as you’d like after blending, return it to the crockpot and cook uncovered for a little longer. Keep in mind that apple butter will also thicken slightly as it cools.
By following these steps, you can achieve a velvety, richly flavored apple butter that spreads beautifully on bread, blends seamlessly into recipes, and stores well. The key is patience and attention to detail during both the cooking and blending stages.
Preservation and Storage of Crockpot Apple Butter
Storing Apple Butter
After investing time in making homemade apple butter, proper storage is crucial to maintain its flavor and extend its shelf life. Here are some effective methods for storing your apple butter:
Refrigeration
- Cool Before Storing: Allow the apple butter to cool to room temperature before transferring it to storage containers. This prevents condensation inside the jars, which can affect the quality and shelf life.
- Use Airtight Containers: Store the apple butter in clean, airtight containers. Glass jars are ideal as they don’t absorb flavors and are easy to sterilize.
- Refrigerator Storage: Once jarred, place the apple butter in the refrigerator. This is the best option if you plan to consume it within a few weeks.
Freezing Tips
- Freezer-Safe Containers: Use freezer-safe jars or containers to avoid cracking. Leave about half an inch of headspace at the top of the jar, as the apple butter will expand when frozen.
- Label and Date: Clearly label each container with the contents and the date it was made. This helps in tracking how long the apple butter has been stored.
- Thawing: When you’re ready to use the frozen apple butter, thaw it in the refrigerator for several hours or overnight.
Shelf Life Expectations
- Refrigerated Apple Butter: When stored properly in the refrigerator, apple butter can last for up to 2 weeks. Always use a clean spoon to scoop it out to prevent contamination.
- Frozen Apple Butter: In the freezer, apple butter can be kept for up to 3 months without significant loss of flavor or texture.
- Signs of Spoilage: Be aware of any signs of spoilage, such as mold, off-odors, or unusual changes in texture. If in doubt, it’s safer to discard the apple butter.
By following these storage tips, you can enjoy your homemade apple butter for several weeks or even months. Whether spread on toast for a quick breakfast or used as a sweet addition to recipes, your apple butter will remain a delightful treat long after you’ve made it.
For long-term preservation, canning is an excellent option. Learn the step-by-step process of how to can apple butter to enjoy your homemade spread all year round.
Canning Process for Crockpot Apple Butter
Canning is an excellent way to preserve your homemade apple butter for long-term storage. Here’s a step-by-step guide to safely can your apple butter:
Step-by-Step Canning Guide
- Sterilize Your Jars and Lids: Before you start, sterilize your canning jars and lids. You can do this by boiling them in water for 10 minutes or using the sterilize setting on your dishwasher.
- Prepare the Apple Butter: Ensure your apple butter is hot before canning. You can reheat it in a large pot if it has cooled down.
- Fill the Jars: Using a ladle and a funnel, fill the sterilized jars with hot apple butter, leaving about 1/4 inch of headspace at the top. This space is necessary for the expansion of the contents during the canning process.
- Remove Air Bubbles: Gently tap the jars on the countertop or use a non-metallic tool to remove any air bubbles. This step is crucial to ensure proper sealing.
- Wipe the Rims and Seal: With a clean, damp cloth, wipe the rims of the jars to remove any residue. Place the lids on the jars and screw on the bands until they are fingertip tight.
- Process in a Water Bath: Place the jars in a canner or large pot with a rack at the bottom. Fill the pot with enough water to cover the jars by at least 1 inch. Bring the water to a boil and process the jars for 10 minutes (adjust the time based on your altitude).
- Cool and Check Seals: Remove the jars from the water and let them cool on a towel for 12-24 hours. Check the seals by pressing the center of each lid. If the lid does not pop back, the jar is sealed.
- Label and Store: Label your jars with the date and store them in a cool, dark place. Properly canned apple butter can last for up to a year.
Safety Tips for Canning
- Use Proper Equipment: Always use jars and lids designed for canning. Regular glass jars may not withstand the heat and could break.
- Check for Jar Damage: Before using, check your jars for any nicks, cracks, or irregularities as these can prevent proper sealing.
- Avoid Over-Tightening Bands: Over-tightening can prevent air from escaping, which is necessary for creating a vacuum seal.
- Use the Correct Processing Time: Processing time varies based on altitude. Ensure you adjust the time accordingly to ensure safe preservation.
- Store in Appropriate Conditions: Store your canned apple butter in a cool, dark place to prevent spoilage.
- Inspect Before Use: Before using canned apple butter, always check for signs of spoilage such as mold, off-odors, or bulging lids.
By following these steps and safety tips, you can successfully can your homemade apple butter, ensuring you can enjoy this delicious spread throughout the year. Canning not only extends the shelf life of your apple butter but also makes for a wonderful homemade gift for friends and family.
Serving Suggestions for Crockpot Apple Butter
Creative Ways to Enjoy Apple Butter
Apple butter made in a crockpot is not only a delightful spread but also a versatile ingredient that can enhance various dishes. Here are some creative ways to incorporate it into your meals:
Breakfast Ideas
- On Toast or English Muffins: Spread a generous layer of apple
butter on warm toast, English muffins, or bagels for a sweet start to your day. It pairs wonderfully with a cup of coffee or tea.
- Yogurt Parfait: Swirl apple butter into Greek yogurt and top with granola and fresh fruit for a nutritious and flavorful breakfast.
- Pancake or Waffle Topping: Replace maple syrup with apple butter for a unique and delicious topping on pancakes or waffles. Add a dollop of whipped cream for extra indulgence.
- Oatmeal Flavor Booster: Stir apple butter into your morning oatmeal or porridge for a naturally sweet and spiced flavor.
Dessert Inspirations
- Apple Butter Bars or Brownies: Swirl apple butter into brownie batter or bar cookie dough before baking for a moist and flavorful treat.
- Fruit Crisp Topping: Mix apple butter with crumble topping for an extra flavorful fruit crisp or crumble.
- Ice Cream Topping: Drizzle warm apple butter over vanilla ice cream for a simple yet decadent dessert.
- Baked Goods Filling: Use apple butter as a filling in muffins, cupcakes, or layered cakes for a moist and flavorful addition.
These serving suggestions showcase the versatility of apple butter, making it a valuable addition to both sweet and savory dishes. Whether you’re enjoying a cozy breakfast or crafting an elegant dessert, apple butter brings a touch of warmth and comfort to your culinary creations.
FAQs:
Can I use any type of apple for making apple butter?
Yes, you can use any type of apple, but the flavor and texture will vary depending on the variety. Softer, sweeter apples like Fuji, Honeycrisp, or Golden Delicious are often preferred for their ability to cook down quickly and provide a naturally sweet flavor.
Do I need to peel the apples?
It is recommended to peel the apples for a smoother texture. However, if you prefer a more rustic apple butter, you can leave the skins on and blend thoroughly after cooking.
How long does homemade apple butter last?
In the refrigerator, homemade apple butter can last up to 2 weeks. If frozen, it can last for about 3 months. For longer storage, canning is an excellent option, allowing the apple butter to last up to a year.
Can I reduce the sugar in the recipe?
Yes, you can adjust the sugar to taste. If you’re using sweeter apples, you might find that you need less sugar. Start with a smaller amount and add more as needed.
Is apple butter suitable for vegans?
Yes, apple butter is naturally vegan as it typically contains only apples and spices.
Can I make apple butter in an Instant Pot?
Yes, apple butter can also be made in an Instant Pot, which can significantly reduce the cooking time. There are many recipes available specifically for Instant Pot apple butter.
Homemade Crockpot Apple Butter: A Step-by-Step Guide
Ingredients
- 5 lbs of apples peeled, cored, and sliced
- 1 cup granulated sugar
- 1 cup brown sugar lightly packed
- 1 tablespoon ground cinnamon
- ½ teaspoon nutmeg
- ¼ teaspoon ground cloves
- ¼ teaspoon salt
- 1 tablespoon pure vanilla extract
Instructions
- Start by preparing your apples – peel, core, and slice them.
- Place the sliced apples in the Crockpot.
How to Prepare
- Add both granulated and brown sugar to the apples in the Crockpot.
- Sprinkle the cinnamon, nutmeg, cloves, and salt over the apples.
- Gently stir the mixture to ensure the apples are well coated.
- Cover and cook on low for 10 hours, stirring occasionally.
- After 10 hours, uncover and stir in the vanilla extract.
- Continue cooking uncovered on low for another 2 hours to thicken.