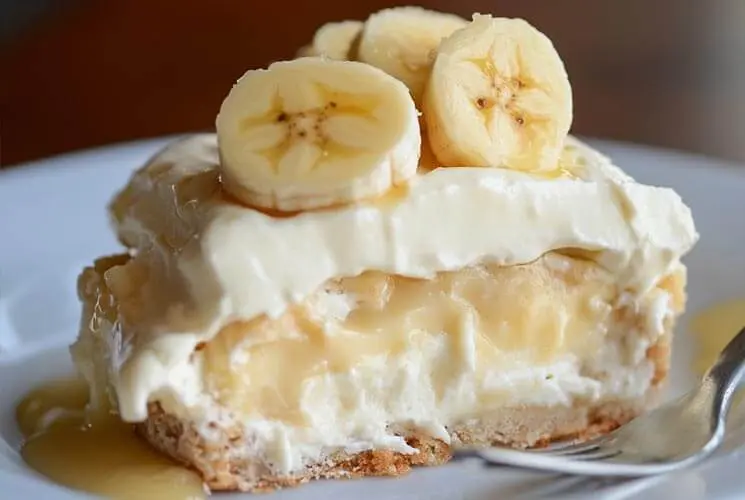
Why Banana Pudding is the Ultimate Comfort Dessert
Few desserts stir up as much nostalgia as a bowl of creamy, layered banana pudding. Whether you first tasted it at a family reunion, a church potluck, or your grandma’s Sunday dinner, there’s something about this Southern classic that brings comfort with every bite. The combination of silky pudding, sweet ripe bananas, and soft vanilla wafers creates a familiar and cozy experience that never goes out of style.
Rooted deeply in Southern cuisine, banana pudding has stood the test of time—evolving from simple homemade versions to no-bake wonders and elegant trifles. It’s a dessert that feels both humble and celebratory, making it perfect for casual gatherings or special occasions.
In this guide, you’ll discover everything from what makes banana pudding unique, how to craft the perfect version at home, and pro tips for presentation and flavor. Let’s dive into this beloved dessert and what makes it so magical.
What Exactly is Banana Pudding?
At its core, banana pudding is a layered dessert made with creamy pudding, sliced bananas, cookies (traditionally vanilla wafers), and a whipped or meringue topping. It’s often served chilled, allowing the flavors to meld and the cookies to soften just enough for that iconic tender texture.
There are two primary styles:
-
Traditional Southern banana pudding, which often uses a stovetop custard and meringue topping, baked until golden.
-
Modern versions, which lean on instant pudding and Cool Whip for speed and convenience—no oven required.
Some recipes are stacked beautifully in trifle bowls for presentation, while others are scooped straight from a casserole dish, just like grandma used to make. Regardless of the method, the goal is the same: comforting layers of sweetness, creaminess, and just the right amount of banana goodness.
Key Ingredients That Make It Shine
The secret to an unforgettable banana pudding lies in the quality of its ingredients. Each layer brings something essential to the overall flavor and texture.
-
Bananas: Choose firm, yellow bananas—no brown spots. Overripe bananas will turn mushy too quickly and overpower the dish.
-
Pudding: You can go the easy route with instant vanilla pudding, or create a homemade egg custard from scratch. The latter has a richer flavor and more old-fashioned charm.
-
Cookies: Classic Nilla Wafers are the gold standard, but don’t be afraid to experiment. Butter cookies, shortbread rounds, or even graham crackers add a fun twist.
-
Topping: Most no-bake recipes use Cool Whip or whipped cream. For a traditional flair, try a fluffy meringue baked until lightly golden.
Tip: Use firm bananas with no brown spots for the best visual appeal and texture.
Choosing the right balance of sweet, creamy, and crunchy will transform a simple dessert into a crowd-pleasing favorite.
Step-by-Step: How to Make Classic Banana Pudding (With Pro Tips)
Whether you’re team no-bake or all-in on from-scratch cooking, assembling banana pudding is all about layering and chilling. Here’s a breakdown of the process:
1. Prepare the Pudding Base
-
Instant Method: Whisk a box of instant vanilla pudding with cold milk until thickened.
-
From Scratch: Combine egg yolks, sugar, milk, and cornstarch in a saucepan. Cook until thick and creamy, stirring constantly. Add vanilla at the end.
2. Slice the Bananas
-
Use firm, just-ripe bananas. Slice them evenly for consistent layers.
-
Optional: Toss slices in a bit of lemon juice to slow browning.
3. Begin Layering
In a trifle dish or 9×13 pan:
-
Start with a layer of cookies
-
Add a layer of banana slices
-
Pour pudding over the top
Repeat until full, finishing with pudding or whipped topping.
4. Chill Thoroughly
Cover the dish and refrigerate for at least 4 hours, or overnight for the best texture.
Bold Tip Box:
“Always chill for at least 4 hours—overnight is even better!”
This allows the wafers to soften and flavors to marry beautifully.
5. Garnish & Serve
-
Top with whipped cream or meringue
-
Sprinkle crushed cookies or banana slices just before serving
The end result? A layered masterpiece that’s as visually appealing as it is delicious.
Shortcut or Homemade? Pros & Cons
Not sure whether to go the quick route or make everything from scratch? Both have their charm, and your choice depends on time, taste, and occasion.
Instant Pudding (Shortcut)
-
Pros: Quick, no cooking required, great for kids to help with
-
Cons: Less depth of flavor
-
Perfect For: Weeknights, parties, or when you need a last-minute dessert
Homemade Custard (From Scratch)
-
Pros: Rich, velvety texture with a deep vanilla flavor
-
Cons: More time-consuming and requires stovetop cooking
-
Perfect For: Holidays, dinner parties, or when you want that Southern authenticity
Level-Up Tip: Even if you use boxed pudding, stir in a splash of real vanilla extract or fold in some whipped cream to give it a homemade feel.
Ultimately, banana pudding is forgiving—and delicious no matter how it’s made. It’s the love you layer into it that makes all the difference.
Delicious Banana Pudding Variations to Try
One of the best things about banana pudding is how easily it can be customized. Whether you’re after a lighter dessert, a decadent twist, or a dietary-friendly option, there’s a version for everyone:
No-Bake Banana Pudding
This is the go-to for busy weeknights. Made with instant pudding, Cool Whip, and layered bananas and wafers, it requires no stovetop or oven—just chill and serve. Bonus: kids can help!
Banana Pudding with Cream Cheese
Want something richer and cheesecake-like? Blend softened cream cheese into the pudding for an ultra-creamy texture. This version pairs beautifully with crushed shortbread cookies.
Layered Trifle Style
Show off those gorgeous layers in a clear trifle bowl or glass cups. Alternate pudding, bananas, cookies, and whipped topping for a visually stunning dessert perfect for entertaining.
Warm Baked Version (Southern Style)
Made with homemade custard and topped with fluffy meringue, this version is baked until the meringue is golden. It’s comforting, warm, and full of Southern charm.
Gluten-Free or Vegan Options
-
Use gluten-free vanilla cookies and plant-based milk for GF.
-
Swap dairy for coconut milk or almond milk, and use whipped coconut cream to make it vegan-friendly.
Tip: Don’t be afraid to make it your own—banana pudding is meant to be fun and flexible.
Tips for Serving, Storing & Meal Prep
To get the most out of your banana pudding, follow these handy serving and storage tips:
Best Serving Dishes
Use a trifle bowl, glass baking dish, or even individual dessert cups for easy portions. Glass is ideal to showcase those lovely layers.
Storage Life
Banana pudding stays fresh for up to 3–4 days in the fridge. Keep it covered tightly with plastic wrap or in an airtight container.
Preventing Banana Browning
Bananas naturally brown once sliced. To slow this process:
-
Dip banana slices in lemon juice or pineapple juice
-
Add bananas to the middle layers only (not the top)
-
Cover exposed bananas with pudding or whipped cream
Freezing Banana Pudding?
Not recommended. While technically possible, freezing can lead to watery pudding and mushy bananas after thawing. Instead, make it fresh or prepare parts ahead (like the pudding base).
Make-Ahead Tip: Assemble the night before serving to let the layers set perfectly and save time the day of your event.
Common Mistakes to Avoid
Even a simple dessert like banana pudding has its pitfalls. Here are the most common ones to watch for:
-
Overripe bananas: While great for banana bread, they’re too soft and sweet for pudding and will brown quickly. Stick with firm, yellow bananas.
-
Skipping the chill time: Letting it sit in the fridge for at least 4 hours helps the flavors meld and softens the cookies.
-
Overlayering: Too many layers or too much pudding can make things mushy and overly sweet.
-
Wrong cookie choice: Nilla Wafers are traditional for a reason—they hold their shape and absorb moisture perfectly. Some cookies get soggy too fast or stay too hard.
Avoid these traps, and you’re on your way to perfect banana pudding every time.
What to Serve with Banana Pudding
Banana pudding is a show-stopper all on its own, but pairing it with the right dishes makes it shine even more:
-
Light fruit salad — adds a fresh contrast to the creaminess
-
Iced tea or sweet milk — classic Southern companions
-
Hearty mains like BBQ ribs, pulled pork, or fried chicken — the creamy pudding is the perfect cool-down dessert after a spicy or smoky main dish
Serve banana pudding at potlucks, summer cookouts, or holiday meals—it’s always a crowd-pleaser.
FAQs About Banana Pudding
Here are some of the most common questions home cooks ask, based on popular searches:
Can you make banana pudding ahead of time?
Absolutely. In fact, it’s better when made a few hours—or even the day—before serving. Just store it tightly covered in the fridge.
How long does banana pudding last in the fridge?
It’s best enjoyed within 3–4 days. After that, the bananas begin to brown and the texture softens too much.
Why is my banana pudding runny?
This often happens if:
-
You didn’t chill it long enough
-
The pudding wasn’t thickened properly
-
There’s too much liquid in the banana layer
Use whole milk for best results and allow time for it to set.
What keeps bananas from turning brown in banana pudding?
Try brushing slices with lemon juice or pineapple juice. Avoid placing banana slices directly on top, and cover them with pudding or cream.
Can you use Cool Whip instead of meringue?
Yes! Cool Whip or homemade whipped cream is the go-to in most modern versions. It’s easy, sweet, and requires no baking.
How do you make banana pudding without wafers?
Swap Nilla Wafers with:
-
Shortbread cookies
-
Graham crackers
-
Sponge cake or ladyfingers for a trifle-style twist
Banana pudding is incredibly adaptable—don’t be afraid to get creative with what you have on hand.
Homemade Banana Pudding
Equipment
- Large mixing bowl
- Electric mixer or whisk
- 9x13 glass dish or trifle bowl
- Measuring cups and spoons
- Spatula
- Knife and cutting board
- Optional: saucepan (for homemade custard)
Ingredients
For Instant Version:
- 1 5.1 oz box instant vanilla pudding mix
- 3 cups cold milk
- 4 –5 ripe bananas firm, yellow
- 1 11 oz box Nilla Wafers
- 1 8 oz tub whipped topping (like Cool Whip)
- Optional: lemon juice for bananas
For Homemade Custard (optional alternative):
- 2 cups whole milk
- 3 egg yolks
- 1/2 cup sugar
- 2 tablespoons cornstarch
- 1/4 teaspoon salt
- 1 teaspoon vanilla extract
- 1 tablespoon butter
Instructions
Make the pudding base:
- For instant: whisk pudding mix with cold milk until thickened (~2 minutes).
- For homemade: whisk egg yolks, sugar, cornstarch, salt, and milk in a saucepan. Cook over medium heat, stirring constantly until thickened. Stir in butter and vanilla. Let cool.
Slice bananas:
- Peel and slice bananas into 1/4-inch rounds. (Optional: dip in lemon juice to prevent browning.)
Layer the dessert:
- In a trifle bowl or 9x13 dish, start with a layer of Nilla Wafers, followed by sliced bananas, then pudding. Repeat layers. Finish with whipped topping.
Chill:
- Cover and refrigerate for at least 4 hours or overnight for best texture.
Serve:
- Garnish with crushed wafers or banana slices. Serve chilled.
Notes
- Make Ahead: Best made the night before serving.
- Substitutions: Use shortbread or graham crackers instead of Nilla Wafers.
- Vegan Tip: Use almond milk and dairy-free pudding/topping.
- Storage: Keeps in the fridge up to 3 days; not freezer-friendly.
- Custom Touch: Add cream cheese or layer in a trifle bowl for a fancier presentation.
Nutrition