There’s something incredibly satisfying about whipping up a treat that’s both delicious and ridiculously easy—and no-bake chocolate oat bars check all the boxes. These chewy, fudgy squares are a dream come true for busy parents, snack-loving kids, and anyone who just wants a sweet bite without turning on the oven.
Packed with pantry staples like oats, peanut butter, and chocolate chips, they come together in minutes and are totally customizable to suit your cravings. Want to make them a bit healthier? Use maple syrup instead of refined sugar. Need them to be gluten-free or dairy-free? Easy—just choose the right oats and butter alternatives.
Whether you’re prepping school lunches, satisfying a late-night sweet tooth, or just need a summer treat that won’t heat up the kitchen, these bars are here to save the day.
In this post, I’ll walk you through how to make the best no-bake chocolate oat bars with minimal effort, simple ingredients, and tons of flavor. Let’s get into it!
Ingredients You’ll Need (and Why They Work)
Each ingredient in no-bake chocolate oat bars serves a purpose—here’s what you’ll need and how they contribute to flavor and texture:
-
Rolled oats – Provide that chewy, hearty texture and help bind the bars together.
-
Peanut butter (or almond/sunflower seed butter) – Adds richness, creaminess, and a slight salty balance to the sweetness.
-
Honey or maple syrup – Acts as a natural sweetener and helps everything stick together.
-
Chocolate chips or cocoa powder – Brings the deep, indulgent chocolate flavor. Melted chips give a fudgy layer; cocoa adds more depth.
-
Coconut oil or butter – Helps the chocolate mixture melt smoothly and firms up beautifully when chilled.
Optional add-ins:
-
Chopped nuts (almonds, walnuts, pecans) for crunch
-
Dried fruit like cranberries or cherries for sweetness
-
Sea salt flakes for that irresistible salty-sweet contrast
Substitution Tips:
-
Use gluten-free oats if needed
-
Swap maple syrup for honey in vegan versions
-
Replace peanut butter with sunflower seed butter for nut-free schools
Healthier Swaps:
-
Use dark chocolate chips
-
Add chia or flaxseeds for fiber boost
-
Use reduced-sugar nut butters
How to Make No-Bake Chocolate Oat Bars (Step-by-Step)
Step 1: Melt wet ingredients
In a saucepan over medium heat, combine your peanut butter, honey (or maple syrup), coconut oil, and chocolate chips. Stir continuously until everything is melted and smooth.
Pro Tip: Don’t overheat—just warm enough to melt everything. High heat can burn the chocolate or separate the oils.
Step 2: Stir in oats
Remove from heat and stir in your rolled oats until fully coated with the mixture. You want every flake to be glossy and chocolatey.
Pro Tip: Let the mixture cool for a few minutes before adding oats if it’s extremely hot—this keeps the oats from getting too soft.
Step 3: Press into pan
Line an 8×8 or 9×9-inch baking pan with parchment paper. Transfer the oat mixture into the pan and press down firmly.
Pro Tip: Use the back of a spoon or a flat-bottomed glass to compress the mixture evenly for best texture and structure.
Step 4: Chill and slice
Refrigerate for at least 2 hours, or until the bars are firm and set. Once chilled, lift out using the parchment paper and slice into squares or bars.
Bonus Tip: For cleaner cuts, warm your knife under hot water and wipe between slices.
Why No-Bake Chocolate Oat Bars Are So Irresistible
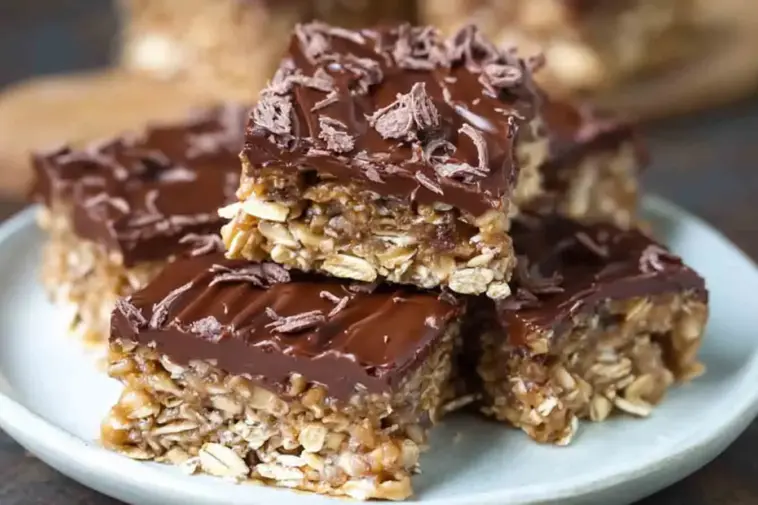
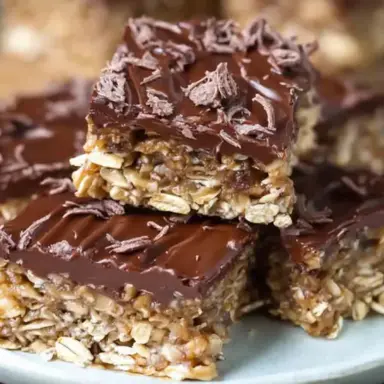
These no-bake chocolate oat bars are everything you want in a snack: chewy from the oats, fudgy from the melted chocolate and nut butter, and just the right amount of sweetness. The salty-sweet contrast from a sprinkle of sea salt on top can take them over the edge—in a good way.
Want more crunch? Stir in chopped nuts or crispy rice cereal. Prefer a softer bar? Add a bit more coconut oil. The versatility of this recipe means you can tweak the texture to your exact liking every single time.
Common Mistakes to Avoid
Even though this is an easy, no-bake recipe, a few slip-ups can affect the final results. Here’s what to watch out for:
-
Using quick oats: They absorb too much liquid and result in a mushy texture. Always stick with rolled oats for the best bite.
-
Overheating the chocolate mix: This can make your chocolate seize or separate. Keep it on low heat and stir constantly.
-
Not pressing the mixture firmly enough: This leads to crumbly bars that fall apart.
Pro Tip: Use a flat-bottomed glass to press the bars down evenly and tightly. -
Skipping the chill time: Bars need time to set up properly—don’t rush this step.
Advertisement
Fun Variations for No-Bake Chocolate Oat Bars
Once you’ve mastered the base recipe, it’s time to have fun with flavor. These no-bake chocolate oat bars are endlessly customizable, making them perfect for different diets, seasons, and snack moods.
-
Nut-Free Twist:
Skip the peanut butter and use sunflower seed butter or Wowbutter—safe for schools and just as creamy. -
Protein-Packed Boost:
Stir in 1–2 scoops of vanilla or chocolate protein powder or hemp hearts to make these more filling. You may need to reduce the oats slightly to maintain the right texture. -
Festive Holiday Bars:
Add a seasonal twist with crushed candy canes, a drizzle of white chocolate, or even colorful sprinkles. These make great additions to a holiday cookie tray. -
Tropical Vibes:
Mix in shredded coconut, chopped dried pineapple, or even mango pieces for a sunny, vacation-worthy spin. -
Dark Chocolate Raspberry Delight:
Use dark chocolate chips and fold in freeze-dried raspberries for a slightly tart contrast that’s irresistibly elegant.
Feel free to mix and match add-ins. These bars are meant to be yours!
How to Store Your No-Bake Chocolate Oat Bars
To keep your no-bake chocolate oat bars tasting their best, follow these simple storage guidelines:
-
Fridge: Store in an airtight container for up to 1 week. They’ll stay firm and fresh.
-
Freezer: Freeze for up to 3 months. Place parchment paper between layers to prevent sticking.
-
Serving Tip: Let them sit out for 5–10 minutes if you prefer a slightly softer bite.
Avoid soggy or crumbly bars:
-
Press the mixture firmly before chilling
-
Store with parchment paper between layers to reduce condensation and sticking
Serving No-Bake Chocolate Oat Bars: Easy Pairings & Ideas
These bars aren’t just tasty—they’re super versatile. Here are a few ways to serve and enjoy them:
-
Classic squares or bars: Cut them to the size you like—bite-size for kids, larger for meal prep
-
Pair with: Cold milk, a cup of coffee, or even a scoop of vanilla ice cream
-
Meal prep ready: Wrap individually for grab-and-go snacks or lunchbox treats
-
Perfect for gatherings: Add them to dessert platters or bring to potlucks—they’re always a hit!
They travel well too, so don’t hesitate to pack them for road trips or hikes!
FAQs About No-Bake Chocolate Oat Bars
Can you make chocolate oat bars without peanut butter?
Absolutely! Use almond butter, cashew butter, or sunflower seed butter for a smooth, nutty base. Just ensure it’s creamy and not too runny.
Are no-bake chocolate oat bars gluten-free?
They can be. Just make sure you’re using certified gluten-free oats and double-check that your chocolate chips are also labeled gluten-free.
Can I use quick oats instead of rolled oats?
You can, but expect a softer, more cake-like texture. Rolled oats provide that chewy bite and hold the bars together better.
How do you keep the bars from falling apart?
A few key tips:
-
Use the right wet-to-dry ratio
-
Mix thoroughly so all oats are coated
-
Press the mixture firmly into the pan
-
Chill for at least 2 hours before slicing
Can I add protein powder?
Yes! Add 1–2 scoops of your favorite protein powder to the mix. You might need to reduce the oats slightly or add a touch more liquid (like honey or nut butter) for the right consistency.
No-Bake Chocolate Oat Bars
Equipment
- Medium saucepan
- Mixing spoon or spatula
- 8x8 or 9x9-inch baking pan
- Parchment paper
- Flat-bottomed glass or measuring cup (for pressing)
Ingredients
- 2 cups rolled oats
- 1 cup creamy peanut butter
- 1/2 cup honey or maple syrup
- 1/2 cup semi-sweet chocolate chips
- 2 tablespoons coconut oil or butter
- Optional: 1/4 cup chopped nuts 1/4 cup dried fruit, sea salt flakes for topping
Instructions
- Melt Wet Ingredients: In a saucepan over medium heat, combine peanut butter, honey, coconut oil, and chocolate chips. Stir until fully melted and smooth.
- Mix in Oats: Remove from heat and stir in rolled oats until well coated.
- Press into Pan: Line your baking dish with parchment paper. Pour in the mixture and press down firmly and evenly.
- Chill: Refrigerate for at least 2 hours until firm.
- Slice & Serve: Lift out, slice into bars, and enjoy! Store chilled for best texture.
Notes
- For nut-free: use sunflower seed butter
- For vegan: use maple syrup and dairy-free chocolate
- For protein boost: add 1 scoop protein powder, reduce oats slightly
- For a crunchier texture: mix in rice crisp cereal or chopped nuts
- Store in fridge up to 1 week, or freeze for 3 months (use parchment between layers)
Nutrition
Final Thoughts & Encouragement to Try It
No-bake chocolate oat bars are the ultimate crowd-pleaser—easy to make, easy to customize, and seriously satisfying. They’re great for busy days, fun to make with kids, and flexible enough to fit almost any dietary preference.
Whether you’re craving a late-night chocolate fix or prepping snacks for the week, these no-bake chocolate oat bars have you covered!
Have a variation you love? Leave a comment below—I’d love to hear how you made them your own!