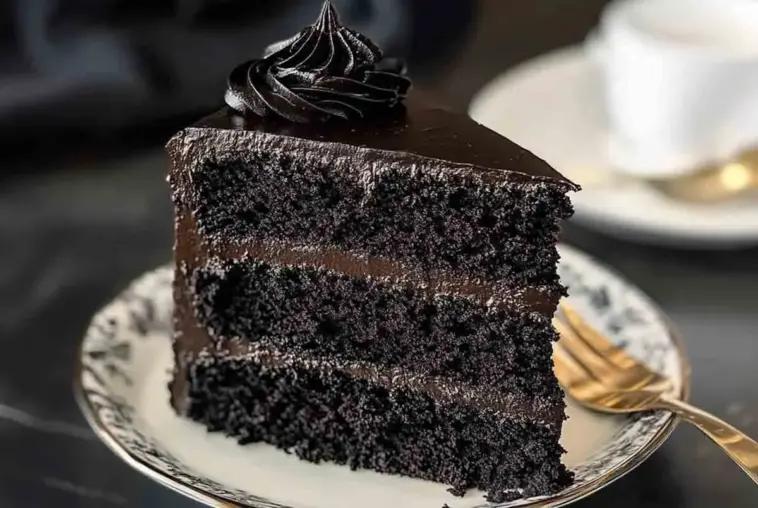
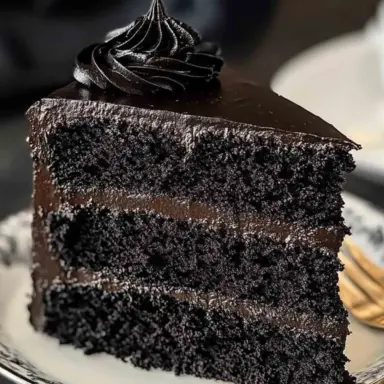
Black Velvet Cake is a rich, deeply hued dessert that combines the elegance of velvet cakes with the dramatic flair of black cocoa. Imagine a cake that’s as tender as red velvet, but with a bold, dark color and deep chocolate flavor that feels like a decadent secret. It’s often layered with tangy cream cheese frosting or contrasted with silky buttercream for a show-stopping finish.
So, what sets it apart from the famous red velvet? While red velvet gets its hue from food coloring and cocoa, black velvet gets its richness from black cocoa powder—a darker, ultra-Dutch processed cocoa with a mellow, almost Oreo-like taste. No food coloring needed.
If you love red velvet, black velvet is the deeper, moodier cousin you didn’t know you needed. It’s ideal for special occasions, Halloween bakes, or anytime you want a dessert that looks as impressive as it tastes.
A Brief History & Origin of Velvet Cakes
Velvet cakes trace their roots back to the 1800s, when bakers began adding acidic ingredients like buttermilk and vinegar to soften flour’s protein structure. The result? A tender, “velvety” crumb that gave these cakes their name.
In the early 20th century, red velvet cake rose to fame, particularly in the American South, becoming a staple at holidays and celebrations. Its vibrant hue and slightly tangy taste made it stand out—and over time, it evolved into the icon we know today.
Enter black velvet cake, a modern twist born from the desire for a more dramatic, gothic aesthetic and richer flavor. With the rise of specialty ingredients like black cocoa powder, bakers started experimenting. The result is a cake that feels both vintage and avant-garde.
Today, black velvet cake is beloved not just for its look, but for its depth of flavor and ability to turn any event into a statement.
What Makes Black Velvet Cake Unique?
There are chocolate cakes, and then there’s black velvet—a cake that looks bold, tastes bold, but still melts in your mouth like velvet. Its secret lies in the use of black cocoa powder, which is ultra-Dutch processed. That means it’s been alkalized to reduce acidity, resulting in a smooth, mellow cocoa flavor and an intensely dark color.
Unlike regular chocolate cake, black velvet isn’t overly sweet or bitter. It strikes a balance: rich but subtle, soft but striking. The signature texture comes from the pairing of buttermilk and vinegar, just like red velvet. This combo not only reacts with baking soda to create lift, but also breaks down gluten to make the cake supremely soft.
What really sets it apart? The presentation. Its black crumb looks luxurious when paired with stark white frosting or dusted with powdered sugar. It’s equally fitting for a chic dinner party or a spooky celebration.
Baking Tip: For best results, use Dutch-process black cocoa powder—you’ll get that iconic color and flavor without needing food dye. And always pair it with a lighter frosting for contrast and flavor balance.
Key Ingredients Breakdown & Why They Matter
To get the best Black Velvet Cake, every ingredient plays a role. Here’s why they matter:
Black Cocoa Powder
-
The star of the show. It gives the cake its deep color and a mild, almost Oreo-like flavor.
-
Look for Dutch-process or ultra-Dutch cocoa—natural cocoa won’t achieve the same richness.
-
Expert Tip: Always sift cocoa powder to prevent clumps in your batter.
Buttermilk & Vinegar
-
Classic velvet cake essentials.
-
The acidity from both helps create a soft crumb by reacting with baking soda.
-
Also enhances flavor and gives that signature “velvety” texture.
Oil vs. Butter
-
Oil = more moisture and a tender texture, even after chilling.
-
Butter = added richness and flavor, but can make the crumb slightly firmer.
-
Pro Tip: Some recipes use a mix of both for the best of both worlds.
Cake Flour vs. All-Purpose Flour
-
Cake flour yields a finer, more delicate crumb.
-
If you don’t have cake flour, you can substitute: For every cup of all-purpose flour, remove 2 tablespoons and replace with cornstarch.
Optional Additions
-
Espresso powder – boosts the chocolate flavor
-
Activated charcoal – deepens color (used sparingly)
-
Vanilla extract – balances the dark cocoa
Each of these ingredients helps create a black velvet cake that’s not only stunning to look at, but also unforgettable to eat.
Equipment Checklist for Flawless Results
You don’t need fancy tools—just the right ones:
-
Two 8-inch cake pans – perfect size for even layers
-
Parchment rounds – prevents sticking and helps release cakes cleanly
-
Offset spatula – essential for smooth frosting
-
Hand or stand mixer – ensures your batter is silky and lump-free
-
Wire rack – cools cakes evenly without soggy bottoms
Tip: Grease and line your pans before pouring in the batter to avoid any mid-bake sticking disasters!
How to Make Black Velvet Cake: Step-by-Step Guide
Making a black velvet cake is easier than you might think—just follow these basic steps:
-
Preheat and prep: Get your oven and pans ready.
-
Mix wet and dry separately: This ensures even distribution of ingredients.
-
Cream butter/oil with sugar until light and fluffy.
-
Add eggs, vanilla, and buttermilk to the wet mixture.
-
Combine wet and dry ingredients slowly, alternating additions.
-
Mix in vinegar and baking soda last to activate the rise.
-
Pour into pans and bake until a toothpick comes out clean.
-
Cool completely on wire racks.
Baking Tip: Let the layers cool fully before frosting—even slightly warm cakes will melt your frosting and ruin the texture.
Best Frostings for Black Velvet Cake
Pairing the right frosting with black velvet cake takes it from great to unforgettable. Here are the best options, each adding its own twist:
Cream Cheese Frosting
This classic is a go-to for velvet cakes for a reason. Its slight tang cuts through the richness, balancing out the deep chocolate flavor. It also adds a nostalgic feel if you’re transitioning from red velvet.
Swiss Meringue Buttercream
Silky, smooth, and less sweet than traditional buttercream. It complements the dark flavors without overpowering them. Plus, it’s ideal if you want a piped finish or polished look.
Black Chocolate Ganache
For those who love drama. Made with heavy cream and black cocoa chocolate, ganache offers an ultra-rich, glossy finish. Perfect for a sleek or gothic aesthetic.
White Chocolate Buttercream
This bright frosting provides visual contrast and a sweet balance to the darker cake. Ideal for weddings or winter themes.
Pro Tip: Want a monochrome masterpiece? Add black cocoa to your frosting for a moody, luxurious finish.
Decorating & Serving Suggestions
Presentation takes Black Velvet Cake to a whole new level. Here are some decorating and serving ideas to impress:
-
Use large piping tips for elegant frosting swirls.
-
Top with edible gold flakes or chocolate shards for drama.
-
Add fresh raspberries, blackberries, or cherries—their brightness pops against the dark cake.
-
Try drip ganache edges or stencil powdered sugar on top for detail.
-
Use black cake stands or matte plates for contrast in photos.
This cake shines at Halloween parties, wedding receptions, or moody-themed birthdays—especially when dressed in elegant or gothic décor.
Serving Suggestion: A slice pairs beautifully with strong coffee, espresso, or a warm berry compote for extra indulgence.
Flavor Variations and Fun Twists
Black Velvet Cake is more versatile than it seems! Try these creative twists:
Espresso Black Velvet Cake
Add 1–2 teaspoons of espresso powder or replace some of the liquid with brewed espresso. It intensifies the cocoa flavor without tasting like coffee.
Black Velvet Cupcakes
Use the same batter to make perfectly portioned cupcakes. Top with cream cheese swirls or mini ganache domes—great for parties or weddings.
Vegan Version
Swap:
-
Flax eggs (1 tbsp flaxseed + 2.5 tbsp water per egg)
-
Non-dairy milk + lemon juice for buttermilk
-
Neutral oil instead of butter
Use vegan frosting like cashew cream or dairy-free buttercream to finish.
Gluten-Free Adaptation
Replace regular flour with a 1:1 gluten-free baking flour (look for blends with xanthan gum). Still rich and tender—just celiac-friendly!
These ideas make it easy to tailor your black velvet cake to different dietary needs or event vibes—without losing its signature allure.
Make-Ahead, Storage & Freezing Tips
Black velvet cake is a great make-ahead dessert—just store it properly to preserve its texture and flavor.
Fridge Storage
-
Frosted cake lasts up to 5 days in an airtight container.
-
Let slices come to room temp before serving for best texture.
Freezing Tips
-
Freeze unfrosted cake layers, tightly wrapped in plastic wrap + foil.
-
Store flat in the freezer for up to 2 months.
-
Label with date to track freshness.
Thawing: Move frozen layers to the fridge overnight. Once thawed, allow to reach room temperature before decorating or serving.
Pro Tip: Want super-moist layers? Brush with a simple syrup (sugar + water) before frosting.
Common Mistakes to Avoid
Even experienced bakers can run into trouble. Avoid these mistakes for the perfect black velvet cake:
-
Overmixing the batter: This can create a tough, dense texture. Mix just until combined.
-
Skipping black cocoa powder: Regular cocoa won’t give the right depth of flavor or that iconic color.
-
Overbaking: Keep a close eye—overbaking dries out the cake. Check for doneness at the minimum time.
-
Frosting warm layers: Always let layers cool completely before frosting to avoid a melted mess.
-
Using the wrong frosting: Choose one that complements, not overpowers. Too-sweet frostings can mask the richness of the cake.
Bonus Tip: Use a kitchen scale for accuracy—especially when working with cocoa powder and flour.
FAQs
Here are the most common questions readers ask about black velvet cake—straight from Google’s “People Also Ask” section:
What’s the difference between black velvet and red velvet cake?
Both share the same moist texture and use of buttermilk and vinegar. Red velvet is lighter in flavor and color, while black velvet uses black cocoa for a darker, richer finish.
Can I use regular cocoa instead of black cocoa?
You can, but it won’t taste or look the same. Black cocoa has a smoother, less acidic taste and gives the cake its signature look. Substituting will change both flavor and color.
Does black velvet cake taste like chocolate cake?
Yes, but it’s more subtle and velvety, thanks to the unique cocoa and acidity from buttermilk. It’s not as rich or dense as traditional chocolate cake.
Why is vinegar used in velvet cakes?
Vinegar reacts with baking soda to create lift and produces a tender, light crumb. It also enhances the cake’s slight tang.
Can I make this cake without buttermilk?
Yes! Mix 1 cup milk + 1 tablespoon lemon juice or vinegar, let sit for 5–10 minutes—instant buttermilk substitute.
Black Velvet Cake
Equipment
- 2 × 8-inch round cake pans
- Parchment paper
- Hand or stand mixer
- Mixing bowls
- Whisk
- Rubber spatula
- Measuring cups and spoons
- Wire rack
- Offset spatula
Ingredients
For the Cake:
- 1¾ cups cake flour
- ¾ cup black cocoa powder Dutch-process
- 1½ tsp baking soda
- ½ tsp salt
- 1 cup buttermilk room temp
- 1 tbsp white vinegar
- 2 tsp vanilla extract
- ½ cup neutral oil vegetable or canola
- 1½ cups granulated sugar
- 2 large eggs room temp
Optional:
- 1 tsp espresso powder enhances chocolate flavor
For Frosting (cream cheese or your choice):
- Prepare according to your preferred recipe e.g., cream cheese, Swiss buttercream, ganache
Instructions
- Prep: Preheat oven to 350°F (175°C). Grease and line cake pans with parchment rounds.
- Mix dry: In a bowl, whisk together cake flour, black cocoa, baking soda, and salt.
- Combine wet: In a separate bowl, mix buttermilk, vinegar, vanilla, and espresso powder (if using).
- Cream sugar & eggs: In a large bowl, beat sugar, oil, and eggs until smooth and pale.
- Alternate additions: Add dry and wet ingredients in batches, mixing just until combined.
- Divide & bake: Pour into pans evenly. Bake 30–35 minutes or until a toothpick comes out clean.
- Cool completely on wire racks before frosting.
- Frost & decorate as desired.
Notes
- Use black cocoa powder, not natural cocoa, for the signature flavor and color.
- If you don’t have buttermilk, mix 1 cup milk + 1 tbsp vinegar and let sit 10 mins.
- Cake layers can be baked ahead and frozen unfrosted for up to 2 months.
- Try white chocolate or black ganache for unique frosting twists.
Nutrition