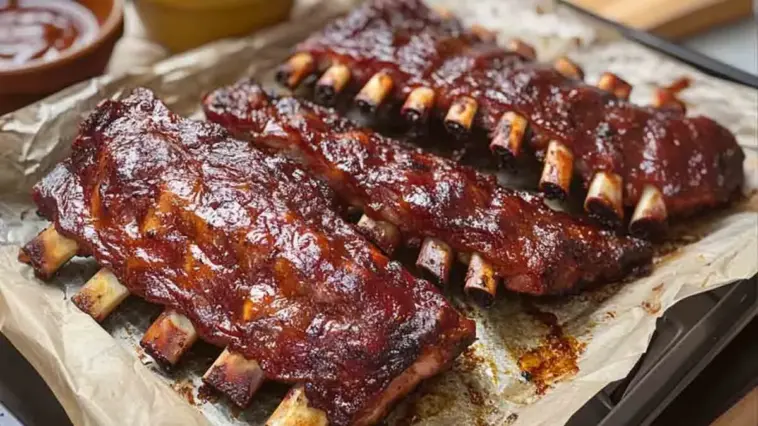
If you’re craving juicy, fall-off-the-bone ribs but don’t have a grill or smoker handy—don’t worry. Oven-baked babyback ribs are a game-changer in the home kitchen. They’re just as flavorful, beautifully tender, and perfectly caramelized without needing any fancy equipment.
This method is ideal for weeknights, dinner parties, or anytime you’re in the mood for barbecue-style comfort food—indoors. With the right approach and a bit of patience, you can transform a rack of ribs into a finger-licking masterpiece using just your oven.
Whether you’re a seasoned cook or a beginner, this guide will walk you through everything you need to know—from choosing the right cut to applying a killer dry rub and nailing the cook time. No grill? No problem. These ribs will impress anyone who takes a bite.
What Are Babyback Ribs?
Let’s break it down: Babyback ribs come from the top of the rib cage, near the spine, where the ribs meet the backbone of the pig. They’re shorter, curved, and more tender than other rib cuts—which makes them perfect for quick oven cooking.
Now, how do they differ from other types of ribs?
-
Spare ribs are meatier and fattier but less tender. They come from the belly area and need longer cook times.
-
St. Louis-style ribs are trimmed spare ribs—flatter and easier to stack or grill, but still tougher than babybacks.
Babyback ribs are called “baby” not because they come from a baby pig, but due to their smaller size compared to spare ribs. They’re typically leaner, more tender, and cook faster.
If you’re cooking in the oven, babybacks are the go-to cut—they’re easy to manage and always deliver big on flavor and tenderness.
Why Choose the Oven Method?
Sure, grilling or smoking ribs is great—but the oven method offers some serious advantages.
First, control. With a stable oven temperature, there’s no guessing or fiddling with coals. You get consistent, even heat from start to finish.
Second, year-round convenience. Rain, snow, or sunshine—your oven is always ready. No need to wait for summer BBQ season to enjoy ribs.
And third, easy caramelization and tenderness. When wrapped in foil and baked low and slow, the ribs steam gently in their own juices. Once unwrapped, a quick broil or sauce glaze gives you that sticky, caramelized finish.
Best of all, you don’t need special tools. Just a baking sheet, aluminum foil, and maybe a wire rack. It’s as simple as it gets—and the results are anything but ordinary.
How to Choose the Best Babyback Ribs
Not all ribs are created equal, so here’s what to look for at the store or butcher:
-
Meat-to-bone ratio: Choose ribs that look meaty—not too much bone showing through.
-
Marbling: A little fat means more flavor. Avoid racks that look dry or lean.
-
Freshness: Look for bright pink color, no off smells, and vacuum-sealed packaging if buying pre-packed.
A typical rack feeds 2–3 people, but if ribs are the star of your meal, plan on ½ to 1 rack per person, especially for hearty appetites. If you’re feeding a crowd, grab a few racks—you won’t have leftovers.
Prepping the Ribs
Before you season or cook, prep your ribs properly—it makes a huge difference.
Step 1: Remove the silver skin
On the back (bone side) of the ribs, there’s a thin, shiny membrane. If left on, it can make the ribs chewy. Use a knife to loosen a corner, then grab it with a paper towel and peel it off. It usually comes off in one piece.
Step 2: Trim excess fat
While some fat adds flavor, thick chunks won’t render properly in the oven. Trim just enough to keep the ribs meaty but not greasy.
Step 3: Dry the surface
Pat the ribs dry with paper towels. A dry surface helps the seasoning stick and promotes better browning.
Pro Tip: If you’re using a wet marinade or mustard binder, do that after drying, not before.
Taking these few minutes to prep ensures you’ll get ultra-tender ribs with flavor that goes all the way through.
Best Dry Rub for Oven-Baked Ribs
A good dry rub is the secret to crave-worthy ribs—and it couldn’t be easier.
Here’s a simple base blend:
-
Brown sugar (for sweetness and caramelization)
-
Smoked paprika
-
Garlic powder
-
Onion powder
-
Salt and black pepper
-
Cayenne or chili powder (optional, for a little kick)
Want more depth? Try mustard powder, cumin, or even a hint of cinnamon. You can customize the rub based on your preferences—make it spicy, sweet, or smoky.
Store-bought vs. homemade? Store-bought rubs work in a pinch, but a DIY rub gives you more control over the flavor profile. Plus, you know exactly what’s in it.
Optional step: For even bolder flavor, slather the ribs in a thin layer of yellow mustard before applying the rub. It acts as a binder and tenderizer—and no, it won’t taste like mustard once cooked.
The Secret to Tender Ribs: Low and Slow
The golden rule for perfect ribs? Low and slow.
Cooking ribs at 275°F to 300°F breaks down the connective tissue gently, turning tough cuts into melt-in-your-mouth bites.
Plan on baking for 2.5 to 3.5 hours, depending on the thickness of the ribs. You want them tender but not mushy—just enough to pull cleanly off the bone.
Pro Tip: Cover the ribs tightly in foil during most of the cook time. This traps steam, keeping the ribs moist and speeding up the tenderizing process. Later, you’ll uncover them and let them finish caramelizing in the open air.
Step-by-Step: How to Bake Babyback Ribs in the Oven
Ready to get cooking? Here’s how to bake babyback ribs in the oven from start to finish.
Step 1: Prep Your Baking Tray
Line a large baking sheet with aluminum foil. This catches drippings and makes cleanup a breeze. For extra airflow, you can place a wire rack on top, but it’s optional.
Step 2: Wrap the Ribs
Lay each seasoned rack of ribs meat-side up on a large sheet of foil. Tightly wrap them to seal in moisture. Want ultra-tender ribs? Add a splash of apple juice, broth, or even a little beer before sealing. This creates gentle steam during cooking.
Step 3: Bake Low and Slow
Place the wrapped ribs on the tray and bake at 275°F.
-
For average-sized babyback ribs, bake for 2.5 to 3 hours
-
For thicker racks, go closer to 3.5 hours
The ribs should feel soft and bend easily when picked up with tongs.
Step 4: Unwrap and Caramelize
Carefully unwrap the ribs and drain any excess liquid. Turn the oven up to 425°F or turn on the broiler. Brush the ribs with BBQ sauce and return them to the oven, uncovered, for 10–15 minutes.
Pro Tip: For a glossy, sticky finish, broil the ribs for 2–4 minutes—but watch closely! They can burn fast.
Sauce or No Sauce?
This one’s personal. Some folks love a dry rub-only rib, while others want that finger-licking sauciness. If you’re in the sauce camp, apply it in the final 20 minutes of baking—after unwrapping the ribs.
Here are a few tasty sauce ideas:
-
Sweet and smoky: Brown sugar, molasses, smoked paprika
-
Spicy: Add chipotle, cayenne, or hot sauce
-
Tangy: Use apple cider vinegar or mustard-based blends
Homemade BBQ sauce is fantastic, but store-bought works in a pinch. Just make sure to broil briefly at the end to caramelize the sauce—it gives that irresistible sticky texture and depth of flavor.
Tip: Serve extra sauce on the side so everyone can dip to their heart’s content.
How to Know When They’re Done
The key to perfect ribs? Don’t just rely on time—check the signs of doneness.
-
The bend test: Pick up the ribs with tongs from one end. They should bend and crack slightly in the middle without falling apart.
-
Internal temperature: Aim for 190°F to 203°F. This is higher than for chops or roasts but perfect for breaking down collagen and getting that fall-apart tenderness.
-
Bone appearance: You should see the bones slightly exposed as the meat shrinks during cooking.
Overcooked ribs will fall apart too much and feel mushy. Undercooked ribs will be chewy. Trust these signs, and you’ll hit the sweet spot every time.
Resting & Slicing
Once your ribs are out of the oven, don’t slice right away. Let them rest for 10 to 15 minutes to allow the juices to redistribute. This helps keep the meat moist and flavorful.
Use a sharp knife and slice between the bones, keeping the cuts even. Each rib should have a good amount of meat on it.
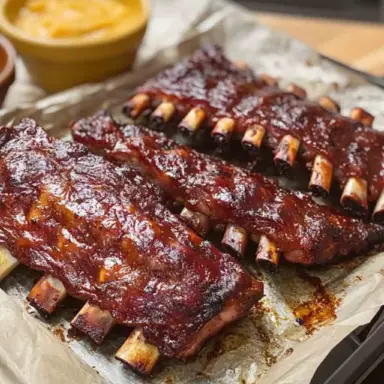
For a beautiful presentation, serve the ribs on a large wooden board or rustic platter with a side of BBQ sauce, pickles, or fresh herbs for garnish. It’s simple, but it makes a big impact.
Best Side Dishes to Serve with Babyback Ribs
Babyback ribs are the star of the plate—but sides make the meal sing. Here are some tasty pairings:
Classic BBQ Sides
-
Creamy mac and cheese
-
Tangy coleslaw
-
Buttery cornbread
Lighter Options
-
Grilled or roasted vegetables
-
Fresh cucumber or tomato salad
-
Charred corn on the cob
Want to go all out? Build a BBQ board with ribs, pickled red onions, jalapeños, small bowls of sauces, baked beans, and biscuits. It’s great for parties and makes every guest feel like they’re at a backyard feast—even if it’s just a Tuesday night.
Storing & Reheating Leftovers
Got leftovers? Lucky you.
Fridge: Wrap ribs tightly in foil or place in an airtight container. They’ll keep for up to 4 days.
Freezer: Cool completely, then wrap in foil and store in a freezer bag. Good for 2–3 months.
When you’re ready to reheat:
-
Oven method is best: wrap in foil with a splash of broth or apple juice, then warm at 300°F for 20–30 minutes.
-
Avoid microwaving if possible—it can make them dry and rubbery.
Tip: Brush with fresh sauce before reheating for an extra pop of flavor.
FAQs
What’s the difference between babyback and spare ribs?
Babyback ribs are smaller, leaner, and more tender. Spare ribs are larger, meatier, and come from the belly side of the pig. Babybacks are better for quicker cooking, especially in the oven.
Can I use this method with other types of ribs?
Yes! The oven method works well with spare ribs or St. Louis-style ribs, but you’ll need to increase the cooking time—usually closer to 3.5 to 4 hours.
Should I boil ribs before baking?
It’s not recommended. Boiling can strip ribs of their flavor. Instead, wrap them in foil and let them steam in their own juices for tender results.
Why are my ribs dry or tough?
You may have overcooked or undercooked them. Ribs need time to break down collagen, but going too far can dry them out. Also, always cook covered first, then uncover for the final stage.
Babyback Ribs In The Oven
Equipment
- Baking sheet
- Aluminum foil
- Small mixing bowl
- Tongs
- Knife (for trimming silver skin)
- Brush (for BBQ sauce, optional)
Ingredients
- 2 racks babyback ribs about 3–4 lbs
- 2 tablespoons brown sugar
- 1 tablespoon smoked paprika
- 1 teaspoon garlic powder
- 1 teaspoon onion powder
- 1 teaspoon salt
- ½ teaspoon black pepper
- ½ teaspoon cayenne optional
- 1 tablespoon yellow mustard optional binder
- ½ cup BBQ sauce optional for glazing
- ¼ cup apple juice or broth optional for moisture
Instructions
- Preheat oven to 275°F (135°C). Line a baking sheet with foil.
- Prep the ribs: Remove the silver skin from the back of the ribs. Trim excess fat. Pat dry.
- Season: If using mustard, rub a thin layer over ribs. Combine spices in a bowl and rub generously on all sides.
- Wrap tightly in foil, adding a splash of apple juice or broth if desired. Place on baking sheet meat-side up.
- Bake for 2.5–3.5 hours, depending on thickness, until ribs are very tender.
- Unwrap ribs carefully and discard liquid. Brush with BBQ sauce (if using).
- Broil or bake uncovered at 425°F for 10–15 minutes, or broil 2–4 minutes until caramelized.
- Rest for 10 minutes before slicing. Serve and enjoy!
Notes
- You can make the dry rub ahead and store it for weeks in an airtight jar.
- For extra smoky flavor, add ½ teaspoon liquid smoke to the rub or sauce.
- If you're feeding a crowd, make two baking sheets’ worth and rotate them halfway through.
- Not a fan of BBQ sauce? These ribs taste amazing dry, too—just add an extra rub layer before broiling.
- Great with mac and cheese, slaw, or grilled corn.
Nutrition