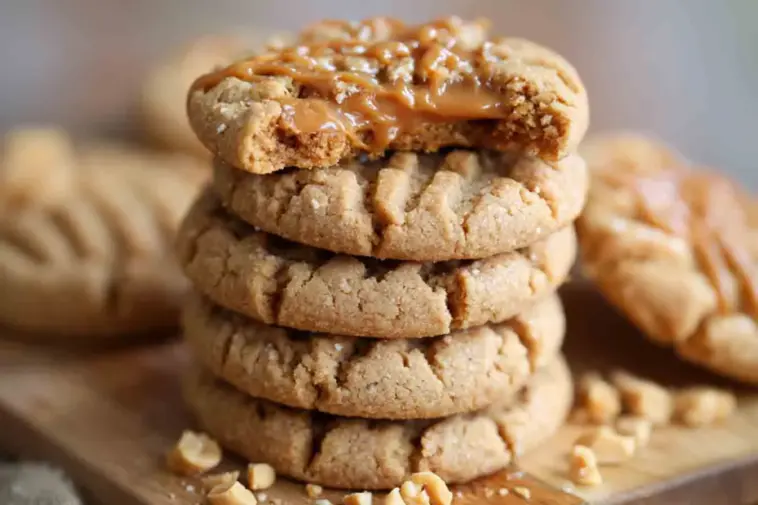
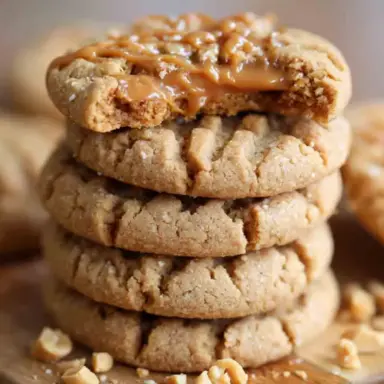
If there’s one cookie that never goes out of style, it’s a classic peanut butter cookie. But not just any peanut butter cookie — we’re talking about thick and chewy peanut butter cookies, which are thick, bakery-style, chewy-centered bites that are crisp on the edges and soft all the way through. No fork marks, no dry crumbs — just rich, nutty flavor in every gooey bite.
This easy recipe doesn’t require any chilling and comes together in under 30 minutes from start to finish. Whether you’re baking for a party or sneaking a midnight snack, this one is guaranteed to satisfy. Let’s dive into the secrets of how to make thick and chewy peanut butter cookies that look and taste like they came straight from a pro bakery.
Why You’ll Love These Thick and Chewy Peanut Butter Cookies
These cookies are nothing like the dry, flat peanut butter cookies you might remember from old-school lunchboxes. Instead, they’re:
-
Thick and puffed with soft, rich centers
-
Slightly crisp around the edges for that perfect bite
-
Full of deep peanut flavor and just the right amount of sweetness
-
No chilling required — scoop, bake, enjoy
-
Freezer-friendly for future cravings
As a professional baker and long-time cookie tester, I’ve spent years experimenting with what makes the perfect texture. This version is the result of dozens of tweaks and trials — and it delivers every time. Your friends will ask what bakery they came from. You’ll proudly say: my kitchen.
Key Ingredients for Thick and Chewy Peanut Butter Cookies
The chewiness of these cookies comes from a smart balance of ingredients and temperature. Here’s how it works:
-
Brown Sugar Overload – Brown sugar contains more moisture than white sugar, and that’s the secret to soft, chewy cookies. We use more brown than white here.
-
High Peanut Butter, Moderate Butter – Too much butter can cause cookies to spread too much. Using more peanut butter than butter helps give structure and keeps the cookies thick.
-
Egg for Structure – One large egg adds richness and stability.
-
Baking Soda (Not Powder) – Just the right lift without making the cookies cakey.
-
Low-ish Bake Temperature (350°F/175°C) – Baking at a slightly lower temp allows the cookies to spread slowly, helping maintain a thick center.
Pro Tip: Don’t over-cream your butter and sugar — too much air will make the cookies puff and collapse. Mix just until combined.
The right ratios and method are what turn a decent cookie into a dreamy, bakery-style treat.
Peanut Butter 101 – Picking the Perfect Jar
All peanut butters are not created equal — especially when baking.
-
Use creamy, no-stir peanut butter like Jif or Skippy for consistent results. These brands are formulated to stay thick, which helps your dough hold its shape.
-
Avoid natural peanut butter, which separates and creates oily, runny dough — leading to thin cookies.
-
Crunchy peanut butter? Totally fine, if you like texture. Just make sure it’s still no-stir.
-
For even better accuracy, weigh your peanut butter with a digital scale. It’s much more precise than scooping, especially when every gram matters for cookie structure.
Bold Flavor Twist: Want even more nuttiness? Add a tablespoon of roasted peanut powder or stir in chopped salted peanuts just before baking.
Essential Tools & Mise-en-Place
Before baking, gather your tools. Mise-en-place (everything in its place) is key to stress-free baking.
Essentials:
-
Mixing bowls
-
Stand or hand mixer
-
Silicone baking mats or parchment paper
-
Large cookie scoop (50 mm / #20) for consistent sizing
-
Wire rack for cooling
-
Rubber spatula and measuring cups
-
Digital kitchen scale (for perfect flour + PB ratios)
Pro Tip: Use room temperature ingredients. Cold butter or eggs can lead to uneven mixing and flat cookies.
Recipe Snapshot (Quick-Reference Box)
Yield: 16–18 large cookies
Prep Time: 10 minutes
Bake Time: 10–12 minutes
Total Time: 25–30 minutes
Difficulty Level: Beginner-friendly
Tools Needed: Mixer, scoop, silicone mat
Best For: Bake sales, dessert boards, freezer stashing
Bonus: No chilling required!
Step-by-Step Instructions (Scooping to Cooling)
Here’s how to bring these thick and chewy peanut butter cookies to life:
Step 1: Preheat & Prep
Preheat oven to 350°F (175°C). Line two baking sheets with parchment paper or silicone baking mats.
Step 2: Cream Butter + Sugars
In a large bowl, beat room temperature butter, brown sugar, and white sugar just until combined and slightly fluffy — about 1 minute.
Tip: Don’t overmix — too much air = puffy cookies that collapse.
Step 3: Add Peanut Butter, Egg, and Vanilla
Mix in the creamy peanut butter, egg, and vanilla extract. Beat on medium-low just until smooth and creamy.
Step 4: Add Dry Ingredients
In a separate bowl, whisk together flour, baking soda, and a pinch of salt. Slowly add to wet ingredients, mixing just until no streaks remain.
Optional Add-ins: Chocolate chips, peanut butter chips, chopped peanuts.
Step 5: Scoop & Shape
Using a 50 mm scoop, portion dough onto baking sheets — 2 inches apart. Gently press each ball just a bit to flatten the top, but don’t overdo it.
Step 6: Bake & Check
Bake for 10–12 minutes or until the edges are lightly golden and the centers look just set. They’ll firm up while cooling.
Cookie Testing Tip: Bake one test cookie first — if it spreads too much, chill the rest of the dough for 15 minutes.
Step 7: Cool Completely
Let cookies cool on the pan for 5 minutes, then transfer to a wire rack to cool completely.
You’ll get cookies with chewy middles and just the right crisp edge — no fork-pressing needed.
Fixing Common Issues with Chewy Peanut Butter Cookies
Even a classic recipe can flop if a few things go wrong. Here’s how to fix the most common peanut butter cookie issues:
Flat Cookies
-
Too little flour – Always measure by weight, not cups.
-
Warm dough or pans – Chill the dough for 15 minutes if your kitchen is warm.
-
Overmixed butter – Cream just until blended to avoid excess air.
Dry or Crumbly Cookies
-
Overbaking – These cookies should look slightly underbaked in the center.
-
Too much flour – Don’t scoop flour with a measuring cup. It packs too much in.
Too Sweet or Greasy
-
Use regular no-stir peanut butter — natural brands can cause oily or gritty texture.
Advertisement
Pro Tip: If your first tray spreads too much, add 1–2 tablespoons of flour to the dough and test again.
Easy Variations for Homemade Peanut Butter Cookies
Want to upgrade your cookies? These mix-ins and tweaks take your base recipe to the next level:
-
Chocolate Chips – Semisweet or milk chocolate for a Reese’s-style cookie.
-
Peanut Butter Cups – Chop mini Reese’s and fold them in before baking.
-
Chopped Salted Peanuts – Adds crunchy texture and flavor contrast.
-
Mini Pretzels or Potato Chips – Salty + sweet magic.
-
Swirl in Nutella – Add 1–2 tablespoons to the top of each dough ball and swirl with a toothpick.
For Special Diets:
-
Gluten-Free – Use a 1:1 baking flour blend that includes xanthan gum.
-
Dairy-Free – Sub in plant-based butter; texture will be slightly softer but still chewy.
Bonus Idea: Drizzle with melted dark chocolate and a sprinkle of flaky sea salt.
Make-Ahead, Storage & Freezing Guide
These cookies are perfect for baking ahead or stashing for later:
-
Room Temperature Storage – Store in an airtight container for up to 5 days.
-
Freeze the Dough – Scoop into balls, flash freeze, then store in a zip-top bag for up to 3 months.
-
Bake from Frozen – Add 1–2 minutes to the bake time — no need to thaw.
-
Freeze Baked Cookies – Wrap tightly in plastic and foil for up to 2 months. Reheat briefly for fresh-from-the-oven taste.
Best Storage Tip: Add a slice of sandwich bread to your cookie container — it helps retain moisture without affecting flavor.
Expert Baker Tips & E-E-A-T Nuggets
These tips come from years of professional testing and bakery experience:
-
Weigh your ingredients — A scale is the most powerful baking tool you can own.
-
Bake one test cookie first — Adjust based on spread or texture before baking the whole batch.
-
Don’t skip salt — Even sweet cookies need a pinch to balance flavor.
-
Avoid parchment curl-ups — Use silicone baking mats for even heat and zero waste.
-
Rotate your pans — Halfway through baking, turn the sheet front to back for even results.
I’ve tested this cookie over 20 times with different peanut butters, flours, and mixers to get that ideal balance of chew, puff, and flavor. Trust me, these ones work.
Serving & Pairing Ideas
These cookies aren’t just good on their own — they’re made for pairing.
-
Classic Combo – Serve with an ice-cold glass of milk.
-
Dessert Board – Pair with fudge brownies, strawberries, and mini s’mores.
-
Ice Cream Sandwiches – Scoop vanilla or chocolate ice cream between two cookies and freeze for 30 minutes.
-
Sweet Snack Platter – Include with dried fruit, nuts, and chocolate bark for a party-worthy dessert board.
Hosting Tip: Serve warm cookies with mini scoops of ice cream at the table — instant crowd-pleaser!
Nutrition Snapshot (per 60 g cookie)
Estimated values — verify with your final ingredients and batch size.
-
Calories: 270 kcal
-
Carbohydrates: 30 g
-
Protein: 6 g
-
Fat: 14 g
-
Saturated Fat: 5 g
-
Sodium: 170 mg
-
Sugar: 18 g
-
Fiber: 2 g
-
Calcium: 25 mg
-
Iron: 1.3 mg
FAQs
Why do my peanut butter cookies go hard after cooling?
They were likely overbaked. Remove them when the centers still look slightly underdone — they firm up as they cool.
Can I use natural peanut butter?
You can, but the texture will be much softer and spread more. Stick to no-stir peanut butter for best results.
Do I really need to press PB cookies with a fork?
Not for this recipe! These cookies are thick and chewy without the fork press — just scoop, shape, and bake.
How do I keep cookies thick and chewy?
Use more brown sugar than white, avoid overmixing, and don’t flatten too much before baking. Bake at 350°F max.
Can I make them gluten-free?
Yes, use a 1:1 gluten-free baking flour blend that contains xanthan gum. No other adjustments are needed.
How long does the dough last in the fridge?
Up to 3 days, tightly wrapped. Let it sit at room temperature for 20 minutes before scooping.
What’s the best way to freeze baked cookies?
Wrap each cookie in plastic, place in an airtight container, and freeze for up to 2 months.
Why did my cookies turn out cakey instead of chewy?
Too much flour, overmixing, or using baking powder instead of baking soda can cause a cakey texture.
Thick and Chewy Peanut Butter Cookies
Equipment
- Stand mixer or hand mixer
- Mixing bowls
- Rubber spatula
- Large cookie scoop (#20 or 50 mm)
- Silicone baking mat or parchment paper
- Baking sheets
- Wire cooling rack
- Digital kitchen scale (optional)
Ingredients
- 1/2 cup 1 stick unsalted butter, softened
- 3/4 cup creamy no-stir peanut butter
- 1/2 cup brown sugar packed
- 1/4 cup granulated sugar
- 1 large egg
- 1 tsp vanilla extract
- 1/2 tsp baking soda
- 1/4 tsp salt
- 1 1/4 cups all-purpose flour
Instructions
- Preheat oven to 350°F (175°C). Line baking sheets with parchment or silicone mats.
- In a large bowl, cream butter, brown sugar, and granulated sugar until just combined.
- Add peanut butter, egg, and vanilla. Mix until smooth.
- In another bowl, whisk flour, baking soda, and salt. Gradually mix into wet ingredients.
- Scoop dough into 2-tbsp balls (50mm scoop). Place 2 inches apart on baking sheets.
- Bake 10–12 minutes, until edges are lightly golden and centers look set.
- Cool on baking sheet for 5 minutes, then transfer to a wire rack to cool completely.
Notes
- For best texture, use commercial creamy peanut butter (like Jif or Skippy).
- Cookies will look soft when removed from the oven — that’s perfect!
- Store in an airtight container for 5 days or freeze for up to 3 months.
- Optional: Add chocolate chips, chopped peanuts, or a drizzle of melted chocolate on top.
Nutrition
Sweet Send-Off & Call-to-Action
There’s nothing like the comfort of a thick, chewy peanut butter cookie. Whether you’re sharing a warm batch with loved ones or sneaking one straight from the freezer stash, this recipe hits every mark — soft center, nutty aroma, and just the right level of sweetness.
If you make this recipe, I’d love to hear what you think! Drop a comment below, give it a star rating, or tag @mastersofkitchen on Pinterest so I can see your creations.
And if you’re a cookie lover (who isn’t?), don’t forget to subscribe to the newsletter for weekly tested dessert recipes that are rich in flavor, short on stress, and always made to impress.
Happy baking — and happy nibbling!