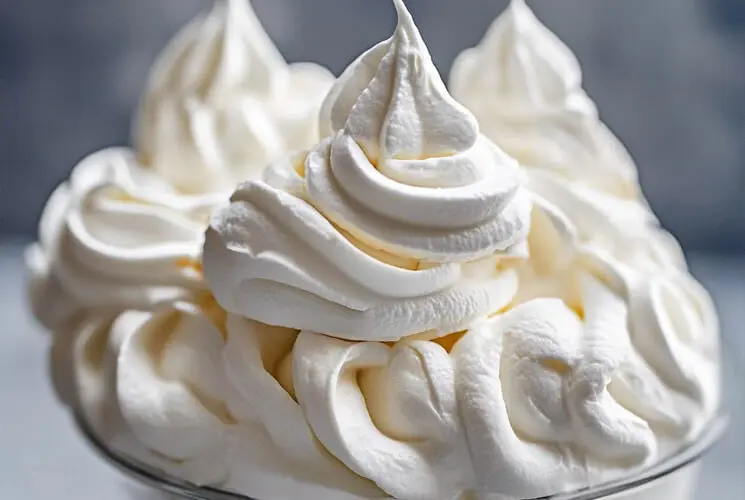
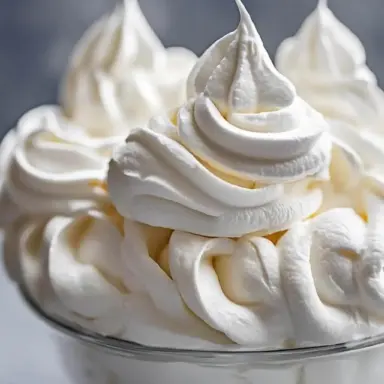
There’s something incredibly satisfying about making homemade whipped cream. It’s silky, fluffy, and naturally sweet—lightyears better than anything you’ll find in a can or tub. The texture is pillowy soft, the flavor is clean and fresh, and best of all—it’s shockingly easy.
With just three simple ingredients and under five minutes, you can transform plain heavy cream into a luscious topping that elevates everything from fresh berries to hot cocoa. Want to give your homemade pies a dreamy finish? Need something magical to dollop over pancakes or lattes? This is your go-to.
Store-bought whipped cream often comes loaded with preservatives, stabilizers, and a chemical aftertaste. But when you whip it up yourself, you’re in control of the sweetness, flavor, and thickness. Customize it however you like—vanilla-kissed, lightly spiced, or even chocolatey and boozy.
Tip: Takes just 3 ingredients and under 5 minutes! Once you try this fluffy topping recipe, you’ll never go back.
Essential Ingredients for the Best Whipped Cream Recipe
Let’s keep it simple. All you really need for whipped cream are: heavy cream, a sweetener, and a touch of flavoring. But a few choices here can make a big difference.
Heavy Cream vs. Whipping Cream
The key player here is cream with at least 36% fat—this is usually labeled as heavy cream or heavy whipping cream. Avoid light cream or half-and-half; they simply won’t whip properly. Whipping cream (30–35% fat) can work too, but your whipped cream may not hold peaks as long.
Sweetener Options
-
Powdered sugar is the classic choice—its fine texture dissolves easily.
-
Granulated sugar can be used too, but beat a bit longer to avoid graininess.
-
Want to switch it up? Try maple syrup, honey, or agave for a natural twist.
Flavor Boosters
A dash of pure vanilla extract is the gold standard. But don’t stop there—almond extract, citrus zest, cinnamon, or even a splash of liqueur can transform your whipped cream into something truly special.
Pro Tip: Always chill your bowl and beaters for best results. Cold tools = fluffier cream!
How to Make Whipped Cream Step-by-Step
Word Count: ~250
Ready to whip it good? Here’s your foolproof method for light, dreamy whipped cream.
Step 1: Chill Everything
Place your mixing bowl and beaters/whisk in the fridge or freezer for about 10–15 minutes. Cold tools and cold cream are essential to help the fat whip up faster and stay fluffy.
Step 2: Add Ingredients
Pour cold heavy cream into the chilled bowl. Add your sweetener (start with 1–2 tablespoons per cup of cream) and your flavoring (like vanilla or almond extract).
Step 3: Whip It Up
-
Stand mixer or hand mixer: Start on medium speed until the cream thickens slightly, then switch to high.
-
By hand: It’s totally possible, just a bit more of an arm workout. Use a balloon whisk and whip in quick, steady strokes.
Step 4: Watch the Peaks
-
Soft peaks: Cream holds shape but flops over—perfect for folding into desserts.
-
Medium peaks: Holds its shape with slight curl at the tip—ideal for topping pies.
-
Stiff peaks: Firm tips that stand tall—great for piping or cake frosting.
How to Avoid Over-Whipping
Stop once your cream forms stiff peaks. If it starts to look chunky or curdled, you’ve gone too far and are heading toward butter. If this happens, stir in a little more cream by hand to smooth it out.
Tips for Making Perfect Whipped Cream at Home
Making This fluffy topping is easy—but these tips will make it exceptional every time.
Use a Metal Bowl
Metal holds the cold better than glass or plastic, helping your cream stay chilled as it whips.
Add Sugar at the Right Time
Wait until the cream has thickened into soft peaks before adding your sugar. This helps avoid deflating the cream and gives you better control over the texture.
Keep Everything Cold
Cold cream, cold bowl, cold beaters. The colder your tools, the fluffier and faster the whip. Warm cream will stay soupy no matter how much you beat it.
Don’t Rush the Whip
Start your mixer on medium speed, then increase to high. Starting too fast can cause splashing and uneven whipping.
Delicious Variations on the Classic Whipped Cream Recipe
Whipped cream doesn’t have to be plain vanilla—get creative! Here are a few crowd-favorite twists:
-
Chocolate Whipped Cream: Add 1–2 tablespoons of unsweetened cocoa powder with the sugar
-
Spiced Whipped Cream: A dash of cinnamon, pumpkin spice, or cardamom is cozy and perfect for fall desserts
-
Boozy Whipped Cream: Stir in 1–2 teaspoons of bourbon, rum, or Baileys for an adult twist
-
Citrus Zest Whipped Cream: Fold in freshly grated lemon or orange zest for brightness
Fun Tip: Mix and match flavors to pair with your dessert—like citrus whipped cream over lemon bars, or chocolate whipped cream on mocha cake.
Creative Ways to Use Whipped Cream on Desserts, Drinks, and More
Whipped cream is more than just a pretty topping—it’s the finishing touch that takes everyday dishes to a whole new level of indulgence. Here are some of the best ways to use it:
On Desserts
It’s the perfect companion for sweet treats like pies, cakes, puddings, brownies, and trifles. A simple spoonful can elevate even store-bought dessert into something special.
In Drinks
A cloud of whipped cream on hot chocolate, milkshakes, or even iced coffee turns your beverage into a mini celebration. Try it on chai lattes or affogatos too!
At Breakfast
A dollop on pancakes, waffles, French toast, or crepes makes breakfast feel like brunch at a café. Pair it with fruit compote or syrup for extra flair.
As a Frosting Alternative
Whipped cream is a light and airy frosting for shortcakes, cupcakes, and snack cakes. Just make sure to stabilize it (see next section) if you’re planning to pipe or decorate.
Tip: A swirl of whipped cream is the easiest way to make any dish feel fancy.
How to Store Homemade Whipped Cream for Later
Want to prep your whipped cream ahead of time? It’s totally doable with just a few precautions:
-
Refrigerate in an airtight container for up to 3 days. It may lose volume slightly, but it’s still delicious.
-
If it starts to deflate, give it a quick whisk to revive the fluffiness. No need to re-whip from scratch!
-
For best results, make whipped cream the same day you plan to use it—especially if you’re not stabilizing it.
Can You Freeze Whipped Cream?
You can freeze it—but it’s not ideal unless it’s stabilized. Unstabilized whipped cream may separate when thawed. If you do freeze it, pipe dollops onto parchment, freeze until solid, and transfer to a freezer bag. Great for topping hot drinks!
How to Stabilize Whipped Cream for Piping and Frosting
If you’re using whipped cream for piping, frosting cakes, or want it to last more than a day, stabilizing it is the way to go. Here are three foolproof options:
1. Gelatin (Most Traditional Method)
-
Soak 1 teaspoon unflavored gelatin in 2 tablespoons cold water for 5 minutes
-
Microwave to dissolve (about 5–10 seconds)
-
Let it cool slightly (but don’t let it set)
-
Slowly drizzle into cream as you beat past soft peaks
Best for: Long-lasting whipped cream, cake frosting, hot weather
2. Instant Pudding Mix
Add 1 tablespoon of instant vanilla pudding mix per 1 cup of cream. It thickens as it whips and adds subtle sweetness.
Best for: Quick fix and added vanilla flavor
3. Cream of Tartar
Add ¼ teaspoon to help the cream hold structure without altering flavor. It’s a gentle stabilizer and works well for lighter applications.
Best for: Piping or topping desserts that will sit out for a while
Common Mistakes and How to Avoid Them
Making this creamy topping is simple, but there are a few pitfalls that can leave you with butter or soup instead of fluff. Here’s how to avoid the most common ones:
-
Over-whipping: If you go too far, the cream will clump and separate into butter. Stop at stiff peaks!
-
Using warm cream: Cold cream is essential for proper volume. Warm cream won’t whip, no matter how long you mix.
-
Not chilling your tools: A warm bowl or whisk slows down the process. Chill everything for faster, fluffier results.
-
Adding sugar too early: Wait until soft peaks form before sweetening to avoid breaking the emulsion.
Fix it tip: If you over-whip slightly, stir in a tablespoon or two of cold cream by hand to smooth it out.
FAQs
Can I make whipped cream without a mixer?
Yes! A balloon whisk and a strong arm will do the job. Chill your bowl and whisk, and use quick circular strokes. It takes 5–10 minutes of steady whisking, but the results are worth it.
What is the difference between heavy cream and whipping cream?
Heavy cream contains at least 36% fat, while whipping cream has 30–35% fat. Both will whip, but heavy cream holds peaks better and stays fluffy longer.
How do I fix over-whipped cream?
If it’s just slightly overdone, stir in 1–2 tablespoons of cold cream to bring it back. If it’s fully curdled, you’ve made butter—it’s delicious, but you’ll need to start over for whipped cream.
Is whipped cream the same as Cool Whip?
Not quite. Cool Whip is a pre-made whipped topping made with hydrogenated oils, sweeteners, and stabilizers. Homemade whipped cream is fresher, richer, and made with real ingredients.
Can I sweeten whipped cream with honey or maple syrup?
Absolutely. Use 1–2 teaspoons of honey or maple syrup per cup of cream. Just note that they’ll add their own flavor and slightly soften the texture.
Stabilized Whipped Cream Recipe
Equipment
- Hand mixer or stand mixer (or balloon whisk)
- Mixing bowl (preferably metal)
- Measuring spoons
- Spatula
Ingredients
- 1 cup 240 ml cold heavy cream (or heavy whipping cream)
- 2 tablespoons powdered sugar adjust to taste
- 1 teaspoon pure vanilla extract or flavor of choice
Instructions
- Chill your tools: Place your mixing bowl and beaters (or whisk) in the fridge or freezer for 10–15 minutes.
- Add ingredients: Pour cold heavy cream into the chilled bowl. Add powdered sugar and vanilla extract.
Whip the cream:
- Using a hand or stand mixer, start on medium speed until the cream begins to thicken.
- Increase to high speed and beat until soft, medium, or stiff peaks form—depending on your preference.
- If whipping by hand, use quick circular strokes with a balloon whisk for 5–8 minutes.
- Use immediately or store in the refrigerator for up to 3 days in an airtight container. Rewhip briefly if needed.
Notes
- Flavor twist: Swap vanilla with almond extract, bourbon, citrus zest, or cocoa powder.
- Stabilized option: Add 1 tsp gelatin or 1 tbsp instant pudding mix per cup of cream if you need it to hold for hours or pipe onto desserts.
- Don't over-whip: Stop at stiff peaks. If it looks grainy or clumpy, you’ve gone too far. Stir in 1 tbsp cream to smooth it out.
- Works best when everything is cold, including the cream, bowl, and beaters.
Nutrition
More Recipes You’ll Love:
- Cream Cheese Chocolate Chip Cookies Recipe
- 3-Ingredient Banana Bread Recipe
- Strawberries Cream Cake Roll Recipe
- 4 Ingredients Lemon Cream Cheese Dump Cake
- Peaches & Cream Cheese Loaf Recipe