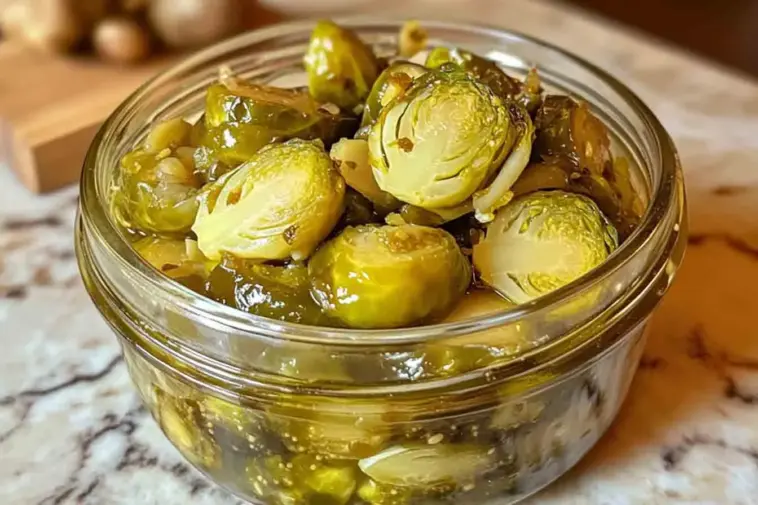
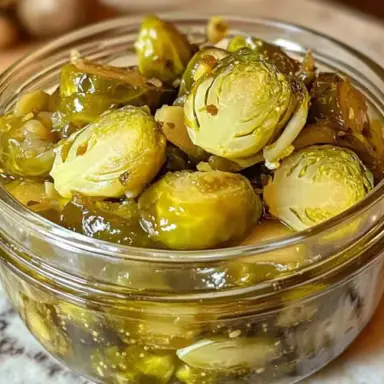
Pickled Brussels Sprouts: The Hidden Gem You’ll Want in Every Jar
Don’t knock ‘em till you pickle ‘em! Brussels sprouts may not be everyone’s favorite vegetable, but once they’re soaked in a tangy brine, something magical happens. The bitterness fades, the crunch stays, and suddenly—you’ve got a bold, punchy snack that steals the show.
Whether you’re building a charcuterie board, mixing up a Bloody Mary, or just need something zippy to balance out rich dishes, pickled Brussels sprouts deliver. They’re crunchy, garlicky, a little spicy if you like, and totally crave-worthy.
In this guide, we’ll cover everything you need to know—from what they are, how they taste, health benefits, pickling methods, storage tips, and the easiest recipe to get you started. If you’re a fan of pickles or just curious about how to preserve veggies in a flavorful way, you’re in for a treat.
What Are Pickled Brussels Sprouts?
Pickled Brussels sprouts are whole or halved sprouts that have been preserved in a vinegar-based brine—often flavored with garlic, spices, and herbs. They’re a cousin to the classic dill pickle, but with their own bold personality.
Unlike fermented Brussels sprouts (which rely on salt and time to develop beneficial bacteria), these are made with vinegar—meaning the sourness is more immediate and the pickling process is quicker and more beginner-friendly.
You can use a cold brine (for crisp, raw results) or a hot brine (for quicker flavor infusion and a softer texture). We’ll explain both shortly so you can pick your preferred method!
What Do Pickled Brussels Sprouts Taste Like?
Imagine a crunchy little cabbage with a big attitude.
Pickled Brussels sprouts are tangy, slightly garlicky, and can be spicy if you add chili flakes or jalapeños. They have a firm bite that holds up beautifully in brine—unlike cucumbers, which tend to soften more.
They’re often compared to pickled green beans or cauliflower, but they’ve got a richer, earthier base flavor that makes them perfect for bold pairings and creative snacking.
Health Benefits of Pickled Brussels Sprouts
Not only do they taste amazing, but pickled Brussels sprouts are a nutrient-rich snack packed with health benefits:
-
High in fiber, which supports digestion and satiety
-
Rich in vitamin C and vitamin K, both essential for immune and bone health
-
Low in calories and naturally low in fat
-
The vinegar may help regulate blood sugar and support gut health
Tip: For an extra nutritional boost, use apple cider vinegar—it adds mild sweetness and natural probiotics, especially when unfiltered.
Ingredients You’ll Need (Quick Notes)
You only need a few pantry staples and fresh produce to get started:
-
Brussels sprouts: Firm, green, and fresh
-
Vinegar: White vinegar for clean flavor or apple cider vinegar for sweetness and added benefits
-
Garlic: Whole cloves for mellow aroma
-
Mustard seeds & peppercorns: Add warm spice and aroma
-
Optional: Red chili flakes for heat, fresh dill for herby depth, sugar to balance tang
Note: Full measurements will be shared in the recipe section below.
Choosing the Best Brussels Sprouts for Pickling
To get the best texture and flavor:
-
Pick small to medium sprouts—they fit better in jars and stay crunchier
-
Look for tight, green leaves with no yellowing or bruising
-
Trim the stem, and peel off outer leaves if they’re damaged
-
If using the hot brine method, blanch the sprouts in boiling water for 2 minutes, then plunge into ice water to lock in color and texture
Cold vs. Hot Pickling: Which Method to Choose?
Each pickling method has its pros:
-
Cold Brine:
-
Pour chilled or room temp brine over raw, prepped sprouts
-
Results: Extra crispy, but takes 3–5 days to absorb flavor
-
Ideal for fridge pickles
-
-
Hot Brine:
-
Boil your brine, pour it hot over the sprouts
-
Results: Faster flavor infusion, slightly softer texture
-
Great for water bath canning
-
Choose cold brine if you’re after crunch. Choose hot brine if you want flavor fast or plan to store jars long-term.
How to Use Pickled Brussels Sprouts (Serving Ideas)
Once you’ve made a batch, the possibilities are endless! Here are some creative and tasty ways to use them:
-
Charcuterie Boards: Add them next to cheeses, olives, and cured meats
-
Bloody Mary Garnish: Swap celery for a bold, briny kick
-
Salads & Grain Bowls: Slice or quarter them for an acidic crunch
-
Tacos & Wraps: They cut through fatty meats like pork belly or brisket
-
Side Dish: Serve with fried chicken, rich casseroles, or grilled steaks
-
Or honestly… just eat them straight from the jar!
Tip: Pair with creamy cheeses like goat or blue cheese and a slice of prosciutto for a next-level snack.
Easy Pickled Brussels Sprouts Recipe (Step-by-Step Guide)
Making pickled Brussels sprouts is easier than you might think. Here’s how to do it at home with simple ingredients and foolproof steps.
Step 1: Clean & Prep
-
Rinse your Brussels sprouts thoroughly.
-
Trim off the stem ends and remove any yellow or damaged outer leaves.
Advertisement -
Optionally blanch them: Boil for 2 minutes, then cool in ice water. This softens them slightly and helps retain their vibrant green color.
Step 2: Make the Brine
In a saucepan, combine:
-
Vinegar (white or apple cider)
-
Water
-
Salt
-
Optional: sugar, garlic, mustard seeds, peppercorns, red chili flakes
Bring the mixture to a gentle boil, then remove from heat.
Step 3: Pack the Jars
-
Place cleaned sprouts into sterilized glass jars.
-
Add garlic cloves, spices, or herbs if you like.
-
Pour hot or room-temperature brine over the sprouts, leaving about ½ inch of headspace.
Step 4: Store or Can
-
Refrigerator Method: Let the jars cool, then seal and refrigerate. They’re ready in 48 hours, but flavor improves after 5–7 days.
-
Canning Method: Process sealed jars in a boiling water bath for 10 minutes for shelf-stable storage.
Pro Tip:
Always use sterilized jars for safety and longer shelf life.
Storage Notes:
-
Fridge pickles: Best within 1–2 months
-
Canned: Lasts up to 1 year in a cool, dark place
Flavor Variations to Try
One of the best things about pickling is how customizable it is. Here are a few fun flavor combinations to experiment with:
-
Spicy Kick: Add red pepper flakes or fresh jalapeño slices
-
Sweet & Tangy: Mix in a tablespoon of sugar and use apple cider vinegar
-
Classic Garlic & Dill: Add fresh dill sprigs and smashed garlic cloves
-
Golden Curry: Sprinkle in turmeric or a dash of curry powder
-
Mediterranean Flair: Use rosemary, thyme, or a bit of lemon zest
Tip: Try small test jars with different flavor combos before committing to a big batch!
Canning Instructions (Water Bath Method)
If you want to store your pickled Brussels sprouts outside the fridge:
-
Use clean, sterilized jars and lids.
-
Fill jars with sprouts and hot brine, leaving ½ inch of headspace.
-
Wipe rims, seal, and submerge jars in boiling water.
-
Process for 10 minutes (add time for higher altitudes: 1–2 extra minutes per 1,000 feet above sea level).
-
Cool and check for proper seals.
Once sealed, store in a cool, dark place for up to 12 months.
How Long to Let Them Sit Before Eating?
-
Cold pickled: Wait 3–5 days before eating
-
Hot pickled: Ready in about 2–3 days
Like most pickled goodies, the flavor deepens over time—they’re usually best after about a week.
Storage Tips & Shelf Life
-
Refrigerated jars: Use within 1 to 2 months
-
Canned jars: Store in a cool, dark spot for up to 1 year
-
Check for spoilage: Toss if you see cloudy brine, smell something funky, or sprouts turn mushy
Always label your jars with the date so you know when they’re ready and when they need to be eaten.
FAQs About Pickled Brussels Sprouts
Do pickled Brussels sprouts need to be refrigerated?
Yes—unless they’ve been properly canned using a hot water bath. Fridge pickles should always be kept cold.
Can I pickle frozen Brussels sprouts?
You can, but they may turn mushy. Fresh is best for crunch and flavor.
Why are my pickled sprouts mushy?
Overcooking or using overripe sprouts can lead to mushy results. Skip the blanching step for firmer pickles.
Are pickled Brussels sprouts good for you?
Absolutely! They’re low in calories, high in fiber, and full of micronutrients like vitamin C and K. The vinegar can also support digestion.
How long do pickled sprouts last in the fridge?
If kept sealed in a clean jar, they can last 1 to 2 months. Just use clean utensils each time you grab some.
Can I reuse the pickling brine?
Not recommended for safety and flavor reasons. Old brine may not preserve properly and will have diluted taste.
Pickled Brussels Sprouts
Equipment
- 2 pint-sized glass jars with lids
- Saucepan
- Cutting board & knife
- Measuring cups and spoons
- Optional: funnel for pouring brine
Ingredients
- 1 lb fresh Brussels sprouts trimmed and halved if large
- 1 cup white vinegar or apple cider vinegar for sweeter flavor
- 1 cup water
- 1 tbsp kosher salt
- 2 garlic cloves peeled and smashed
- 1 tsp mustard seeds
- ½ tsp black peppercorns
Optional:
- ½ tsp red pepper flakes for spice
- 1 tbsp sugar for sweet & tangy
- Fresh dill sprigs
Instructions
- Prepare the Brussels Sprouts: Trim stems and remove loose leaves. Halve large sprouts. Optional: Blanch in boiling water for 2 minutes, then plunge into ice water for crunch and color.
- Make the Brine: In a saucepan, combine vinegar, water, salt, garlic, mustard seeds, and peppercorns. Bring to a boil, then remove from heat.
- Pack the Jars: Divide Brussels sprouts between the jars. Add flavor add-ins if desired (chili flakes, dill, sugar).
- Add the Brine: Pour the hot brine over the sprouts, covering them completely. Leave about ½ inch of headspace.
- Seal and Cool: Let jars cool to room temperature, seal, and refrigerate.
- Wait & Enjoy: Let sit at least 48 hours. Flavor improves over 5–7 days. Enjoy straight from the jar or on your favorite dishes!
Notes
- Use fresh, firm Brussels sprouts for best texture.
- Do not reuse the brine for future batches.
- If you want to can them for shelf storage, use the water bath method and adjust for altitude.
Nutrition
Conclusion
Pickled Brussels sprouts may not be the first thing that comes to mind when you think of pickles—but once you try them, you’ll wonder how you ever lived without a jar in the fridge. They’re crunchy, tangy, and endlessly customizable, whether you like them garlicky, spicy, or herbaceous.
Plus, they’re a fun and easy way to preserve seasonal produce, make the perfect addition to charcuterie boards, and add a flavorful punch to everyday meals.
So whether you’re a pickling pro or a total beginner, give this recipe a go. You’ll not only level up your snack game—you might just convert a Brussels sprout skeptic or two along the way!
Ready to try it? Grab a jar, pick your favorite flavor combo, and get pickling!