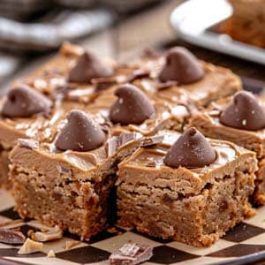
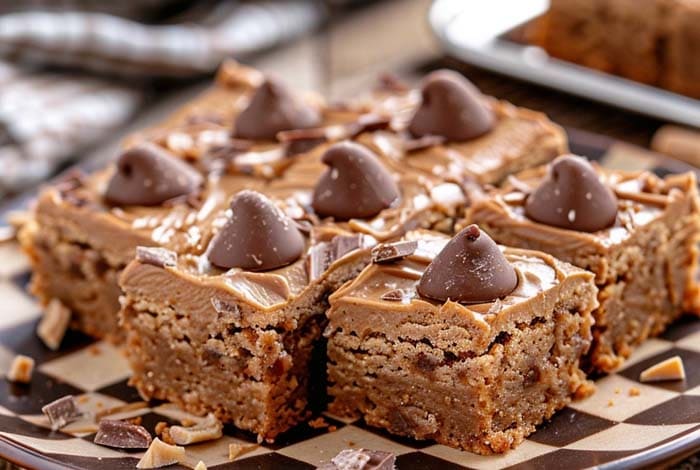
Introduction to Peanut Butter Blossom Bars
Peanut Butter Blossom Bars embody the sweet marriage of peanut butter and chocolate, a duo celebrated across countless desserts but perhaps never more delightfully than in this simple yet irresistible treat. Tracing its lineage to the beloved peanut butter blossom cookies, a staple in American baking since the mid-20th century, these bars simplify the process without sacrificing any of the charm. Originally designed for the ease of baking and sharing during the holidays, their popularity has transcended seasonal boundaries, making them a year-round favorite. Their allure lies not just in the taste but in their nostalgic value and the joy of a homemade treat that appeals to all ages. Perfect for any occasion, from casual gatherings to festive celebrations, Peanut Butter Blossom Bars have cemented their status in the baking repertoire of both novice and experienced bakers alike, offering a testament to the timeless combination of chocolate and peanut butter.
Ingredients List
Creating Peanut Butter Blossom Bars requires a delightful array of ingredients that blend together to form a treat that’s both rich and comforting. The dough, a soft, peanut butter-infused base, starts with staples such as:
- Unsalted butter
- Granulated sugar and brown sugar
- Creamy peanut butter
- An egg
- All-purpose flour
- Baking soda and baking powder
- A pinch of salt
For the chocolatey topping, the recipe embraces versatility, allowing for personal preference or pantry availability to guide the choice of chocolate:
- Hershey’s Kisses for a traditional look and feel
- Milk chocolate chips for a more integrated chocolate experience
- Or peanut butter cups, chopped, offering a double dose of peanut butter indulgence.
This flexibility in chocolate choice ensures that every batch of Peanut Butter Blossom Bars can be tailored to the specific tastes of the baker or recipients, making each pan a unique and personalized treat. Whether you’re a fan of the classic Hershey’s Kisses indentation or prefer the rich, melty goodness of chocolate chips or the decadent addition of peanut butter cups, these bars can accommodate your chocolate preferences, ensuring a delicious result every time.
Step-by-Step Baking Instructions
To create the delectable Peanut Butter Blossom Bars, follow these detailed steps, ensuring a perfect blend of textures and flavors:
- Preparation of Dough: Start by creaming together softened unsalted butter, granulated sugar, brown sugar, and creamy peanut butter until the mixture is smooth and well-combined. This ensures a rich, flavorful base. Beat in an egg to this mixture for added moisture and binding. Separately, whisk together all-purpose flour, baking soda, baking powder, and a pinch of salt for leavening and taste. Gradually mix the dry ingredients into the wet mixture until just combined, avoiding over-mixing to ensure a tender texture. Stir in chocolate chips for added chocolatey goodness throughout the bars.
- Pressing the Dough: Transfer the dough to a greased 9×13-inch baking pan, pressing it evenly across the bottom. This uniform layer serves as the foundation for your bars, so aim for consistency in thickness.
- Baking: Bake in a preheated oven at 350°F for about 20-25 minutes, or until the surface is golden and a toothpick inserted into the center comes out clean. The golden color is your cue that the flavors have melded beautifully and the texture is just right.
- Adding the Chocolate: Immediately after removing from the oven, press Hershey’s Kisses, chocolate chips, or peanut butter cups into the soft, warm top of the bars. If using Hershey’s Kisses, space them evenly to ensure each bar gets its share of chocolate. For a seamless chocolate layer, sprinkle chocolate chips over the top and lightly press them into the dough.
- Cooling and Serving: Allow the bars to cool completely in the pan before cutting into squares. This rest period lets the chocolate set and the bars firm up, making them easier to slice and serve.
Tips for Perfect Texture and Flavor:
- Ensure your butter is softened to room temperature for a smooth dough.
- Press the chocolate into the bars while they’re still warm so it melds slightly with the dough, but allow it to cool completely for the chocolate to set properly.
Variations and Customizations
Peanut Butter Blossom Bars are delightfully versatile, offering numerous possibilities for customization to suit different tastes and dietary needs:
- Chocolate Variations: Beyond the classic Hershey’s Kisses, consider topping your bars with a variety of chocolate types, such as dark chocolate chips for a bittersweet contrast, or white chocolate chips for a creamy twist. Chopped peanut butter cups add an extra layer of peanut butter flavor and a delightful texture.
- Gluten-Free Option: Substitute the all-purpose flour with your favorite gluten-free flour blend to make these bars accessible for those with gluten sensitivities. Ensure that the blend you choose is a 1:1 substitute to maintain the desired texture of the bars.
- Dietary Adaptations: For those catering to vegan preferences, use plant-based butter and a suitable egg substitute. Additionally, ensure your chocolate choice is dairy-free. For a reduced-sugar version, experiment with substituting a portion of the sugar with a sugar alternative, keeping an eye on the texture and flavor adjustments.
These variations and customizations allow you to tailor the Peanut Butter Blossom Bars to fit any preference or dietary requirement, ensuring everyone can enjoy this delightful treat.
Nutritional Information
A serving of Peanut Butter Blossom Bars, based on a recipe that yields 20 bars, contains approximately 249 calories. This nutritional estimate also details the protein at 3.8 grams, fat at 12.4 grams (with 6.7 grams being saturated), carbohydrates at 31.9 grams, and fiber at 1.2 grams per serving. This breakdown provides a comprehensive view of the treat’s nutritional profile, making it easier for individuals to incorporate it into a balanced diet, keeping in mind that these figures can vary based on specific recipe adaptations and portion sizes.
Storage and Freezing Instructions
Peanut Butter Blossom Bars can be stored effectively to maintain their freshness and texture. For short-term storage, keep the bars in an airtight container at room temperature. They will stay fresh for several days when stored this way. For longer storage, these bars can be frozen. Wrap individual bars or a whole batch in plastic wrap, then place them in a freezer bag. They can be frozen for up to 3 months. To enjoy, simply thaw them at room temperature or in the refrigerator. This method ensures that the bars retain their delicious taste and texture over time.
Serving Suggestions
Peanut Butter Blossom Bars are versatile and can be served in various delightful ways. A classic serving suggestion is alongside a cold glass of milk, which complements the richness of the peanut butter and the sweetness of the chocolate perfectly. These bars also pair beautifully with coffee or a latte for a comforting snack or dessert. For a more indulgent treat, serve them with a scoop of vanilla ice cream, allowing the contrast of the cold ice cream with the chewy texture of the bars to create a delightful taste experience.
For entertaining, these bars can be cut into smaller pieces and served as part of a dessert platter alongside other bite-sized treats such as mini cupcakes, chocolate truffles, and fruit skewers. This allows guests to enjoy a variety of flavors. Additionally, these bars can be a festive addition to holiday dessert tables, pairing well with seasonal beverages like hot cocoa or spiced cider, enhancing the cozy, celebratory atmosphere.
Common Mistakes to Avoid
When baking Peanut Butter Blossom Bars, a few common pitfalls can hinder achieving that perfect batch. Here’s how to avoid them:
- Not Softening the Butter: Using butter straight from the refrigerator can result in a dough that’s hard to mix and may affect the texture of the bars. Allow the butter to soften at room temperature before starting your recipe.
- Overmixing the Dough: Once you add the dry ingredients to the wet, mix just until combined. Overmixing can develop the gluten in the flour, leading to tough bars.
- Skipping the Chocolate Press: Forgetting to press the chocolate into the bars immediately after baking can prevent the chocolate from melting slightly and adhering properly to the top. This step is crucial for that signature look and taste.
- Overbaking: Keep a close eye on your bars as they bake. Overbaking can lead to dry, hard bars rather than the moist, chewy texture desired. They should be just set and lightly golden when done.
- Cutting Before Cooling: Allow the bars to cool completely in the pan before slicing into them. Cutting too early can cause them to crumble and lose their shape.
FAQs
- Can I make Peanut Butter Blossom Bars gluten-free? Yes, you can easily make these bars gluten-free by substituting the all-purpose flour with a gluten-free flour blend designed for 1:1 substitution. Ensure all other ingredients used are gluten-free as well.
- How can I ensure my bars are moist and not dry? To prevent dry bars, ensure not to overbake them. They should be removed from the oven as soon as they are set and lightly golden. Also, make sure your measurements, especially for the flour and peanut butter, are accurate.
- Can I freeze Peanut Butter Blossom Bars? Absolutely! These bars freeze well. Wrap them tightly in plastic wrap and place them in a freezer-safe bag. They can be stored for up to 3 months. Thaw at room temperature before serving.
- What can I use if I don’t have Hershey’s Kisses? If you don’t have Hershey’s Kisses, you can substitute with chocolate chips or chopped chocolate bars for a similar chocolatey effect. Peanut butter cups also make a delicious topping alternative.
- Are there any variations to the classic recipe? For a twist, try adding a layer of jam before pressing in the chocolate, or sprinkle the top with coarse sea salt for a sweet and salty flavor profile. Incorporating different types of chocolate or adding nuts to the dough are other great ways to customize your bars.
By addressing these common concerns and mistakes, you can enhance your baking experience and enjoy perfect Peanut Butter Blossom Bars every time.

Peanut Butter Blossom Bars Recipe
Equipment
- 9x13 inch baking pan
- Mixing bowls
- Electric mixer (optional)
- Spatula
Ingredients
- Unsalted butter
- Granulated sugar
- Brown sugar
- Creamy peanut butter
- Egg
- All-purpose flour
- Baking soda
- Baking powder
- Salt
- Chocolate of choice Hershey's Kisses, chocolate chips, or peanut butter cups
Instructions
- Preheat your oven and prepare the baking pan.
- Cream together the butter, sugars, and peanut butter until smooth. Beat in the egg.
- Whisk the dry ingredients separately, then gradually combine with the wet ingredients. Mix in chocolate chips if using.
- Press the dough evenly into the pan and bake until golden. Press in your choice of chocolate topping while the bars are still warm.
- Allow to cool completely before cutting into bars.
Notes
- Softening the butter at room temperature ensures a smooth dough.
- Be careful not to overmix the dough to keep the bars tender.
- For a gluten-free version, use a 1:1 gluten-free flour substitute.
- These bars can be frozen for up to 3 months for extended enjoyment.

