Why Everyone Loves Old Fashioned Sour Cream Donuts
There’s something incredibly nostalgic about biting into an Old Fashioned Sour Cream Donut. That slightly crisp, golden exterior paired with a soft, tender crumb inside? Pure comfort. These donuts bring back memories of cozy weekend mornings, coffee shop runs, or even grandma’s kitchen.
Unlike yeasted donuts that are light and airy, old fashioned donuts are cakey, dense, and rich—perfect for dunking into a hot cup of coffee or tea. They’re made without yeast, so there’s no long proofing process, making them a great project for weekend bakers or those looking to whip up a satisfying homemade treat.
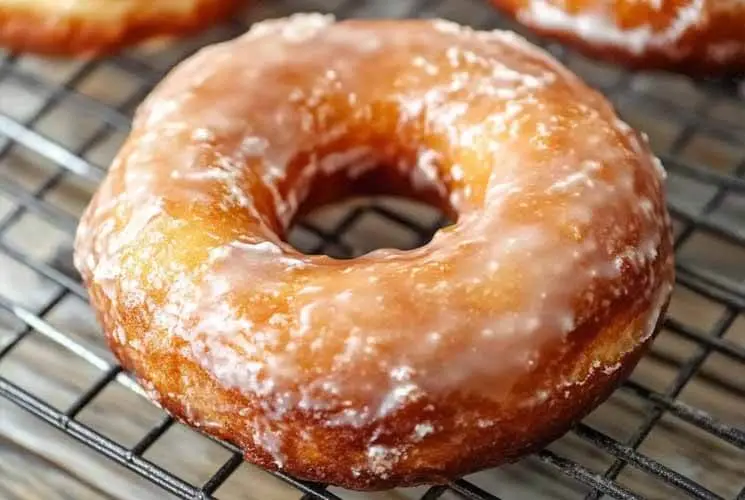
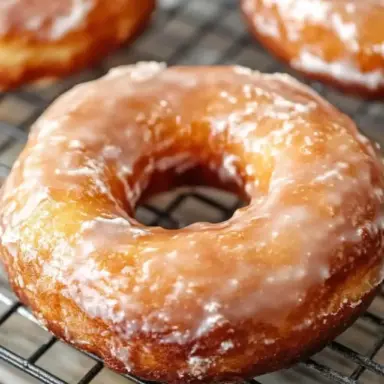
The best part? That telltale crackly top and a simple vanilla glaze that soaks into all the little crevices. Whether you’re new to frying or a seasoned donut lover, these donuts hit the sweet spot between old-school charm and homemade goodness.
What Makes These Donuts “Old Fashioned”?
So what exactly sets these donuts apart from other varieties? The secret is all in the technique—and the ingredients. Old fashioned sour cream donuts are made with baking powder instead of yeast, which gives them a denser, more cakey texture. No need to wait hours for dough to rise!
Instead of milk, sour cream is used as the star dairy ingredient, lending a slightly tangy flavor and extra moist crumb. You’ll also notice they have slightly crisp, craggy edges—that’s not a flaw, that’s their trademark look. When fried just right, the surface splits and cracks beautifully.
These donuts also carry that timeless bakery flavor, often enhanced with a touch of nutmeg or vanilla. It’s a taste that feels like it’s been passed down for generations.
Bold Tip: Letting the dough chill for at least an hour helps it firm up, develop flavor, and makes it easier to roll and cut.
Ingredients You’ll Need
The ingredient list is simple, but quality matters. Here’s what you’ll need to make a batch of delicious old fashioned sour cream donuts:
-
All-purpose flour: Gives structure without being too heavy.
-
Granulated sugar: For sweetness and caramelization.
-
Sour cream: The hero ingredient—adds moisture and tang. Full-fat works best.
-
Eggs: For richness and structure.
-
Unsalted butter: Adds flavor and tenderness.
-
Baking powder: The leavening agent that gives these donuts lift without yeast.
-
Salt: To balance sweetness.
-
Nutmeg: Traditional spice that gives a nostalgic bakery flavor.
Optional Add-ins:
-
Vanilla extract: Deepens the flavor.
-
Lemon zest: Adds a fresh twist if desired.
Ingredient Tips:
-
Use fresh nutmeg if possible—it makes a noticeable difference.
-
Let eggs and sour cream come to room temperature before mixing for better blending.
-
Don’t substitute baking soda unless adjusting for acid—baking powder is key here.
Making the Dough Step-by-Step
Making the dough is simple, but there are a few techniques to keep it tender and easy to work with.
Step 1: Cream the butter and sugar
Start by creaming together softened butter and sugar until light and fluffy. This creates air pockets that help with the donut’s lift.
Step 2: Add wet ingredients
Mix in the eggs one at a time, followed by the sour cream and any flavorings (like vanilla). The mixture should be smooth and creamy.
Step 3: Combine dry ingredients
In a separate bowl, whisk together the flour, baking powder, salt, and nutmeg. Then slowly add the dry ingredients to the wet mixture, mixing until just combined.
The dough will be sticky but should hold its shape. Avoid overmixing—this will toughen the donuts.
Step 4: Chill the dough
Cover and refrigerate the dough for at least 1 hour (or up to overnight). This firms up the butter, making the dough easier to roll and cut, and enhances flavor.
Pro Tip: Dust your hands and rolling surface lightly with flour to prevent sticking—but don’t add too much or the dough will dry out.
Shaping and Cutting the Donuts
Once your dough is well-chilled, it’s time to shape those beauties!
Roll out the dough on a lightly floured surface to about ½ to ¾ inch thick. Thicker dough creates that signature cracked top when fried, so don’t go too thin.
Use a donut cutter if you have one. If not, a round biscuit cutter and a smaller cutter (or bottle cap) for the center will work perfectly. Every center you cut becomes a bonus donut hole—don’t waste them!
Gently transfer the cut donuts and holes onto a parchment-lined baking sheet. Let them sit at room temperature for a few minutes while you heat your oil. This little rest time helps prevent them from shrinking or cracking oddly when they hit the oil.
Don’t overwork the dough. Re-rolling it too many times can make the donuts tough, so gather scraps only once for a final roll.
How to Fry Old Fashioned Sour Cream Donuts
Frying your sour cream donuts is where the magic really happens. It’s what gives them that signature cracked golden crust and a deep, bakery-style flavor you can’t get from baking.
Start by heating a neutral oil like vegetable or canola oil in a deep pan or Dutch oven. You’ll want to keep the temperature steady between 325°F and 340°F (165–170°C)—any hotter and the outside will brown too quickly while the inside stays raw.
If you don’t have a thermometer, drop in a small piece of dough. It should sizzle and rise to the top within a few seconds—not too fast, not too sluggish.
Fry the donuts 2–3 at a time for about 2 minutes per side, flipping once golden brown. Donut holes may need slightly less time.
The cracks and splits that form as they fry? That’s what gives these donuts their classic, rustic charm.
Bold Tip: Drain fried donuts on a wire rack lined with paper towels to avoid soggy bottoms and greasy fingers.
Best Glazes for Sour Cream Donuts
A great donut deserves a great glaze—and these old fashioned sour cream donuts pair beautifully with a few classics.
Vanilla Glaze:
A simple mix of powdered sugar, milk, and vanilla extract. It’s sweet, smooth, and lets the donut shine.
Chocolate Glaze:
Melt semi-sweet chocolate with a bit of cream and butter for a rich, fudgy finish. Perfect for chocoholics.
Maple Glaze:
Whisk powdered sugar, real maple syrup, and a dash of vanilla for a warm, cozy glaze with depth.
How to glaze:
Dip each cooled donut halfway into the glaze, then let the excess drip off. Place back on a rack so the glaze can set properly—usually about 10 minutes.
Avoid glazing too early. If the donuts are still hot, the glaze will melt and slide right off.
For a fun touch, try drizzling two glazes on top of each other or adding crushed nuts or sprinkles before the glaze sets.
Fun Variations You Can Try
Once you’ve mastered the classic version, try putting your own spin on these donuts:
-
Spiced Donuts: Add a teaspoon of cinnamon or allspice to the dough for a warm, bakery-style twist.
-
Lemon Glazed: Mix lemon zest into the batter and finish with a tangy lemon glaze for a refreshing take.
-
Chocolate Chip Donut Holes: Fold in mini chocolate chips and fry as bite-sized holes—kids love these!
-
Mini Donuts: Use a cake pop maker or mini donut pan for baked mini versions if you’re looking to skip frying.
Feel free to experiment. The base dough is very forgiving and works well with different flavorings and mix-ins.
Make-Ahead and Storage Tips
Need to prep ahead? No problem.
-
Make the dough the night before and refrigerate. It’ll be easier to roll and shape the next day.
-
Once fried, donuts are best eaten within 1–2 days. Store them in an airtight container at room temperature.
-
If they lose their crispness, just microwave for 8 seconds or warm in a toaster oven to revive them.
Freezing tips:
Un-glazed donuts freeze beautifully. Let them cool completely, then place in a freezer-safe bag with parchment paper between layers. Thaw at room temp and glaze just before serving for a fresh-from-the-fryer feel.
This recipe is perfect for doubling and freezing a batch for spontaneous donut cravings!
Common Mistakes to Avoid
Even simple recipes can go sideways without a few pointers. Here’s how to dodge common donut mishaps:
-
Oil too cold? Donuts soak up excess oil and come out greasy. Always test the temp before frying.
-
Overmixing the dough toughens it. Mix just until combined to keep that crumb soft and cakey.
-
Rolling too thin? You’ll end up with flat, dry donuts that don’t puff or crack. Aim for at least ½ inch thick.
-
Glazing too soon means the coating won’t stick—it’ll melt into a mess. Let donuts cool first.
A little patience and attention go a long way in getting those perfectly golden, bakery-worthy results.
Frequently Asked Questions (FAQs)
What is the difference between cake donuts and yeast donuts?
Cake donuts, like these sour cream ones, use baking powder for lift instead of yeast. They’re denser, more crumbly, and have a slight crispness on the outside. Yeast donuts are lighter, puffier, and require rising time.
Can I bake these donuts instead of frying?
You can, but the results will be more like dense muffins than true donuts. You’ll miss out on the crackly edges and rich flavor that comes from frying. For a healthier twist, try making mini donuts in a cake pop or donut pan.
Why did my sour cream donuts turn out dry?
This usually happens when the dough is overmixed or the donuts are overcooked. Use a light hand when mixing, and watch the oil temperature closely to avoid over-frying.
Can I use Greek yogurt instead of sour cream?
You can substitute Greek yogurt 1:1, but it will change the texture slightly. Greek yogurt is thicker and less fatty, which can lead to a slightly drier donut. Sour cream gives the most authentic flavor and moist crumb.
Old-Fashioned Sour Cream Donuts
Equipment
- Mixing bowls
- Electric mixer
- Donut cutter or biscuit cutter
- Rolling Pin
- Candy/deep fry thermometer
- Slotted spoon or tongs
- Wire rack
- Heavy pot or Dutch oven
- Parchment paper
Ingredients
For the Donuts:
- 2 ¼ cups all-purpose flour
- 1 tsp baking powder
- ½ tsp salt
- ½ tsp ground nutmeg
- ½ cup unsalted butter softened
- ¾ cup granulated sugar
- 2 large egg yolks
- ⅔ cup full-fat sour cream
- 1 tsp vanilla extract optional
For the Vanilla Glaze:
- 2 cups powdered sugar
- 2 –3 tbsp milk
- ½ tsp vanilla extract
Instructions
- Mix Dry Ingredients: In a bowl, whisk flour, baking powder, salt, and nutmeg.
- Cream Butter & Sugar: In another bowl, beat butter and sugar until fluffy.
- Add Yolks & Sour Cream: Mix in egg yolks, sour cream, and vanilla (if using) until combined.
- Combine: Gradually add dry ingredients to wet, mixing until dough forms (it will be sticky).
- Chill: Cover and refrigerate dough for at least 1 hour.
- Roll & Cut: On floured surface, roll dough to ½–¾ inch thickness. Cut with donut cutter.
- Heat Oil: In a heavy pot, heat oil to 325–340°F (165–170°C).
- Fry Donuts: Fry 2–3 at a time, about 2 minutes per side. Donut holes cook faster.
- Drain: Remove with tongs, place on paper-towel-lined rack. Cool completely.
- Glaze: Mix glaze ingredients, dip cooled donuts, and let set on rack.
Notes
- Chill thoroughly for easy rolling and better texture.
- Don’t overmix the dough—gentle mixing = tender donuts.
- Nutmeg gives authentic bakery flavor—don’t skip it!
- Store unglazed donuts for freezing and glaze after reheating.
- Make chocolate or maple glaze for fun twists.
Nutrition