
Introduction to Old Fashioned Fudge Icing
When you hear old fashioned fudge icing, you can almost taste the sweet nostalgia. It’s the kind of rich, chocolatey goodness your grandmother might have made — thick, glossy, and just the right balance between creamy and slightly fudgy. What makes it “old fashioned” isn’t just the ingredients; it’s the method. Instead of whipping up something quick with powdered sugar and butter, this icing is cooked gently on the stove, creating a deep, caramelized chocolate flavor you just can’t fake.
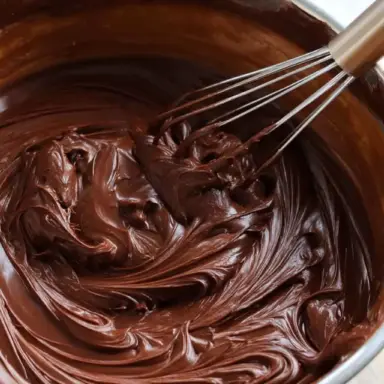
There’s something magical about the process. The bubbling of cocoa and sugar, the careful watch over the boiling stage, the satisfying moment when it sets into a smooth, luscious spread — it feels like a labor of love. Old fashioned fudge icing holds a nostalgic charm because it’s from a time when baking was a cherished ritual, not a race against the clock.
The classic flavor is deeply chocolatey without being overly sweet, and the texture is thick but not heavy, with a velvety smoothness that melts into every bite of cake. It’s the perfect finish for a celebration cake or a simple Sunday dessert.
What is Old Fashioned Fudge Icing?
Old fashioned fudge icing is a cooked chocolate frosting that’s made by heating sugar, cocoa, butter, and milk together until thick and glossy, then beating it to a spreadable consistency. It’s thicker than a glaze but not as stiff as candy fudge — it strikes a perfect middle ground, setting slightly as it cools but staying beautifully soft on your cake.
Unlike modern frostings, which often rely on powdered sugar or premade shortcuts, this icing requires a little more patience and technique. It’s about timing, stirring, and feeling the texture transform, almost like making candy but easier and more forgiving.
You’ll usually find old fashioned fudge icing slathered on traditional chocolate cakes, fluffy yellow cakes, rich pound cakes, and even brownies. It’s loved for the way it creates a satiny, fudgy layer that doesn’t just sit on top but becomes one with the cake, enhancing every bite with old-school charm.
Key Ingredients You’ll Need
You don’t need anything fancy for old fashioned fudge icing — just a few simple pantry staples:
-
Butter: Always use real butter. It adds unbeatable richness and helps the icing set.
-
Cocoa Powder: Unsweetened cocoa powder is the star. Tip: Use high-quality Dutch-process cocoa for a smoother, deeper chocolate flavor.
-
Sugar: Granulated white sugar is essential for creating that soft fudge texture.
-
Milk: Whole milk works best for a creamy finish, but you can swap in evaporated milk for a thicker, slightly caramelized flavor.
-
Vanilla Extract: A splash of vanilla balances out the cocoa’s intensity and rounds out the flavor.
Important Tip: Choose the best cocoa powder you can find — it truly makes the difference between a good fudge icing and a jaw-droppingly delicious one!
Step-by-Step: How to Make Old Fashioned Fudge Icing
Step 1: Prep Your Ingredients Before you turn on the heat, have everything measured and ready to go. Timing matters once things start cooking!
Step 2: Combine and Cook In a heavy saucepan, combine the butter, cocoa powder, sugar, and milk. Place it over medium heat and stir constantly. As it heats, the mixture will melt together into a smooth chocolate river.
Step 3: Bring to a Boil Let it gently boil for about 1-2 minutes, stirring all the while. Important Tip: Never walk away! Boiling sugar can go from perfect to scorched in seconds.
Step 4: Check for Soft-Ball Stage You want the mixture to reach the soft-ball stage (around 235°F/112°C). If you don’t have a thermometer, drop a tiny bit into cold water — if it forms a soft, pliable ball, it’s ready.
Step 5: Remove and Beat Take the pan off the heat. Add the vanilla extract and let it cool slightly — about 5 minutes. Then beat the mixture until it thickens to a spreadable consistency. This can take 2–5 minutes by hand or mixer.
Troubleshooting Common Issues:
-
Gritty icing? You may have cooked it too long or stirred too little.
-
Too stiff to spread? Add a teaspoon or two of warm milk and beat again.
-
Too runny? Keep beating; it often thickens as it cools.
Tips for Perfect Fudge Icing Every Time
Watch the Cooking Time Carefully Overcooking = dry, gritty icing. Undercooking = thin, runny icing. Keep a close eye once it starts boiling!
Stir Constantly From the moment you place the pan on heat, stir gently but steadily. It keeps the sugar dissolving evenly and prevents scorching.
Cool Slightly Before Beating Give the mixture a few minutes off the heat before you start beating. This helps it set up properly without becoming grainy.
Test Without a Thermometer Don’t have a candy thermometer? No problem. Drop a little fudge into a cup of cold water. If it forms a soft ball you can squish between your fingers, it’s ready.
Best Cakes to Pair with Old Fashioned Fudge Icing
Old fashioned fudge icing shines brightest when paired with moist, simple cakes that let its deep chocolate flavor take center stage:
-
Classic Chocolate Cake: Double down on chocolate for the ultimate crowd-pleaser.
Advertisement -
Yellow Cake: The sweet vanilla base contrasts beautifully with the rich icing.
-
Texas Sheet Cake: This Southern favorite practically demands a fudgy topping.
-
Pound Cake: The dense, buttery crumb of pound cake makes it a dreamy canvas for thick fudge icing.
Pro Tip: Apply the icing while the cake is still slightly warm — it spreads easier and creates a luscious, almost ganache-like layer.
Variations on the Classic Fudge Icing Recipe
Once you master the basic old fashioned fudge icing, you can have a little fun and put your own spin on it!
-
Adding Espresso Powder for Depth: A teaspoon of instant espresso powder deepens the chocolate flavor without making it taste like coffee. It’s a secret ingredient many bakers swear by!
-
Swapping Milk for Cream: If you want an even richer, silkier icing, substitute heavy cream for milk. It creates a slightly thicker texture and adds luxurious richness.
-
Nutty Fudge Icing: Fold in ½ cup of chopped pecans or walnuts after beating the icing. Important Tip: Toast the nuts first to bring out their flavor and keep them crunchy.
-
Vegan-Friendly Fudge Icing Ideas: Use a plant-based butter and unsweetened almond milk or oat milk. Choose a high-quality vegan cocoa powder, and you’ll have a delicious dairy-free version that no one will even guess is vegan!
Storing and Freezing Fudge Icing
If you somehow end up with leftovers (lucky you!), here’s how to keep your fudge icing fresh:
-
At Room Temperature: If you’re using it within a day, you can leave the iced cake or the icing itself at cool room temperature, tightly covered.
-
In the Refrigerator: For longer storage, refrigerate the icing in an airtight container. It can firm up, so before using, let it come to room temp and stir gently to bring back its creamy texture.
-
Freezing Tips: Freeze the icing in a freezer-safe container, pressing a piece of plastic wrap directly on the surface to prevent freezer burn. Thaw overnight in the refrigerator, then let it sit at room temperature and re-beat until smooth before using.
Common Mistakes to Avoid When Making Fudge Icing
Even seasoned bakers can slip up! Here are the top pitfalls to dodge:
-
Overcooking the Sugar: Going past the soft-ball stage can lead to a hard, grainy icing. Use the water test or a candy thermometer to stay on track.
-
Not Beating Enough After Cooking: If you stop beating too soon, the icing will stay runny. Important Tip: Keep beating until it thickens visibly!
-
Adding Cold Milk: If you add cold milk mid-process (especially to thin icing), it can cause the fudge to seize. Always warm your milk slightly if you need to adjust consistency.
FAQs About Old Fashioned Fudge Icing
Here are quick answers to some of the most common fudge icing dilemmas:
Why is my fudge icing grainy?
Graininess usually happens when the sugar wasn’t fully dissolved or the icing was cooked too long. Stir constantly and cook only to the soft-ball stage.
Can you fix overcooked fudge icing?
Sometimes! Try stirring in a few teaspoons of warm milk to loosen it up. If it’s too crystallized, though, it might be best to start fresh.
How do you know when fudge icing is ready?
After beating, the icing should thicken enough to spread but not so much that it hardens immediately. It should hold soft peaks and look glossy.
Can you make fudge icing ahead of time?
Yes! Store it in an airtight container in the fridge for up to 4–5 days. Let it come to room temperature and stir well before spreading.
Does fudge icing harden on cake?
It will set into a soft, slightly firm layer — not crunchy or candy-like, but enough to hold its shape beautifully.
Final Thoughts: Why You’ll Fall in Love With This Old-School Treat
There’s something so wonderfully imperfect and charming about old fashioned fudge icing. It doesn’t aim for the hyper-smooth, overly sweet frostings we often see today. Instead, it brings you rich flavor, a little nostalgia, and a lot of heart.
Bringing back these vintage desserts makes baking feel personal again — a way to connect with the generations who stirred pots of cocoa and sugar before us. Whether it’s for a birthday, a potluck, or just a Tuesday night treat, this icing is sure to make your cakes unforgettable.
Old Fashioned Fudge Icing Recipe
Equipment
- Heavy-bottom saucepan
- Wooden spoon or heatproof spatula
- Hand mixer (optional for beating)
- Candy thermometer (optional but helpful)
- Measuring cups and spoons
- Mixing bowl
Ingredients
- ½ cup 1 stick unsalted butter
- 1/3 cup unsweetened cocoa powder
- 2 cups granulated sugar
- ½ cup whole milk
- 1 teaspoon vanilla extract
- Pinch of salt optional, enhances flavor
Instructions
- In a heavy-bottom saucepan, combine the butter, cocoa powder, sugar, and milk.
- Place the saucepan over medium heat, stirring constantly until the mixture melts and becomes smooth.
- Bring the mixture to a gentle boil. Boil for 1–2 minutes, stirring constantly. Important: Don’t overcook!
- Remove from heat. Add the vanilla extract and stir.
- Let the mixture cool slightly for 5 minutes.
- Beat the mixture with a spoon or hand mixer until it thickens to a spreadable consistency (about 2–5 minutes).
- Immediately spread the fudge icing over your cake or cupcakes before it fully sets.
Notes
- Use quality cocoa powder for the best chocolate flavor.
- If the icing sets too quickly, warm it gently and stir to loosen.
- To test for soft-ball stage without a thermometer, drop a little icing into cold water — it should form a soft, pliable ball.
- This icing sets firm but stays creamy when you cut into the cake — not hard or crunchy.
- Add ½ cup toasted chopped pecans or walnuts for a delicious crunchy twist.
Nutrition