There’s something undeniably heartwarming about Jelly Thumbprint Cookies. Maybe it’s the nostalgic scent of buttery dough filling the kitchen, or the sparkle of ruby-red jam nestled in each cookie’s center. These little delights have graced cookie trays for generations — especially around the holidays — but they’re just as lovely for a rainy afternoon or cozy tea break.
What sets them apart? Their simplicity. A soft, buttery base and a center filled with your favorite jelly — they’re elegant yet easy, beautiful yet effortless.
Whether you’re an experienced baker or just getting started, thumbprint cookies offer a fun and rewarding way to get creative in the kitchen. You can switch up the flavors, make them gluten-free, or turn them into edible gifts that’ll make anyone smile.
So, preheat your oven and grab your favorite jar of jam — let’s bake these together!
What Are Jelly Thumbprint Cookies?
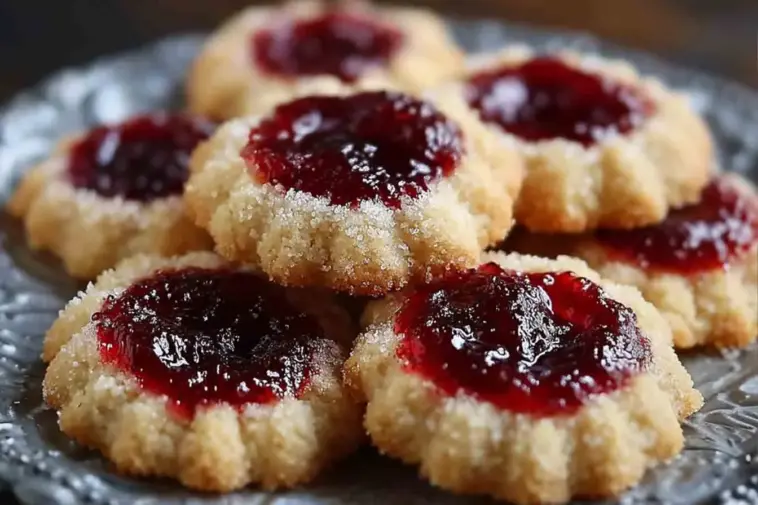
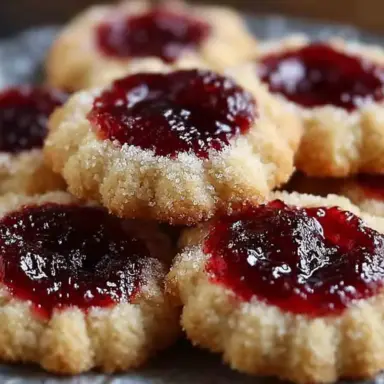
Jelly Thumbprint Cookies are soft, buttery cookies with a small indentation — traditionally made with your thumb — filled with jelly, jam, or preserves. Think of them as a cross between a shortbread and a sweet surprise, where every bite offers a melt-in-your-mouth texture and a burst of fruity flavor.
They’re closely related to hallongrotta, a classic Swedish cookie that translates to “raspberry cave.” While the Swedish version sticks to raspberry jam, modern thumbprints are versatile — you’ll see everything from apricot and blackberry to lemon curd and chocolate ganache.
What makes them timeless is their simplicity. Just a handful of pantry staples come together to create something beautiful, festive, and irresistibly good. They’re a mainstay during the holidays, cookie swaps, and homemade gift baskets — but honestly, once you bake a batch, you’ll want them all year long.
Key Ingredients for Perfect Jelly Thumbprint Cookies
To get the perfect thumbprint cookie — tender, flavorful, and beautifully shaped — you’ll need a few baking basics done right.
-
Butter: Always use unsalted butter so you can control the salt content. Room temperature is key — it should be soft enough to press a finger into but not greasy. This ensures smooth creaming with sugar.
-
Sugar: Granulated sugar is the go-to, giving the cookies structure and just the right amount of sweetness. Some recipes call for powdered sugar for a more delicate crumb — but granulated offers that classic shortbread bite.
-
Flour: All-purpose flour keeps things simple. Sifting isn’t strictly necessary, but it helps avoid clumps for an even dough.
-
Egg yolks: These add richness and tenderness. Some recipes omit whites entirely to prevent a rubbery texture.
-
Vanilla extract or almond? That’s up to your taste! Almond gives a classic cookie flavor — vanilla keeps it warm and buttery.
-
Jelly or Jam: The real star of the show. Choose thick, smooth options that won’t melt too much during baking. Seedless raspberry, strawberry, apricot, and blackberry are all crowd-pleasers.
Each of these ingredients plays a part in achieving the perfect bite — soft yet structured, sweet but not overly so, and buttery with just enough sparkle.
Best Jam Choices for Jelly Thumbprint Cookies
The question every thumbprint baker eventually asks: Which jelly or jam should I use?
Let’s break it down:
-
Jelly is clear and smooth — made from fruit juice and ideal for clean centers that hold their shape.
-
Jam is thicker and made with crushed fruit, offering a richer flavor but sometimes a chunkier texture.
-
Preserves contain whole fruit pieces and are generally too thick and sticky for this recipe.
For the best results, stick with smooth, seedless varieties. You want something that won’t run or bubble over during baking. If your favorite jam is a bit runny, no worries — just heat it slightly in a saucepan and reduce it for a few minutes until it thickens.
Pro Tip: Let your jelly cool before spooning it into the cookies to avoid overspreading.
Choose flavors that complement your dough. Classic? Go raspberry. Feeling bright? Try apricot. Want cozy? Blackberry all the way.
Fun Variations of Jelly Thumbprint Cookies
Once you’ve mastered the classic thumbprint cookie, it’s time to have fun with flavor twists. These variations can make your cookies stand out on any dessert table:
-
Nutty Coating: Roll the dough balls in finely chopped pecans, almonds, or walnuts before pressing the center. Adds crunch and a rich flavor contrast.
-
Chocolate Drizzle or Dip: After the cookies have cooled, drizzle with melted dark or white chocolate. Want something more decadent? Dip half of the cookie in chocolate and let it set.
-
Lemon Zest in the Dough: A little lemon zest mixed into the dough adds a bright citrusy kick that pairs beautifully with raspberry or blackberry jam.
-
Use a Curd Instead of Jelly: Lemon curd, mango curd, or even passionfruit can replace jam entirely for a gourmet twist.
Don’t be afraid to get creative — just keep the base dough consistent, and the possibilities are endless!
Common Jelly Thumbprint Cookie Mistakes to Avoid
Even the simplest cookies can trip you up — especially when you’re aiming for picture-perfect thumbprints. Here are a few common issues (and how to fix them):
-
Cookies spreading too much? That’s usually because the dough wasn’t chilled. Let it rest in the fridge for at least 30–60 minutes before shaping. Cold dough = cookies that hold their shape.
-
Cracks forming around the edges? Your dough might be too dry. Try adding a tiny splash of milk or ensuring your butter isn’t too cold when mixing.
-
Jelly overflow or disappearing into the dough? Use thick jam and only about ½ teaspoon per cookie. Another trick: bake the cookies halfway, then spoon in the jam and return to the oven to finish baking. This prevents burning or bubbling over.
-
Uneven indentations? If you’re not confident using your thumb, a ½ teaspoon measuring spoon or the back of a rounded utensil gives a clean, consistent shape.
Bonus Tip: Always bake a test cookie first! That one little trial run can save you a whole batch from going sideways.
How to Bake Jelly Thumbprint Cookies (Step-by-Step)
Let’s get baking! Follow these steps to create perfect Jelly Thumbprint Cookies every time:
-
Cream the butter and sugar
In a large bowl, beat room temperature unsalted butter and granulated sugar together until the mixture is light, fluffy, and pale — about 2–3 minutes. This step creates that soft, tender crumb. -
Add egg yolks and vanilla
Mix in the egg yolks and vanilla extract (or almond, if preferred) until fully incorporated. The yolks bring richness and help bind the dough. -
Incorporate the flour gradually
Add the all-purpose flour a bit at a time. Don’t overmix — just enough to form a soft dough. If it seems dry, add a splash of milk. -
Chill the dough
Wrap the dough in plastic wrap and refrigerate for at least 30–60 minutes. Chilling helps prevent spreading and firms up the butter for better shape. -
Roll into balls
Scoop about 1 tablespoon of dough and roll into smooth balls using your palms. If the dough is sticky, lightly flour your hands.Advertisement -
Make the indentation
Use your thumb or the back of a ½ teaspoon to gently press an indent in the center of each dough ball. -
Add the jelly
Fill each indent with about ½ teaspoon of thick, seedless jam. Don’t overfill — it will bubble over in the oven. -
Bake
Bake at 350°F (175°C) for 12–14 minutes, or until the edges are just golden. The centers should remain pale and soft. -
Cool
Let the cookies cool on the tray for 5 minutes, then transfer to a rack to cool completely.
Tip: If the centers puff up during baking, gently press them down with the back of a spoon while still warm.
Storing Jelly Thumbprint Cookies
Freshly baked Jelly Thumbprint Cookies are best enjoyed within a few days — but they store beautifully with the right care:
-
Room temperature: Keep them in an airtight container for up to 5–7 days. Place parchment between layers to prevent sticking.
-
Freezing baked cookies: Let them cool completely. Freeze on a baking sheet, then transfer to a zip-top bag or container. They’ll keep for up to 2 months. Thaw at room temp.
-
Freezing the dough: Yes, you can! Roll into balls, make indentations, then freeze unbaked on a tray. Once firm, store in a bag. Bake from frozen — just add an extra 2–3 minutes.
These cookies are incredibly freezer-friendly, making them perfect for prepping ahead during the holidays or for gifting.
Perfect for Gifting & Occasions
Jelly Thumbprint Cookies aren’t just delicious — they’re adorable and gift-worthy too!
They fit beautifully into:
-
Holiday cookie boxes
-
Wedding or baby showers
-
Tea parties and brunches
-
“Just because” treat bags
Their jewel-toned centers and delicate texture make them feel extra special, even though they’re easy to make in bulk.
Wrap them up in parchment, place in a clear bag, and tie with twine or ribbon. Add a handwritten label with the jam flavors used — it’s a personal touch your friends and family will love.
Troubleshooting Guide: What Went Wrong?
Every baker runs into hiccups — here’s how to fix common thumbprint cookie issues:
-
Dough is too crumbly?
Add a teaspoon of milk or gently knead until it holds together. -
Cookies are too soft or fragile?
They may be underbaked or contain too much jam. Stick to ½ teaspoon per cookie. -
Flat, spread-out cookies?
That’s usually from overmixing the dough or skipping the chilling step. Always chill! -
Jelly disappeared or ran off?
Use a thicker jam, or partially bake the cookies first, then add the jelly and return them to the oven to finish.
Don’t be discouraged — even “flawed” thumbprint cookies are still delicious.
Expert Tips to Elevate Your Cookies
Want bakery-quality results? Try these expert upgrades:
-
Line baking trays with silicone mats or parchment to prevent sticking and promote even baking.
-
Brown your butter before cooling and using it for a richer, nutty flavor twist.
-
Dust cooled cookies with powdered sugar for a classic look and light sweetness.
-
Add a pinch of flaky sea salt to the jelly center for a sweet-salty contrast that’s absolutely irresistible.
Even small touches can turn this simple cookie into something extraordinary.
FAQs
Can I use any kind of jam for thumbprint cookies?
Yes — but make sure it’s thick and seedless so it doesn’t run or boil over. Classic options include raspberry, apricot, and strawberry.
Why do my thumbprint cookies crack?
Cracks often come from dry dough or skipping the chill time. You can fix it by adding a bit more butter or a splash of milk, and always chill the dough for best results.
Should jelly go in before or after baking?
You can do either!
-
Before baking: Jelly sets into the cookie.
-
After baking: Jelly stays bright and fresh-tasting (great for curds too).
You can also do a hybrid: add halfway through baking.
How do you keep thumbprint cookies from spreading?
Be sure to chill the dough thoroughly, and avoid overmixing after adding the flour.
Can I make these cookies gluten-free?
Yes! Use a 1:1 gluten-free flour blend. The dough may be slightly softer, so chill it a bit longer.
Jelly Thumbprint Cookies
Equipment
- Mixing bowls
- Hand mixer or stand mixer
- Measuring cups/spoons
- Rubber spatula
- Baking sheet
- Parchment paper or silicone baking mat
- ½ teaspoon measuring spoon or your thumb
- Wire cooling rack
Ingredients
- 1 cup 226g unsalted butter, room temperature
- ½ cup 100g granulated sugar
- 2 large egg yolks
- 1 teaspoon vanilla extract or almond extract
- 2 cups 240g all-purpose flour
- ¼ teaspoon salt optional, if using unsalted butter
- ~½ cup thick jelly or jam raspberry, apricot, etc.
Instructions
- In a large bowl, cream butter and sugar together until light and fluffy (2–3 minutes).
- Mix in egg yolks and vanilla extract until well combined.
- Add flour gradually and mix until a soft dough forms. Avoid overmixing.
- Chill the dough for 30–60 minutes.
- Preheat oven to 350°F (175°C). Line baking sheets with parchment.
- Roll dough into 1-inch balls and place 2 inches apart on baking sheets.
- Make an indentation in the center of each ball using your thumb or a ½ teaspoon.
- Fill each indentation with ½ tsp of jam or jelly.
- Bake for 12–14 minutes, until edges are lightly golden.
- Cool on tray for 5 minutes, then transfer to a wire rack to cool completely.
- Optional: Dust with powdered sugar once cooled or drizzle with melted chocolate.
Notes
- For a firmer filling, reduce jelly on the stovetop before using.
- Dough can be frozen in advance (shaped but unbaked).
- Try lemon curd, seedless raspberry jam, or even Nutella for creative fillings.
- If the indentation rises during baking, press it down again gently after baking.
Nutrition
Final Thoughts: A Cookie Worth Keeping
Jelly Thumbprint Cookies are more than just a pretty dessert — they’re a reminder of cozy kitchens, shared laughter, and sweet traditions.
Their ease and versatility make them a go-to recipe for any season. Whether you stick to the classics or explore new jams and curds, they’re a treat that always delivers.
So go ahead — fill your kitchen with the scent of warm butter and fruity jam. Whether you’re baking for loved ones or just for yourself, this simple cookie has a way of turning ordinary moments into something special.