Why Make Home Canned Baked Beans?
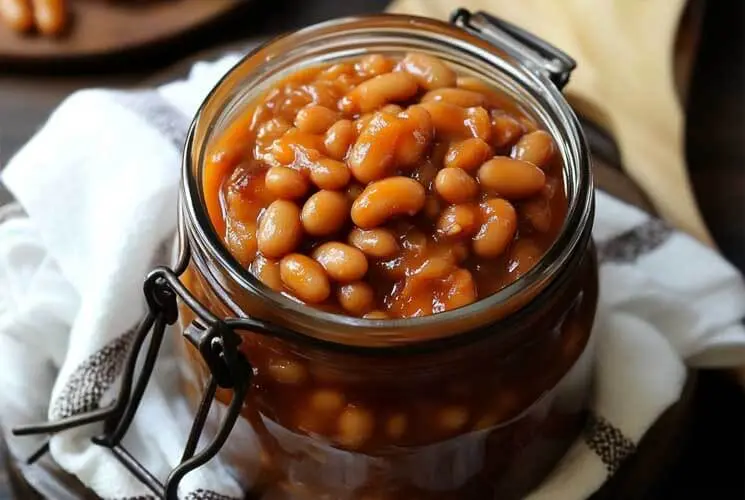
There’s something deeply comforting about a warm bowl of baked beans, especially when you’ve made them yourself—and even better when they’re ready to go straight from the pantry. Home canned baked beans are more than just a DIY project; they’re a way to bring rich, homemade flavor to your table anytime you want, without the preservatives or added sugars often found in store-bought versions.
These beans are slow-cooked in a sweet, smoky, tangy sauce, then preserved in jars so you always have a hearty side or main dish on hand. Whether you’re stocking your prepper pantry or just love the idea of scratch-made convenience, home canning makes it possible.
Why bother canning baked beans at home? The answer’s simple: flavor, savings, and control. You decide how sweet, spicy, smoky, or savory they’ll be. Want to skip the bacon or go big on maple? It’s up to you. Plus, you’ll save money while reducing waste and gaining peace of mind knowing exactly what’s in your food.
Tip: You control the texture, seasoning, and sweetness. No more overly sugary beans or mushy bites—just homemade goodness, sealed and ready to enjoy.
Benefits of Home Canning Baked Beans
Canning your own baked beans brings a handful of unbeatable perks. For starters, it’s budget-friendly. A bag of dried beans and a few pantry staples cost far less than buying multiple cans from the store—and you get way more.
You’re also getting cleaner ingredients. There’s no high-fructose corn syrup or preservatives in your jars—just the good stuff. Want them vegan? Easy. Prefer spicy over sweet? Go for it. The recipe adapts to your taste.
Another plus? Shelf life. Properly pressure-canned beans are pantry-stable for up to a year, making meal prep easier and emergency meals a breeze. You’re not just cooking; you’re creating convenience.
And let’s not forget the eco-friendly angle. Fewer cans mean less waste. Reusable jars mean a greener kitchen.
Home canning is practical, personal, and just plain satisfying.
Equipment & Tools You’ll Need
Before diving in, it’s important to gather the right tools for safe and smooth canning. Most importantly, you’ll need a pressure canner—this is not optional when working with low-acid foods like beans. A water bath canner won’t cut it here.
Next, stock up on clean glass canning jars with new lids and bands. You’ll also want a jar lifter, canning funnel, bubble remover, and lid wand to handle hot jars safely and efficiently.
Have a large pot for simmering your beans and sauce, plus measuring cups and spoons to keep things precise. Optional but handy: a food scale and thermometer to monitor consistency and temperatures.
Always sterilize your tools before starting. Clean gear means fewer risks and better results.
Tip: Always use a pressure canner—not a water bath—for baked beans due to their low acidity. It’s the only safe method.
Ingredients Overview & Custom Add-ins
Home canned baked beans start with a handful of humble ingredients that come together into something crave-worthy. The foundation is dried navy beans, soaked and simmered until just tender.
From there, the flavor magic happens. Classic ingredients include molasses, brown sugar, tomato paste, onions, mustard, and spices like garlic powder or smoked paprika. Some folks add bacon, salt pork, or ham hock for that traditional smoky punch.
Want to keep things vegetarian or vegan? Skip the meat and amp up flavor with maple syrup, apple cider vinegar, or liquid smoke. Regional twists might include more mustard, hot sauce, or even chili flakes for heat.
Don’t forget: soaking your beans is essential. You can go the classic overnight route (cover with water, soak 8–12 hours), or do a quick soak (boil for 2 minutes, rest for 1 hour). Either way, rinse and drain before cooking.
Customize your batch! Like them tangy? Add vinegar. Want a sweeter edge? Go heavier on brown sugar or maple.
Safety First: Pressure Canning for Low-Acid Foods
When it comes to canning baked beans, safety isn’t optional—it’s essential. Because beans are low-acid foods, they must be pressure canned to eliminate the risk of botulism, a dangerous bacteria that thrives in anaerobic, low-acid environments.
Following USDA-approved guidelines is crucial. That means using a tested recipe and a pressure canner that can reach the temperatures needed (240°F or higher) to safely process and preserve your beans.
Avoid using water bath canning—it simply can’t reach the required temperature. You’ll also need to adjust pressure or timing based on altitude, so check your location specifics before starting.
For official guidelines, refer to trusted resources like the National Center for Home Food Preservation.
Remember: Low-acid foods like beans = pressure canner only. It’s not just a preference—it’s a safety must.
Prepping the Beans: Soaking and Pre-Cooking
Properly prepping your beans is key to a successful canning session. It all starts with the soak. The overnight soak is the easiest—just rinse beans, cover with water, and leave them overnight. This helps soften the beans, reduce cooking time, and make them easier to digest.
Pressed for time? Try the quick soak method: boil beans in water for 2 minutes, then let sit covered for 1 hour. Drain and rinse before continuing.
Next comes the pre-cook. Simmer soaked beans in fresh water until they’re just barely tender—not fully cooked. They’ll finish cooking inside the jars during pressure canning.
Drain the beans well and set them aside while you prepare your sauce.
Tip: Don’t skip the simmer—fully raw beans can swell too much during canning and may cause jars to overflow or burst.
Making the Sauce from Scratch
The heart of flavorful baked beans is in the sauce—rich, sweet, tangy, and smoky. Making it from scratch is easy and lets you adjust everything to your taste.
Start by sautéing chopped onions in a little oil or bacon grease until soft and golden. This adds depth right from the start. Then stir in molasses, brown sugar, tomato paste, yellow or Dijon mustard, and a splash of apple cider vinegar for balance.
Simmer the sauce gently for about 10–15 minutes, allowing the flavors to meld and the mixture to thicken slightly. Add spices like garlic powder, paprika, or even a pinch of cayenne if you like heat. Want a smokier vibe? Try a dash of liquid smoke or smoked paprika.
Taste and tweak. Like it sweeter? More brown sugar. Tangier? More vinegar.
Tip: Keep the sauce thinner than you’d normally serve—it will thicken more during the pressure canning process.
Packing Jars & Pressure Canning Step-by-Step
Now that your beans are pre-cooked and your sauce is simmering, it’s time to fill your jars.
-
Ladle the partially cooked beans into hot, sterilized jars. Fill them about ⅔ to ¾ full.
Advertisement -
Pour your hot sauce over the beans, leaving 1 inch of headspace at the top.
-
Use a bubble remover tool (or a plastic knife) to gently release trapped air bubbles.
-
Wipe jar rims clean with a damp cloth. Add new lids and tighten the bands to fingertip tight.
-
Load jars into your preheated pressure canner, following the manufacturer’s directions.
-
Process:
-
Pints: 75 minutes
-
Quarts: 90 minutes
-
Use 10 PSI for altitudes up to 1,000 ft (adjust for your elevation).
-
-
Once processing is done, let the canner depressurize naturally. Don’t rush this part!
-
Carefully remove jars and place on a towel-lined surface. Let them cool undisturbed for 12–24 hours.
Once cooled, check that the lids have sealed (they shouldn’t flex when pressed). Label each jar with the date.
Pro Tip: Always adjust time and pressure based on your altitude—check your local chart!
Storing and Checking the Shelf Life of Canned Baked Beans
Once sealed and cooled, your home canned baked beans are ready for long-term storage.
Store jars in a cool, dark, and dry pantry. Avoid direct sunlight or places with wide temperature swings (like above the stove). Properly canned beans will last up to 1 year without issue.
Before opening a jar, always check the seal. If the lid flexes, makes a popping sound, or you see any signs of spoilage (bulging, cloudiness, bad odor), discard it immediately.
If a seal has failed but the beans still look and smell fine, refrigerate and use within 3 days.
When in doubt, throw it out—safety comes first!
Serving Ideas: How to Use Home Canned Baked Beans
Once you’ve stocked your shelves, you’ll find endless ways to enjoy your home canned baked beans.
They’re a natural fit as a BBQ side—serve them warm with grilled burgers, ribs, or chicken. For breakfast, heat a jar alongside eggs, toast, and sausage for a hearty plate.
Stir them into chili, shepherd’s pie, or casseroles to stretch meat and add extra flavor. You can even enjoy them as a fast vegetarian protein option—just heat and eat with rice or cornbread.
Want to level it up? Try “cowboy beans” by heating the baked beans with cooked ground beef and extra spices for a bold, filling dish.
These beans are your pantry’s secret weapon—delicious, fast, and endlessly versatile.
Troubleshooting Issues with Canning Baked Beans
Even experienced canners run into hiccups—here’s how to avoid the most common ones:
-
Beans turned mushy? They were likely overcooked before canning. Aim for just-barely-tender pre-cooking.
-
Sauce too thick or uneven? It may have been too dense going into the jar, or there wasn’t enough liquid to cover the beans.
-
Lids didn’t seal? Rims may have been dirty, or lids could’ve been reused or defective. Always use new lids and wipe rims well.
-
Liquid leaked out of jars? This is often caused by a too-rapid pressure drop. Always let the canner return to zero pressure on its own before opening.
Stay patient and follow the process—it gets easier with practice!
FAQs About Making and Canning Baked Beans at Home
Can you water bath can baked beans?
No. Water bath canning doesn’t reach high enough temperatures to safely process low-acid foods like beans. Only pressure canning is safe.
Do you have to soak beans before canning?
Yes. Soaking beans helps reduce cooking time, improves texture, and removes compounds that can cause gas or bitterness.
How long do you pressure can baked beans?
Typically, 75 minutes for pint jars and 90 minutes for quarts, at 10 PSI (adjust for your altitude).
Can you use canned beans instead of dried beans for canning?
No. Re-canning already cooked canned beans is not recommended. It can result in overly soft texture and may not be food-safe.
Do home-canned baked beans taste better than store-bought?
Absolutely! You control the ingredients, the sweetness, the seasoning, and the texture. Plus, no preservatives or additives—just rich, homemade flavor.
Pressure canning might seem intimidating at first, but the reward is a shelf full of real, wholesome food ready whenever you are.
Home Canned Baked Beans Recipe
Equipment
- Pressure canner
- Canning jars (pint or quart size) with new lids and rings
- Large stockpot
- Medium saucepan
- Canning funnel
- Jar lifter
- Bubble remover or spatula
- Clean kitchen towels
- Ladle
- Measuring cups and spoons
Ingredients
- 3 lbs dried navy beans
- Water for soaking and cooking
- 2 medium onions finely chopped
- 1 tbsp oil or bacon grease for sautéing
- 1 ½ cups molasses
- 1 ½ cups brown sugar packed
- ¾ cup tomato paste
- 3 tbsp yellow or Dijon mustard
- 2 tbsp apple cider vinegar
- 1 tbsp salt or to taste
- 1 tsp smoked paprika
- ½ tsp garlic powder
- Optional: chopped bacon salt pork, ham hock, hot sauce
Instructions
Soak the Beans:
- Rinse dried navy beans. Soak overnight in a large bowl with enough water to cover by several inches. Drain and rinse before cooking. (Quick soak: boil for 2 minutes, let sit 1 hour, then drain.)
Simmer the Beans:
- Add soaked beans to a pot with fresh water. Bring to a simmer and cook for about 30–40 minutes until just tender (not mushy). Drain and set aside.
Make the Sauce:
- In a saucepan, sauté onions in oil or bacon grease until soft. Stir in molasses, brown sugar, tomato paste, mustard, vinegar, salt, and seasonings. Simmer for 10–15 minutes. Adjust to taste.
Prepare Jars:
- Sterilize jars and keep them hot. Add partially cooked beans to jars, filling ⅔ to ¾ full. Ladle hot sauce over beans, leaving 1 inch headspace.
Remove Bubbles & Seal:
- Use a spatula to remove air bubbles. Wipe rims clean, place lids on, and screw bands to fingertip tight.
Pressure Can:
- Process in a pressure canner at 10 PSI:
- Pints: 75 minutes
- Quarts: 90 minutes
- (Adjust for altitude as needed.)
Cool & Store:
- Let pressure drop naturally. Remove jars and cool for 12–24 hours. Check seals. Label and store in a cool, dark place for up to 1 year.
Notes
- Headspace matters – Always leave a full 1 inch at the top to prevent siphoning during canning.
- Customize to your taste – Add chili flakes, maple syrup, or even diced jalapeños.
- Vegetarian option – Skip the bacon and use smoked paprika or liquid smoke for that savory depth.
- Altitude adjustments – Always check your altitude and adjust PSI accordingly (e.g., 15 PSI over 1,000 ft).
- For thicker sauce post-canning, simmer the contents after opening before serving.
Nutrition