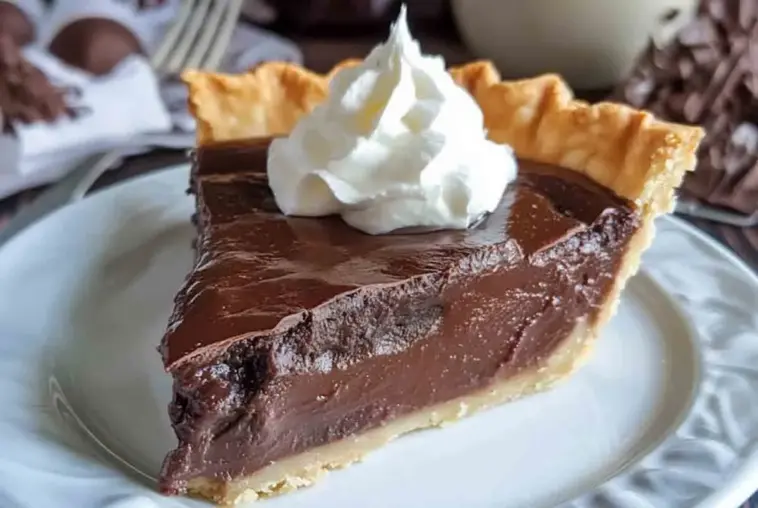
There’s something undeniably nostalgic about chocolate pie. Maybe it’s the way the smooth, velvety filling melts in your mouth, or how it always seems to make an appearance at just the right moment—whether it’s a holiday gathering, a weeknight dessert, or that last-minute dish you bring to a potluck and watch disappear in minutes.
This dessert is a crowd-pleaser in every sense. It bridges generations, loved equally by kids who crave something sweet and adults who appreciate its deep cocoa flavor and luxurious texture. It can be dressed up for special occasions with a touch of sea salt and whipped cream or kept simple with a store-bought crust and a few pantry staples.
The best part? It’s easier to make than you might think. Whether you prefer a baked custard or a no-bake version, the process is straightforward and the results are reliably delicious. In this guide, we’ll walk you through the types of chocolate pie, ingredient choices, crust options, and pro tips to make your chocolate pie truly unforgettable. Ready to dive into decadence? Let’s go.
What Is Chocolate Pie?
At its heart, chocolate pie is a dessert that combines a pie crust with a luscious chocolate filling. That filling might be baked custard-style, pudding-based, or even French silk, depending on the recipe. Some versions are light and airy, while others are rich and dense—what they all share is a deep, comforting chocolate flavor.
There’s also the no-bake chocolate pie, a lifesaver for hot days when turning on the oven is a no-go. These often rely on instant pudding mixes or stovetop fillings poured into a pre-chilled crust, then topped with whipped cream.
Chocolate pie has earned a place in American kitchens for generations. It’s a classic that appears everywhere from Thanksgiving spreads to church potlucks, especially in the South. Whether passed down through family recipe cards or discovered online, chocolate pie continues to evolve—yet always remains a symbol of comfort and indulgence.
Ingredients Overview and Why They Matter
A great chocolate pie starts with a smart choice of high-quality ingredients. Each component plays a role in achieving that smooth, decadent texture and deep flavor we all crave.
-
Chocolate: This is the star of the show. Semi-sweet chocolate is a safe bet for most recipes, but dark chocolate adds a more intense flavor. You can also use cocoa powder, especially for pudding-based pies.
-
Dairy: Heavy cream or whole milk adds creaminess. Some Southern-style pies use evaporated milk for richness and body. Vegan? Use full-fat coconut milk or plant-based cream.
-
Binder: Depending on the style, you’ll use either eggs (in custard or French silk pies) or cornstarch (in pudding pies) to help the filling firm up.
-
Sweetener: Granulated sugar is common, but sweetened condensed milk also works beautifully, especially in no-bake or stovetop recipes.
-
Crust: A flaky pastry crust, buttery graham cracker base, or chocolatey Oreo crust—each adds a unique layer of flavor and texture.
Pro Tip: Use the best chocolate you can find—it truly makes or breaks the flavor.
Choosing the Right Chocolate: Dark, Milk, or Semi-Sweet?
The kind of chocolate you use makes a big difference in flavor and texture. So how do you choose?
-
Dark Chocolate (70% and above): Bold and bittersweet, it creates a more intense, sophisticated pie. Great for grown-up palates or pairing with flaky sea salt.
-
Semi-Sweet Chocolate (50–60%): The most common and balanced choice. It delivers rich cocoa flavor without being too bitter or too sweet. Ideal for classic chocolate pies.
-
Milk Chocolate: Much sweeter and creamier, it’s a hit with kids or those who prefer a mellow dessert. You may need to reduce the added sugar in the recipe.
If you’re avoiding dairy, opt for dairy-free chocolate chips or baking bars. Coupled with coconut milk or almond milk, you’ll still achieve that creamy, dreamy filling.
Expert Tip: Taste the chocolate before using it—if it’s not good on its own, it won’t shine in the pie either.
Best Crusts for Chocolate Pie + Easy Homemade Options
Your pie crust sets the foundation for your chocolate masterpiece. Let’s break down the most popular (and easiest) options:
-
Graham Cracker Crust: Sweet, crumbly, and buttery. It’s perfect for no-bake chocolate pies. Just mix crushed graham crackers with melted butter and a bit of sugar, press into a pan, and chill or bake for a firmer base.
-
Oreo Cookie Crust: Want to double down on chocolate? Crush whole Oreos (filling included), mix with melted butter, and press into the pan. No added sugar needed! This crust pairs beautifully with mocha or dark chocolate fillings.
-
Classic Pastry Crust: A traditional pie dough crust gives that tender, flaky bite and works well with baked chocolate custard pies. Make sure to blind bake (pre-bake) it to avoid sogginess.
-
Gluten-Free Option: Use gluten-free graham crackers or a nut-based crust with almonds or pecans blended with dates or coconut oil.
Tip: No matter which crust you choose, chill it before adding your warm filling to prevent it from turning soggy.
Step-by-Step: How to Make the Perfect Chocolate Pie Filling
Creating a silky-smooth filling is where the magic happens. Whether you’re making a stovetop or baked pie, follow these steps for success:
For pudding-style (no-bake) pies:
-
In a saucepan, whisk together sugar, cocoa powder, cornstarch, and a pinch of salt.
-
Gradually add milk, whisking constantly to avoid lumps.
-
Cook over medium heat, whisking continuously until the mixture thickens (about 7–10 minutes).
-
Remove from heat and stir in chopped chocolate, butter, and vanilla extract until glossy.
-
Pour into a prepared crust and chill until set.
For baked custard-style pies:
-
Warm the milk or cream gently in a saucepan.
-
In a bowl, whisk eggs with sugar and melted chocolate.
-
Slowly temper the eggs by drizzling in the warm milk while whisking—don’t rush or you’ll scramble the eggs.
-
Pour into a partially baked crust and bake until just set with a slight jiggle in the center.
Proper Thickness Test: The filling should coat the back of a spoon and leave a clean line when you run your finger through it.
Cooling, Setting, and Serving: Timing Is Everything
This part is crucial for perfect slices. Once the filling is in the crust—baked or not—let it cool at room temperature for 30–60 minutes. Then transfer to the fridge and chill for at least 4 hours, ideally overnight. This ensures a clean cut and a firm, velvety texture.
When ready to serve, slice with a warm knife for cleaner cuts. Top with whipped cream, chocolate curls, or fresh berries for a little flair.
Leftovers? Store covered in the fridge for up to 5 days. For longer storage, you can also freeze individual slices wrapped tightly in plastic.
Delicious Variations You’ll Want to Try
There’s no one-size-fits-all chocolate pie—and that’s what makes it so much fun. Here are some crave-worthy twists to try:
French Silk Chocolate Pie
Ultra-light and mousse-like, this version is whipped to perfection. Typically made with eggs, butter, and melted chocolate, it’s rich yet airy. Serve chilled with a fluffy cloud of whipped cream.
No-Bake Chocolate Pie
Perfect for summer, this version skips the oven. Just whip up a stovetop pudding filling or use instant chocolate pudding with whipped topping, then pour into a graham or Oreo crust and chill.
Mexican Chocolate Pie
Spice things up with a pinch of cinnamon and a dash of cayenne pepper. The warmth adds a surprising depth to the chocolate without overpowering it.
Peanut Butter Chocolate Pie
Swirl in peanut butter or add a peanut butter layer beneath the chocolate filling. A peanut butter whipped topping also works beautifully!
Mocha Pie
Add espresso powder or a shot of strong coffee to the filling. Coffee enhances chocolate’s depth and brings a bold, slightly bitter edge that balances sweetness.
Pro Tip: Use these variations as a base to get creative with toppings, mix-ins, and presentation.
Expert Tips for Chocolate Pie Success
Even simple recipes need a few tricks to truly shine. Here are some pro-level tips to make your chocolate pie smooth, rich, and bakery-worthy:
-
Use a fine mesh strainer to remove any lumps or bits of scrambled egg from your filling. It’s the secret to that silky texture.
-
Whisk constantly while cooking the filling to prevent curdling and burning. Don’t walk away—this step is quick but sensitive!
-
Let the filling cool slightly before adding it to the crust. Pouring in piping-hot filling can melt your crust or make it soggy.
-
Taste before chilling. Every chocolate is different in sweetness and intensity. Add a pinch more sugar or salt if needed before setting it.
Little tweaks = big rewards. Trust your senses, and don’t rush the chilling process. Patience is what turns a good pie into an unforgettable one.
What to Serve with Chocolate Pie
This pie is rich and satisfying on its own, but the right garnishes and sides can elevate the experience:
-
Garnishes: Try a swirl of fresh whipped cream, chocolate curls, a few fresh berries, or a sprinkle of flaky sea salt for contrast.
-
Drinks: A shot of espresso, a glass of port wine, or even a cup of mint tea cuts through the richness nicely.
-
On the side: A scoop of vanilla ice cream or some raspberries can balance each bite with brightness or creaminess.
Pair wisely, and your chocolate pie becomes the centerpiece of an unforgettable dessert course.
Storage, Freezing, and Make-Ahead Tips
One of the many perks of chocolate pie? It stores beautifully, making it ideal for holidays or busy weeknights.
-
Fridge: Cover your pie with plastic wrap or foil and store in the refrigerator for up to 4–5 days. The texture often improves overnight.
-
Freezer: To freeze, wrap the whole pie or individual slices tightly in plastic and foil. It’ll keep well for up to 1 month. Thaw in the fridge overnight before serving.
-
Make-Ahead Tip: You can prepare the filling a day ahead, store it separately in the fridge, and then pour it into the crust before chilling or baking the next day.
Whether you’re prepping for a party or just planning ahead, chocolate pie is a stress-free make-ahead dessert that delivers every time.
Nutrition Snapshot
A standard slice of chocolate pie (1/8 of a 9-inch pie) ranges between 300–450 calories, depending on the crust and chocolate type. It’s typically high in fat and sugar, thanks to the chocolate and dairy. Want to lighten it up? Use coconut milk, skip the whipped topping, or opt for a nut-based crust. It’s all about balance and finding what works for you.
FAQs
Why is my chocolate pie not setting?
This is often due to under-cooking or not using enough thickener (like cornstarch or egg yolks). Make sure the filling thickens on the stove or is baked until it has just a slight jiggle in the center.
Can I use cocoa powder instead of baking chocolate?
Yes, but you’ll need to adjust. For every ounce of chocolate, substitute with 3 tablespoons cocoa powder + 1 tablespoon butter or oil to replicate the fat content.
How long does chocolate pie last in the fridge?
When covered and refrigerated, chocolate pie stays fresh for up to 5 days. The texture may firm up more over time, which many people love!
Can I make chocolate pie without eggs?
Absolutely. Opt for a cornstarch-based pudding filling, or for a vegan twist, use silken tofu blended with melted chocolate and a bit of maple syrup.
What’s the difference between French silk and chocolate cream pie?
French silk is made with butter and raw or lightly cooked eggs, whipped until fluffy. It’s more like a mousse. Chocolate cream pie usually uses a custard or pudding filling that’s thicker and creamier.
Final Thoughts: Make It Your Signature Dessert
There’s a reason chocolate pie has stood the test of time—it’s indulgent, flexible, and undeniably satisfying. Whether you keep it classic or explore fun new twists, it’s the kind of dessert that brings people together and makes memories.
Try a new crust, experiment with spices, or pile on the whipped cream—just make it yours. And don’t forget to snap a photo before your guests devour it. You might just create a signature dessert that becomes a family favorite for years to come.
Now it’s your turn—what’s your favorite chocolate pie variation? Let us know in the comments!
Chocolate Pie Recipe
Equipment
- Medium saucepan
- Whisk
- Fine Mesh Strainer
- Mixing bowl
- 9-inch pie pan
- Rubber spatula
- Measuring cups/spoons
Ingredients
- 1 ½ cups whole milk
- ½ cup heavy cream
- ½ cup granulated sugar
- ¼ cup unsweetened cocoa powder
- 3 tablespoons cornstarch
- ¼ teaspoon salt
- 4 oz semi-sweet chocolate chopped
- 1 tablespoon unsalted butter
- 1 teaspoon vanilla extract
- 1 prepared 9-inch graham cracker or Oreo crust
- Optional: whipped cream chocolate curls, berries for garnish
Instructions
- In a medium saucepan, whisk together sugar, cocoa powder, cornstarch, and salt.
- Gradually add milk and cream, whisking until smooth.
- Cook over medium heat, whisking constantly, until the mixture thickens and starts to bubble (about 8–10 minutes).
- Remove from heat and stir in chopped chocolate, butter, and vanilla until smooth.
- Strain the filling through a fine mesh sieve for extra smoothness.
- Pour the warm filling into the prepared pie crust.
- Let cool at room temperature for 30 minutes, then chill in the refrigerator for at least 4 hours or overnight.
- Top with whipped cream and garnishes before serving.
Notes
- For a deeper flavor, use dark chocolate (70%) instead of semi-sweet.
- To make it egg-free, ensure your crust and chocolate are also dairy-free.
- Add espresso powder or cinnamon for a flavor twist.
- Pie can be frozen (wrapped well) for up to 1 month.
Nutrition