Why Everyone Loves a Homemade Yeast Roll
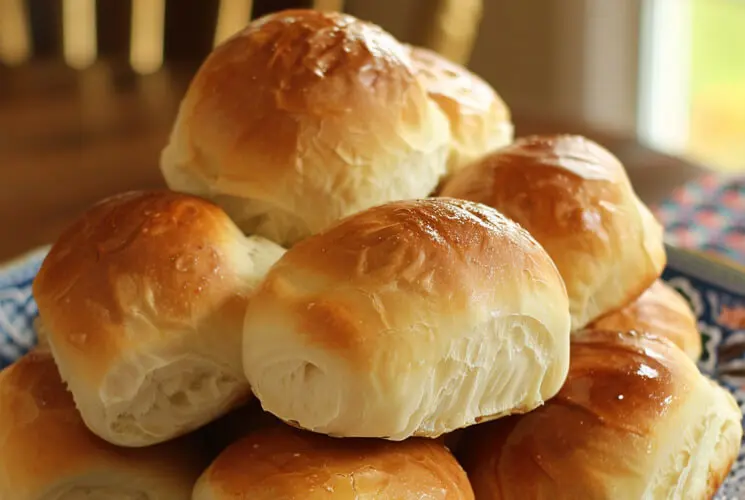
There’s something magical about the smell of yeast rolls baking in the oven. The rich, buttery aroma fills the kitchen, hinting at the soft, pillowy goodness to come. Whether served at Sunday dinner or a holiday feast, a well-made yeast rolls recipe has a way of bringing people together.
These rolls strike the perfect balance: fluffy yet rich, simple yet deeply satisfying. With just a few pantry staples—flour, yeast, sugar, butter, and milk—you can create something that tastes like it came straight from grandma’s kitchen. No fancy techniques, no long ingredient lists—just classic comfort food made with love.
If you’ve never tried baking bread before, yeast rolls are the perfect place to start. They’re beginner-friendly, easy to shape, and incredibly rewarding. Once you pull that first golden batch out of the oven, don’t be surprised if they become a regular feature on your dinner table.
What Are Yeast Rolls?
Yeast rolls are soft, fluffy bread rolls made with yeast as the leavening agent, giving them their signature airy texture and slightly chewy bite. Unlike quick breads or baking powder biscuits, yeast rolls take time to rise—but that’s where the flavor and structure come from.
They differ from crusty artisan loaves or sourdough in both technique and taste. While sourdough has a tangy flavor and crisp exterior, yeast rolls are known for their gentle sweetness and tender, melt-in-your-mouth crumb. They often include enriched ingredients like eggs, milk, and butter, which add richness and softness.
Yeast rolls can be either sweet or savory. You’ll find honey-glazed versions served with butter at Southern tables, and plain, salted varieties accompanying roast meats or soups. However you serve them, their versatility and cozy charm make them a must-have side for nearly any meal.
The History and Homestyle Heritage of Yeast Rolls
Yeast rolls have deep roots in American Southern cuisine, where they’ve long held a spot at the table for special gatherings. These rolls are more than just bread—they’re tradition. Passed down through generations, each family has its own beloved version, often scribbled on a weathered recipe card or stored in memory.
Historically, yeast rolls were baked for Sunday dinners, Thanksgiving, Christmas, and other holiday celebrations. The slow preparation—letting dough rise, punching it down, shaping each roll by hand—was a labor of love that often involved the whole family.
Their comforting presence hasn’t faded with time. Today, yeast rolls remain a staple at everything from backyard barbecues to cozy weeknight dinners. They bring not only flavor, but a sense of continuity, warmth, and home. If you’re looking to recreate that classic comfort, a homemade batch of yeast rolls is the perfect place to start.
Essential Ingredients and Why They Matter
Before diving into the method, let’s break down the key players that make this yeast rolls recipe work so well:
-
Flour: Most recipes call for all-purpose flour, which gives a tender result. If you want a slightly chewier texture, bread flour has more protein and strengthens the dough structure.
-
Yeast: You can use active dry or instant yeast. Active dry requires proofing in warm liquid first, while instant yeast can be mixed directly into the flour. Both work beautifully as long as they’re fresh.
-
Warm Milk or Water: Milk adds extra richness and softness, while water creates a slightly leaner dough. Either works, but warm milk is ideal for that ultra-tender interior.
-
Sugar: Just a touch is needed—not to make it sweet, but to feed the yeast and encourage a strong rise. It also helps with browning in the oven.
-
Eggs & Butter: These ingredients enrich the dough and make the rolls soft, golden, and flavorful.
-
Salt: Don’t skip it! Salt balances the sweetness, enhances flavor, and controls yeast activity.
Pro Tip: Use room-temperature ingredients to avoid shocking the yeast and ensure even fermentation throughout your dough.
Equipment You’ll Need for Fluffy Success
You don’t need a bakery setup to make soft yeast rolls at home—just a few basic kitchen tools:
-
Mixing bowls (one large for dough, one small for yeast)
-
Measuring cups and spoons for accuracy
-
Stand mixer with dough hook (optional, but helpful)
-
Wooden spoon or spatula for mixing by hand
-
Baking sheet or casserole dish depending on how you want the rolls to rise and bake
-
Plastic wrap or a clean kitchen towel to cover the dough during proofing
That’s it! If you’ve baked cookies before, you’re already equipped to tackle yeast rolls.
How to Make Yeast Rolls Step-by-Step
Here’s the part you’ve been waiting for! Making yeast rolls is a slow, satisfying process, and each step plays a role in building flavor and texture:
1. Activate the Yeast
If using active dry yeast, dissolve it in warm milk (about 105°F–110°F) with a pinch of sugar. Let it sit for 5–10 minutes until foamy. If using instant yeast, you can skip this step and mix it directly with the dry ingredients.
2. Mix and Knead the Dough
Combine the flour, sugar, salt, and yeast. Add the milk mixture, melted butter, and eggs. Stir to form a shaggy dough, then knead until smooth and elastic—about 8–10 minutes by hand or 5–6 minutes with a stand mixer.
3. First Rise (Bulk Fermentation)
Place the dough in a greased bowl, cover it, and let it rise in a warm place for 1 to 1.5 hours, or until doubled in size.
4. Shape the Rolls
Punch down the dough gently. Divide into even portions and shape into balls by tucking the dough under itself. Arrange them in a greased baking dish with a bit of space between each roll.
5. Second Rise
Cover again and let the shaped rolls rise for 30–45 minutes, until puffy and touching.
6. Bake
Bake at 375°F (190°C) for 15–20 minutes, or until golden brown. Brush the tops with melted butter for that irresistible shine.
Helpful Tip: Let your dough rise in a warm, draft-free spot—like a turned-off oven with the light on.
Expert Tips for Perfect Yeast Rolls Every Time
A few key tricks can take your yeast rolls recipe from good to bakery-quality:
-
Temperature matters. Keep your liquid between 105°F and 110°F—too cool and the yeast won’t activate, too hot and you’ll kill it. The same goes for your kitchen: draft-free and warm is best for proofing.
-
Don’t over-knead. While kneading helps develop gluten for structure, going overboard can make the rolls tough.
-
Avoid under-proofing. Let the dough rise until it doubles. If it hasn’t had time to ferment, the rolls will be dense instead of airy.
-
Weigh your ingredients. A digital scale ensures flour and liquids are perfectly balanced.
Advertisement -
Dough too sticky? Add a tablespoon of flour at a time. Too dry? A small splash of warm water will help.
Baking is a science, but it doesn’t need to be intimidating—just stay patient and observant.
Common Mistakes to Avoid
Even experienced bakers can slip up! Here are some common errors and how to steer clear:
-
Using water that’s too hot: This is one of the quickest ways to kill your yeast. Always test the temperature—warm, not hot.
-
Skipping the second rise: Many new bakers get impatient. But this final proofing gives the rolls their signature fluffiness and rise in the oven.
-
Expired yeast: Always check the date. Old yeast won’t rise properly, leaving you with flat, disappointing rolls.
-
Not covering the dough: During proofing, uncovered dough can dry out and form a skin, preventing a good rise and even baking.
Helpful Tip: If your dough seems sluggish, try proofing it in your oven (turned off) with just the light on—it creates the perfect warm environment.
Delicious Variations to Try
Once you’ve nailed the classic yeast rolls recipe, don’t be afraid to get creative with flavors and textures:
-
Sweet Honey Butter Yeast Rolls: Add 1–2 tablespoons of honey to the dough and brush the baked rolls with honey butter.
-
Garlic Herb Rolls: Mix in minced garlic, chopped rosemary, or thyme. Top with melted garlic butter after baking.
-
Whole Wheat Yeast Rolls: Replace up to half of the flour with whole wheat for a nuttier flavor. Add a bit more liquid to compensate.
-
Buttermilk Yeast Rolls: Swap out regular milk for buttermilk. It adds a tender crumb and slight tang.
-
Vegan or Dairy-Free Version: Use plant-based milk (like almond or oat) and a neutral oil or vegan butter instead of dairy.
Creative Tip: Stuff small cheese cubes into the center of each roll before baking, or top with sesame, poppy seeds, or everything bagel seasoning for texture and flair.
Rolls can be whatever you want them to be—sweet, savory, hearty, or light!
What to Serve With Yeast Rolls
Yeast rolls are the ultimate versatile side—they go with almost everything:
-
Classic comfort meals: Roast chicken, turkey, beef stew, or pot roast.
-
Soups: Tomato bisque, creamy mushroom, or chicken noodle soup.
-
Breakfast or brunch: Pair warm rolls with honey butter, homemade jam, or soft scrambled eggs for a cozy morning treat.
They’re also perfect for sliders or mini sandwiches. Try leftover rolls with ham and cheese or filled with pulled pork. However you serve them, they’ll steal the spotlight.
Make-Ahead, Storing & Freezing Instructions
Want to prep your yeast rolls in advance? Here’s how:
-
Make-ahead (before baking): Shape the rolls and place them in the baking dish, then cover and refrigerate overnight. Let them come to room temperature and rise before baking the next day.
-
Storing leftovers: Keep baked rolls in an airtight container at room temperature for up to 3 days. Warm them in a 300°F oven, wrapped in foil, to refresh the texture.
-
Freezing baked rolls: Cool completely, then wrap tightly in plastic wrap and foil. Freeze for up to 2 months. Thaw and reheat in the oven for best results.
-
Freezing dough: Shape the dough into rolls and freeze before baking. Thaw overnight in the fridge, then allow to rise and bake as usual.
Tip: Freezing in small batches helps with quick weeknight sides or breakfast options.
FAQs: Yeast Rolls Recipe Questions Answered
Why are my yeast rolls not fluffy?
Most often, it’s because of under-proofing or expired yeast. Make sure your dough rises fully and that your yeast is fresh and properly activated.
Can I make yeast rolls without a stand mixer?
Absolutely. Mix the dough in a large bowl with a wooden spoon, then knead by hand on a floured surface. It takes a bit longer, but it’s just as effective—and a bit meditative too!
How long does it take for yeast rolls to rise?
The first rise typically takes 60–90 minutes, and the second rise 30–45 minutes, depending on room temperature. Warmer environments speed things up.
Can I use self-rising flour instead?
It’s not recommended. Self-rising flour contains baking powder and salt, which interferes with the yeast process. Stick to all-purpose or bread flour for best results.
What’s the difference between active dry yeast and instant yeast?
Active dry yeast needs to be dissolved in warm liquid before use, while instant yeast can be mixed directly with dry ingredients. Both work great—just adjust your process slightly.
Helpful Tip: If your yeast isn’t bubbling or foaming during activation, toss it—it won’t rise properly.
Final Thoughts: Time to Make Your Kitchen Smell Like a Bakery!
Homemade yeast rolls are more than just a side—they’re a celebration of simple, soulful baking. With just a handful of ingredients and a bit of patience, you can turn your kitchen into a warm, welcoming bakery.
These rolls are endlessly adaptable, freezer-friendly, and guaranteed to disappear fast. Whether you’re serving them with Sunday roast or slathering them in butter for breakfast, they’re always a crowd-pleaser.
So go ahead—roll up your sleeves and try this yeast rolls recipe. Share them with family, tuck them into lunchboxes, or just keep a warm batch all to yourself. You’ve got this!
Easy Big Fat Yeast Rolls Recipe
Equipment
- Large mixing bowl
- Measuring cups and spoons
- Dough hook or wooden spoon
- Clean towel or plastic wrap
- 9x13 baking dish or sheet pan
- Oven
Ingredients
- 4 cups all-purpose flour plus extra for dusting
- 1 packet 2 ¼ tsp active dry yeast or instant yeast
- 1 cup warm milk about 105°F
- ¼ cup granulated sugar
- 1 large egg
- ¼ cup unsalted butter melted (plus extra for brushing)
- 1 tsp salt
Instructions
- Activate the Yeast (if using active dry): Combine warm milk, sugar, and yeast in a small bowl. Let sit for 5–10 minutes until foamy.
- Make the Dough: In a large bowl, combine flour and salt. Add yeast mixture (or dry yeast if using instant), melted butter, and egg. Stir until a shaggy dough forms.
- Knead: Knead the dough on a floured surface or in a stand mixer until smooth and elastic (5–8 minutes).
- First Rise: Transfer dough to a greased bowl, cover, and let rise in a warm spot for 1–1.5 hours, or until doubled in size.
- Shape the Rolls: Punch down dough and divide into 12 equal pieces. Shape into balls and place in a greased baking dish.
- Second Rise: Cover and let rise again for 30–45 minutes, until puffy.
- Bake: Preheat oven to 375°F (190°C). Bake for 18–20 minutes until golden brown.
- Finish: Brush warm rolls with melted butter and serve!
Notes
- If using instant yeast, skip the activation step and mix it directly with the flour.
- Add a little more flour or water as needed while kneading for the perfect dough consistency.
- These rolls freeze beautifully—wrap tightly and store for up to 2 months.
- For extra flavor, mix in herbs, garlic, or a spoonful of honey.