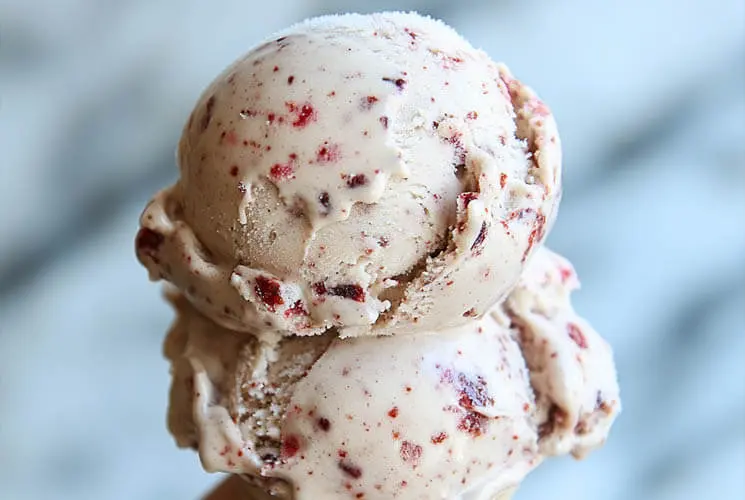
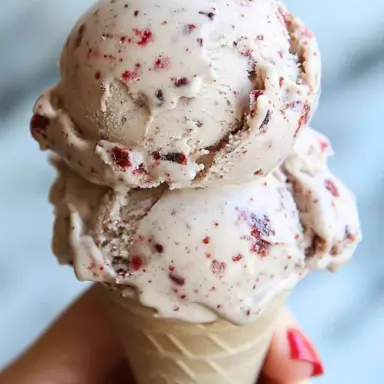
If you’re a Dr Pepper fan, get ready to fall head over heels. Imagine the sweet, slightly spicy, cherry-vanilla magic of Dr Pepper — but transformed into a cool, creamy scoop of ice cream! It’s everything you love about the soda, but richer, dreamier, and absolutely perfect for hot summer days.
Dr Pepper makes such a fun and nostalgic base for ice cream because of its unique, layered flavor profile. Unlike simple sodas, it offers hints of spice, cherry, almond, and vanilla — which all happen to play beautifully with cream.
In this guide, I’ll walk you through exactly how to make Dr Pepper Ice Cream at home, share pro tips to get the smoothest, most flavorful result, and even show you a few fun twists you can try!
Why You’ll Love This Dr Pepper Ice Cream
There’s something so special about this ice cream — it’s not just another vanilla or chocolate treat. Dr Pepper Ice Cream has a sweet, slightly spicy, cherry-vanilla flavor that feels like a little bit of summer nostalgia in every bite.
It’s the perfect dessert for:
-
Backyard BBQs
-
Summer potlucks
-
Birthday parties
-
Or just cooling down after a long, sunny day
Another reason to love it? It’s surprisingly simple to make. You don’t need a complicated list of ingredients or fancy techniques. Just a few key steps (and a little patience while it chills!) will reward you with the creamiest homemade treat.
Tip: Using real Dr Pepper syrup — either homemade from a soda reduction or purchased — gives you the most intense, authentic flavor. It’s worth the extra step!
Ingredients Needed
Before you start, here’s a quick rundown of what you’ll need:
-
Dr Pepper soda or Dr Pepper syrup: If using soda, you’ll reduce it down first to concentrate the flavors.
-
Heavy cream: For the richest, smoothest texture.
-
Whole milk (or half-and-half): Helps balance the richness without making it too heavy.
-
Sugar: Only if you’re not using a pre-sweetened syrup.
-
Vanilla extract: Optional, but a splash enhances the soda’s natural vanilla notes.
Note: Soda reduction makes a huge difference. Using plain soda directly can water down your ice cream, so reducing it into a thick syrup is key to bold flavor.
When it comes to dairy, heavy cream and whole milk are ideal. Half-and-half works too, but avoid low-fat milk — it can make your ice cream icy instead of creamy.
Step-by-Step: How to Make Dr Pepper Ice Cream
Step 1: Prepare the Dr Pepper Reduction
-
Pour your Dr Pepper soda into a saucepan and simmer over medium heat.
-
Let it reduce by about half, stirring occasionally.
-
It should thicken into a syrupy consistency — glossy but pourable.
Pro Tip: If it smells burnt or bitter, toss it and start again. Over-reduced soda will ruin the flavor.
2: Make the Ice Cream Base
-
In a large bowl, mix together the heavy cream, milk, a little sugar (if needed), and the cooled Dr Pepper syrup.
-
Whisk until well combined and slightly frothy.
3: Chill the Mixture
-
Cover the bowl with plastic wrap.
-
Refrigerate for at least 2–4 hours, preferably overnight.
Pro Tip: Chilling the base fully helps avoid large ice crystals, making your ice cream ultra-smooth.
4: Churn the Ice Cream
-
Pour the chilled base into your ice cream maker.
-
Churn according to the manufacturer’s instructions until it thickens and looks like soft-serve.
5: Freeze to Set
-
Transfer the churned ice cream into a freezer-safe container.
-
Smooth the top, press a piece of parchment paper directly onto the surface, and seal with a lid.
-
Freeze for at least 4–6 hours to firm up completely.
No-Churn Dr Pepper Ice Cream Method
No ice cream maker? No problem!
Here’s how to make a no-churn version:
Ingredients You’ll Need
-
Heavy whipping cream
-
Sweetened condensed milk
-
Dr Pepper syrup
-
Vanilla extract (optional)
Steps
-
Whip the heavy cream until stiff peaks form.
-
In a separate bowl, mix the sweetened condensed milk with the cooled Dr Pepper syrup.
-
Gently fold the whipped cream into the condensed milk mixture, being careful not to deflate it.
-
Pour into a loaf pan or freezer-safe container, cover, and freeze for at least 6 hours.
Advertisement
Shortcut Tip: Sweetened condensed milk not only sweetens but also keeps the no-churn ice cream scoopable straight from the freezer.
Texture Note: No-churn ice cream tends to be a little softer and lighter, but still deliciously rich with flavor.
Best Dr Pepper Brands or Variations to Use
You might be surprised — using different versions of Dr Pepper can tweak the final taste beautifully!
Here are a few fun options:
-
Original Dr Pepper: The classic, beloved flavor with that spicy-cherry punch.
-
Dr Pepper Cherry: Brings an extra layer of fruity sweetness, almost like black cherry ice cream.
-
Dr Pepper Cream Soda: Adds a smooth, vanilla-forward note for an even more decadent experience.
Pro Tip: If you love a stronger cherry flavor, mix Dr Pepper Cherry with a few chopped maraschino cherries folded into the churned ice cream!
Expert Tips for the Best Results
Want your Dr Pepper Ice Cream to be absolutely perfect? Keep these tips in mind:
-
Chill everything! From your mixing bowl to the whisk to the base itself — cold ingredients churn better and faster.
-
Don’t over-reduce the soda. Aim for a syrupy texture, not a thick tar.
-
Adjust sweetness carefully. Some Dr Pepper versions are sweeter than others. Taste your base before freezing.
-
Don’t over-churn. Once it looks like soft-serve, stop! Over-churning can make the ice cream grainy or icy.
-
Flavor balance is key. A little extra Dr Pepper syrup can be tempting, but too much can overpower the creaminess.
Must-know Tip: If your Dr Pepper reduction starts to smell burnt, it’s better to scrap it and make a new batch. Burnt syrup will taste bitter and ruin your ice cream!
Fun Variations You’ll Want to Try
If you love the classic Dr Pepper Ice Cream, you’re going to have so much fun experimenting with these creative twists:
-
Dr Pepper Float Ice Cream: Add a splash of root beer during the soda reduction step to create old-fashioned float vibes. The blend of creamy vanilla and spice is irresistible!
-
Cherry Dr Pepper Ice Cream: Boost the natural cherry notes by adding a handful of chopped maraschino cherries (fold them in after churning) or using Dr Pepper Cherry soda.
-
Chocolate Dr Pepper Ice Cream: Whisk a tablespoon of unsweetened cocoa powder into the milk before combining with the syrup. It creates a deep, rich flavor without overpowering the Dr Pepper goodness.
-
Boozy Dr Pepper Ice Cream: Stir in a tablespoon of cherry liqueur or amaretto right before churning for an adults-only treat. (Tip: Alcohol keeps the texture a little softer too!)
Serving Ideas and Pairings
Dr Pepper Ice Cream is a star on its own, but pairing it with the right extras takes it over the top:
-
Serve with mini Dr Pepper floats: Scoop some ice cream into a small glass and top with a splash of fresh Dr Pepper for an instant float.
-
Pair with warm brownies: The fudgy chocolate and the fizzy spice notes make a seriously dreamy combo.
-
Top with whipped cream and maraschino cherries: A simple, pretty finishing touch that brings out the soda-shop vibes.
Fun idea: Create a DIY Dr Pepper Ice Cream Sundae Bar with toppings like crushed cookies, sprinkles, and cherry sauce for parties!
How to Store Dr Pepper Ice Cream
To keep your Dr Pepper Ice Cream as delicious as the day you made it:
-
Use airtight containers specifically designed for ice cream or deep loaf pans tightly covered with plastic wrap.
-
Store in the coldest part of your freezer (not the door) to avoid softening and ice crystal formation.
-
Best eaten within 1–2 weeks for optimal flavor and texture.
Texture Tip: If the surface looks a little frosty after a few days, just let the ice cream sit out at room temperature for 5–10 minutes and give it a quick stir before scooping.
Troubleshooting: Common Mistakes to Avoid
Homemade ice cream is super rewarding, but a few things can trip you up. Here’s how to avoid them:
-
Over-reducing the soda: If your Dr Pepper syrup tastes burnt or bitter, start over. You want rich, concentrated flavor, not caramelized sugar.
-
Over-churning: Once the mixture hits a thick, soft-serve texture, stop! Over-churning whips in too much air and can make your ice cream icy.
-
Skipping the chilling step: Warm ice cream bases churn poorly and can create a gritty texture. Always chill the mixture fully before churning.
Quick Fix Tip: If your ice cream is too icy after freezing, let it soften for a few minutes before serving. It’ll still taste amazing!
FAQs About Dr Pepper Ice Cream
Can you use diet Dr Pepper for ice cream?
You can, but regular Dr Pepper is definitely better for richness and flavor. Diet sodas can result in a thinner base, and artificial sweeteners may create a slightly different aftertaste.
Does the ice cream actually taste like Dr Pepper?
Absolutely! Especially if you take the time to properly reduce the soda into a syrup. The spicy-sweet cherry-vanilla notes come through beautifully.
Can you make Dr Pepper Ice Cream without an ice cream maker?
Yes! You can easily make a no-churn version. Just whip heavy cream to stiff peaks, fold it into a sweetened condensed milk and Dr Pepper syrup mixture, then freeze. It’s simple and still deliciously creamy.
Can I add chunks like chocolate chips or cherries?
Definitely. Stir in your add-ins after churning (or folding if using no-churn) to keep them evenly distributed and avoid sinking to the bottom.
Final Thoughts: Why Dr Pepper Ice Cream is Your New Summer Favorite
Dr Pepper Ice Cream is more than just a fun kitchen experiment — it’s a bold, nostalgic treat that’s perfect for summer celebrations, backyard BBQs, or simply cooling off with a smile.
The fizzy spice and fruity notes make it a refreshing twist on classic ice cream, and it’s so easy to customize with your favorite variations.
Get creative, share it with family and friends, and don’t forget to snap a picture of your scoop-tacular creation!
Here’s to a sweet, fizzy, and oh-so-delicious summer!
Dr Pepper Ice Cream Recipe
Equipment
- Saucepan
- Mixing bowls
- Whisk
- Ice cream maker (or electric mixer for no-churn)
- Plastic wrap
- Freezer-safe container
Ingredients
- 2 cups Dr Pepper soda for reduction
- 1 ½ cups heavy cream
- 1 cup whole milk or half-and-half
- ½ cup granulated sugar optional if soda reduction is very sweet
- 1 teaspoon vanilla extract optional
(For No-Churn Version)
- 1 can 14 oz sweetened condensed milk
- 2 cups heavy whipping cream
Instructions
Reduce the Soda:
- Pour Dr Pepper into a saucepan and simmer over medium heat until reduced by half and syrupy. Cool completely.
Prepare the Base:
- In a bowl, whisk together heavy cream, whole milk, sugar (if using), vanilla extract, and the cooled Dr Pepper syrup.
Chill the Mixture:
- Cover and refrigerate the base for 4 hours or overnight.
Churn the Ice Cream:
- Pour the chilled base into your ice cream maker and churn until it reaches a soft-serve consistency.
Freeze to Set:
- Transfer the churned ice cream to a freezer-safe container. Press plastic wrap directly on the surface, seal, and freeze for at least 4–6 hours.
Serve and Enjoy!
- Scoop, top with whipped cream and cherries if desired, and enjoy your homemade Dr Pepper Ice Cream!
Notes
- Chill everything: Make sure your base, bowls, and beaters are cold for the best creamy texture.
- Watch the reduction: Don’t let the Dr Pepper overcook or burn — it should be thick and glossy, not sticky or bitter.
- No-churn tip: Whip heavy cream to stiff peaks before folding into sweetened condensed milk and Dr Pepper syrup for an easy no-churn method.
- Flavor boosters: Add maraschino cherries or a splash of cherry liqueur for extra richness.
- Storage: Best enjoyed within 1–2 weeks. Soften slightly before scooping after long freezing.
Times
- Prep Time: 15 minutes
- Cook Time (Reduction): 20 minutes
- Chill Time: 4 hours
- Churn Time: 20–25 minutes
- Freeze Time: 4–6 hours
- Total Time: ~9 hours
Nutrition