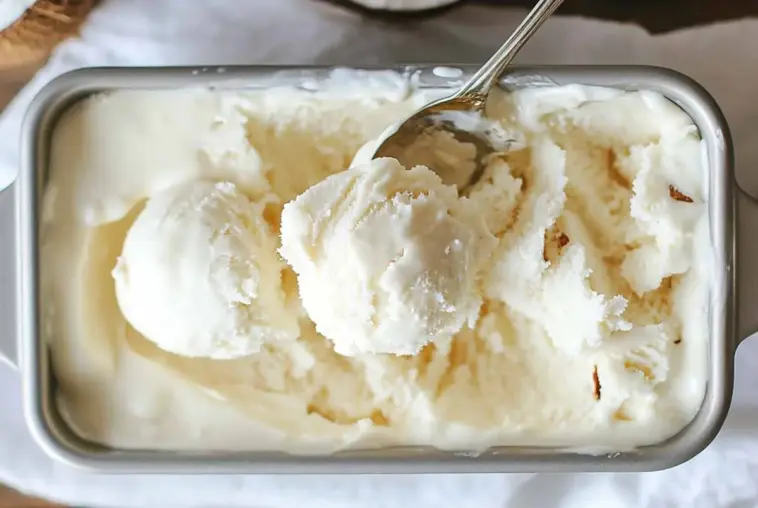
Why Coconut Ice Cream Is a Game-Changer
There’s something magical about a scoop of creamy coconut ice cream on a warm summer day. It’s cool, tropical, and incredibly refreshing. But what truly makes it a standout is that it delivers luscious, melt-in-your-mouth texture—without any dairy at all. Whether you’re soaking in the sun or just craving a guilt-free treat, this dessert feels like a mini vacation.
Unlike traditional ice cream, coconut ice cream is made with full-fat coconut milk or cream, which gives it a velvety richness that’s hard to beat. It’s naturally vegan, making it a dream come true for those avoiding dairy, and perfect for anyone with lactose intolerance.
But you don’t need dietary restrictions to fall in love with it. If you enjoy the flavor of coconut—or you’re just looking for something new and exciting to whip up at home—creamy coconut ice cream is about to become your go-to dessert.
What Is Creamy Coconut Ice Cream?
Creamy coconut ice cream is a dairy-free frozen dessert that uses coconut milk or coconut cream as its main base instead of traditional milk or heavy cream. This switch not only makes it plant-based but also gives it a unique tropical flavor and indulgent texture that rivals any classic ice cream.
In terms of taste, expect a smooth, nutty richness from the coconut, sometimes enhanced with vanilla, fruit, or chocolate. The texture is soft, silky, and scoopable—especially if you use the right kind of coconut milk and proper churning technique.
Traditionally, coconut ice cream is a staple in some Southeast Asian cuisines, often served alongside sticky rice or tropical fruit. Modern versions have evolved to suit vegan and health-conscious diets, often free from eggs, gluten, or refined sugars.
Homemade versions have the edge: they’re fresher, more customizable, and often contain fewer stabilizers or fillers than store-bought brands.
Health Benefits of Coconut in Ice Cream
Not only is creamy coconut ice cream delicious, but it can also be part of a better-for-you dessert option. Coconut milk contains lauric acid, a type of medium-chain fatty acid that may help support immune health and provide a quick energy boost.
Another big plus? It’s naturally dairy-free, which makes it easier to digest for many people—especially those who are lactose-intolerant. If your tummy doesn’t tolerate traditional milk, coconut ice cream offers the same indulgence without the discomfort.
It’s also a great fit for plant-based lifestyles. With no animal products, it aligns with vegan and paleo-friendly eating habits. And if you make it at home, you can use less sugar—or swap in healthier sweeteners—to make it suit your goals.
Bold Tip: Use unsweetened coconut milk for better control over sugar content and overall sweetness.
With the right ingredients, it’s entirely possible to create a dessert that’s both nourishing and indulgent.
Essential Ingredients for Creamy Perfection
Creating the perfect batch of creamy coconut ice cream starts with the right ingredients. Here’s what you need:
-
Full-fat coconut milk or coconut cream: This is the star of the show. The fat content ensures a rich, creamy texture. Avoid “lite” or diluted coconut milk—they result in icy, hard ice cream.
-
Sweeteners: Depending on your preference, you can use regular sugar, maple syrup, agave nectar, or honey (note: not vegan). Maple syrup adds a lovely depth, while agave gives a more neutral sweetness.
-
Thickening agents: These help prevent ice crystals and give the ice cream structure. A small amount of cornstarch, arrowroot powder, or guar gum works wonders.
-
Vanilla extract and a pinch of salt: Vanilla enhances the coconut’s natural flavor, while salt balances the sweetness and richness.
-
Optional add-ins: Customize it! Stir in shredded coconut for texture, chocolate chips for indulgence, or swirls of mango puree for a tropical twist.
The secret to dreamy texture lies in the balance—fat, sweetener, and stabilizer must work together to give you a scoop-worthy result every time.
Choosing the Best Coconut Milk for Ice Cream
The kind of coconut milk you use can make or break your ice cream. For best results, always go with canned full-fat coconut milk or coconut cream. These versions have a higher fat content that’s crucial for a creamy, non-icy texture.
Avoid using coconut milk from cartons (the kind meant for drinking or cereal)—they’re watered down and often contain additives that don’t freeze well.
Also, be mindful of emulsifiers and stabilizers like guar gum or carrageenan. While some are okay in small amounts, too many can lead to an odd or gummy texture.
Recommended brands that consistently perform well include:
-
Trader Joe’s Organic Coconut Milk
-
Thai Kitchen Organic Coconut Milk
-
Aroy-D 100% Coconut Milk
Whenever possible, choose BPA-free cans and organic options to ensure a clean, high-quality base for your dessert.
A good coconut milk is the foundation of everything. Don’t skimp here—you’ll taste the difference in every bite.
How to Make Creamy Coconut Ice Cream (Step-by-Step Guide)
Making coconut ice cream at home is easier than you might think. Here’s a simple overview to get started:
-
Heat the base: In a saucepan, gently warm the coconut milk, sweetener, and vanilla over medium heat. Stir in your thickener (like cornstarch or arrowroot) and whisk until smooth. Let it thicken slightly.
-
Chill thoroughly: Transfer the mixture to a bowl and let it cool to room temperature. Then refrigerate it for at least 4–6 hours, or overnight. Cold mixtures churn better.
-
Churn the mixture: Pour the chilled base into your ice cream maker and churn according to the manufacturer’s instructions—usually about 20–30 minutes.
-
Freeze to firm up: Scoop the churned ice cream into a container and freeze for another 2–4 hours for a scoopable texture.
-
Serve and enjoy: Let the ice cream sit at room temp for 5–10 minutes before scooping.
Pro Tip: For extra creaminess, blend the mixture in a high-speed blender before chilling to fully emulsify the fats.
The result? A cold, creamy treat that’s naturally vegan, bursting with coconut flavor, and totally crave-worthy.
Delicious Coconut Ice Cream Variations to Try
One of the best things about homemade coconut ice cream is how easy it is to get creative with flavors. Whether you’re craving fruity, crunchy, or indulgent, there’s a variation to match every mood.
-
Toasted Coconut Crunch: Add toasted coconut flakes into the mix or sprinkle on top for extra texture and nutty flavor. Toasting brings out the natural sweetness and adds a satisfying bite.
-
Mango Coconut Swirl: Blend fresh or frozen mango into part of the base, then swirl it in after churning. It’s like a tropical vacation in a bowl!
Advertisement -
Chocolate Chip Coconut: Stir in mini dark chocolate chips or chopped chunks. The bitterness of dark chocolate perfectly balances the rich coconut.
-
Matcha Coconut: Add a teaspoon of culinary-grade matcha powder to the base for an earthy twist. Matcha and coconut are a dream pairing.
-
Coconut Lime or Pineapple Coconut: Zest in some lime or fold in crushed pineapple for that tangy-sweet contrast.
-
Keto/Low-Carb Options: Use monk fruit, erythritol, or allulose in place of sugar to make a low-carb version that still feels indulgent.
Tip: Don’t overload your base with too many mix-ins—less is more when keeping the texture smooth and creamy.
No-Churn Coconut Ice Cream Method
Don’t have an ice cream maker? No worries—you can still make incredibly creamy coconut ice cream with a no-churn method.
Start by chilling a can of full-fat coconut milk and scooping out the thick cream. Whip it until fluffy using a hand mixer or stand mixer. Add your sweetener, vanilla extract, and any mix-ins.
Once combined, pour the mixture into a freezer-safe container. Cover it tightly, then freeze. Every 30–45 minutes for the first 2–3 hours, stir the mixture to break up any ice crystals. This helps mimic the churning process and results in a smoother texture.
Let it freeze fully for 4–6 hours. Before serving, let it sit at room temperature for 5–10 minutes to soften.
Bonus Tip: Add a splash of alcohol (like vodka or rum) to lower the freezing point and keep the texture scoopable.
It’s easy, hands-on, and still absolutely delicious.
Vegan & Allergy-Friendly Coconut Ice Cream Tips
Coconut ice cream is naturally vegan and can be tailored for a variety of dietary needs—making it a go-to dessert for many!
-
Nut-Free Options: Stick to pure coconut milk without almond or cashew additions. Always double-check labels for cross-contamination if allergies are severe.
-
Gluten-Free Cones & Toppings: Serve your coconut ice cream with gluten-free cones, cookies, or brownies to keep the whole dessert allergy-friendly.
-
Refined Sugar-Free Sweeteners: Opt for natural alternatives like maple syrup, coconut sugar, or date syrup if you’re avoiding refined sugars.
-
Cross-Contamination Awareness: Follow the EAT principles—Exclusion, Awareness, and Testing. Use clean equipment, separate storage, and allergen-safe utensils when making and serving.
Because it’s already dairy- and egg-free, coconut ice cream makes an easy base for allergen-free desserts. Just a few mindful tweaks can ensure everyone at the table gets to enjoy a safe, satisfying treat.
How to Store and Serve It Right
Once you’ve made your coconut ice cream, proper storage is key to keeping it fresh and scoopable.
-
Best Containers: Use a shallow, airtight container (like a loaf pan with a tight-fitting lid or a reusable silicone container). The shallower shape allows quicker freezing and easier scooping.
-
Avoid Freezer Burn: Press a piece of parchment paper or plastic wrap directly onto the surface before sealing to prevent ice crystals from forming.
-
Let It Soften: When you’re ready to serve, let it sit at room temp for 5–10 minutes. Coconut ice cream firms up more than dairy ice cream in the freezer, so a little patience goes a long way.
-
Shelf Life: Homemade coconut ice cream is best enjoyed within 10–14 days, though it will last longer if stored well. Texture may change slightly after two weeks.
Tip: Label your container with the date you made it so you always know how fresh it is.
Perfect Pairings & Serving Ideas
Coconut ice cream is wonderfully versatile—here’s how to turn it into an unforgettable dessert:
-
Grilled Pineapple or Mango: A warm, caramelized fruit pairs beautifully with the cool creaminess.
-
Drizzled Toppings: Add chocolate ganache, salted caramel, or fruit compote for extra flair.
-
Coconut Ice Cream Sandwiches: Scoop it between gluten-free cookies or coconut macaroons for a tropical spin on a classic.
-
Refreshing Beverages: Serve with cold brew coffee, an iced matcha latte, or even a coconut mojito for a summery treat.
Mix and match your combos to keep things fun—and always serve with a smile!
Frequently Asked Questions
Can I make coconut ice cream without an ice cream maker?
Absolutely. Use whipped coconut cream, fold in your sweeteners, and freeze. Stir it occasionally for the smoothest texture.
Why is my coconut ice cream icy?
Light coconut milk or skipping stabilizers could be the issue. Always use full-fat and consider a thickener like cornstarch.
Is coconut ice cream healthier than regular ice cream?
Often, yes. It’s dairy-free and can be made with less sugar. Just watch the saturated fat if that’s a concern.
Can I use coconut milk from a carton?
It’s best to avoid—it’s too thin. Canned, full-fat coconut milk gives the creamiest result.
Creamy Coconut Ice Cream
Equipment
- Saucepan
- Whisk
- Mixing bowl
- Ice cream maker (or loaf pan for no-churn method)
- Freezer-safe container
- Spatula
Ingredients
- 2 cans 13.5 oz each full-fat coconut milk
- ½ cup maple syrup or agave nectar
- 1 tbsp cornstarch or arrowroot powder
- 1½ tsp vanilla extract
- Pinch of sea salt
- Optional: ½ cup toasted coconut flakes chocolate chips, or mango purée
Instructions
- In a saucepan over medium heat, combine coconut milk, maple syrup, and a pinch of salt.
- In a small bowl, mix cornstarch with 2 tbsp of water to make a slurry.
- Add the slurry to the saucepan and whisk continuously until slightly thickened (about 5 minutes).
- Remove from heat and stir in vanilla extract.
- Let cool to room temperature, then cover and refrigerate for at least 4 hours or overnight.
- Churn in an ice cream maker according to manufacturer instructions (about 25–30 minutes).
- No ice cream maker? Whip coconut cream, fold in sweetener and vanilla, and freeze while stirring every 30–45 minutes for 2–3 hours.
- Transfer to a freezer-safe container and freeze for 2–4 hours until firm.
- Let sit at room temp for 5–10 minutes before scooping.
Notes
- Always use full-fat canned coconut milk (not from a carton).
- For sweeter results, add 2–3 tablespoons of coconut sugar or honey (if not strictly vegan).
- Add a teaspoon of vodka or rum to improve scoopability (optional).
- Best consumed within 2 weeks for ideal texture and taste.
Nutrition
Conclusion: Cool, Creamy, and Coconutty
Whether you’re chasing the tropical taste of summer, cutting out dairy, or just craving something rich and refreshing, creamy coconut ice cream checks every box. It’s easy to make at home, endlessly customizable, and surprisingly healthy—especially when you control the ingredients.
From no-churn methods to decadent mix-ins like mango or chocolate, this frozen treat proves that plant-based desserts can be just as satisfying as the classics. And with a little planning and the right coconut milk, you’ll be scooping up velvety, dreamy bites in no time.
So the next time the temperature rises (or you just need a mood boost), skip the store-bought stuff and make your own coconut masterpiece. It’s the kind of dessert that brings people back for seconds—sometimes even straight from the freezer.
Now go grab that spoon—you’ve got a batch to enjoy!