Introduction: Why This Ice Cream Cake Is a Dream Come True
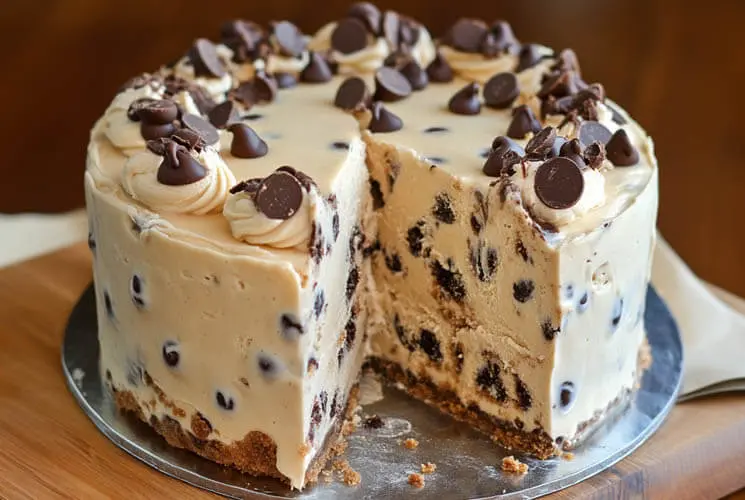
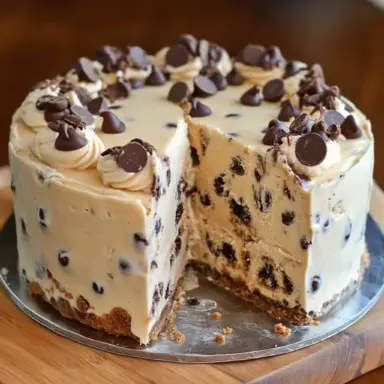
There’s something magical about the combination of chocolate chip cookie dough and creamy ice cream. It instantly sparks memories of sneaking spoonfuls of dough from the mixing bowl and savoring every bite like it was the best treat in the world. Now imagine turning that pure joy into a show-stopping dessert: a Chocolate Chip Cookie Dough Ice Cream Cake.
This recipe brings together everything you love — sweet, nostalgic flavors, cool refreshing texture, and just the right amount of indulgence. Plus, it’s easier to make than you might think, and it’s guaranteed to be the star of any birthday, barbecue, or casual get-together.
In this guide, I’ll show you exactly how to make the perfect cookie dough ice cream cake at home — with tips on choosing the best dough, the creamiest ice cream, and decorating it like a pro. Get ready to wow your guests (and yourself)!
What You’ll Need to Make Chocolate Chip Cookie Dough Ice Cream Cake
Before we dive into layering deliciousness, let’s quickly walk through the key ingredients you’ll need:
-
Chocolate Chip Cookie Dough: You can either whip up a quick batch of edible cookie dough at home (more on that soon!) or pick up your favorite store-bought version.
-
Ice Cream: Classic vanilla is the perfect base, but you can mix things up with cookie dough ice cream, chocolate chip, or even caramel swirl for extra decadence.
-
Crust or Base: Some people love a traditional cookie crust (think crushed chocolate cookies with a bit of butter), while others prefer a soft, chewy brownie layer or even just sheets of baked cookie dough.
-
Toppings: The finishing touches make all the difference. A simple chocolate ganache, fluffy whipped cream, mini chocolate chip cookies, or even a handful of sprinkles can turn your cake into a true masterpiece.
Important Tip: Use high-quality ice cream. Since ice cream is the star here, splurging on a creamier, premium brand makes a noticeable difference in flavor and texture.
Choosing the Right Cookie Dough: Homemade vs. Store-Bought
When it comes to cookie dough, you have two fantastic options: homemade or store-bought.
Homemade Edible Cookie Dough
Making your own is easier than you think — and gives you full control over the ingredients. Plus, it’s safer because you’ll skip the eggs and use heat-treated flour to avoid any food safety risks. The flavor is rich, buttery, and loaded with mini chocolate chips for the perfect bite.
Store-Bought Options
If you’re short on time, many brands now sell edible cookie dough that’s safe to eat straight from the tub. Look for options like Toll House Edible Cookie Dough, Ben & Jerry’s Dough Chunks, or Sweet Loren’s.
Important Tip: Always double-check that the store-bought dough is labeled “edible” — regular raw cookie dough isn’t safe without baking!
The Best Ice Cream for Cookie Dough Cakes
Ice cream selection is another place where you can get creative.
Classic vanilla is always a winner because it lets the cookie dough shine. But don’t be afraid to branch out: cookie dough-flavored ice cream, chocolate chip, caramel swirl, or even fudge ripple varieties work beautifully.
Softening Tip: Let the ice cream sit at room temperature for about 10 minutes before using. It should be soft enough to spread easily but not melted into soup — you want that perfect scoopable texture for layering.
Fun Variations: For an extra pop of flavor and texture, gently fold in mini chocolate chips, crushed Oreos, or fudge chunks into the softened ice cream before assembling your cake.
How to Assemble Your Chocolate Chip Cookie Dough Ice Cream Cake
Now for the fun part — putting it all together!
Step-by-Step Assembly:
-
Prepare the base: Press your cookie crust or brownie layer firmly into the bottom of a springform pan. Freeze for about 15–20 minutes to firm up.
-
Layer the first ice cream layer: Spread a thick layer of softened ice cream over the chilled base, smoothing it out with a spatula.
-
Add cookie dough chunks: Scatter generous amounts of cookie dough pieces across the ice cream. Press them in lightly so they stay put.
-
Freeze between layers: Pop the cake back into the freezer for 30–45 minutes to set this first layer.
-
Add the second ice cream layer: Once the cookie dough layer is firm, spread another layer of softened ice cream over the top.
-
Finish with toppings: Drizzle with ganache, pipe on whipped cream, sprinkle with more cookie dough bites, or decorate however your heart desires!
Important Tip: Work quickly! Ice cream can melt fast — if needed, return the cake to the freezer between steps to keep things firm.
Decorating Ideas to Make It Look Amazing
The best part of making an ice cream cake (besides eating it!) is getting creative with the decorations. Here are some easy, eye-catching ideas:
-
Ganache Drizzle: Gently melt chocolate with cream to make a simple ganache, then drizzle it over the top in messy zigzags. It looks fancy but takes just a minute.
-
Dollops of Whipped Cream: Pipe little mounds of whipped cream around the edges and top each with a mini chocolate chip cookie for a playful, bakery-style look.
-
Sprinkles or Chocolate Curls: Scatter colorful sprinkles, mini chocolate chips, or shaved chocolate curls over the top for an extra fun finish.
Pro Tip: Chill your decorations before adding them. Cold toppings stick better to the frozen cake and help prevent melting disasters.
Advertisement
Keep it simple or go over the top — either way, the result will look irresistibly homemade and full of love.
Storage Tips: Keeping It Perfect Until Serving
To keep your ice cream cake tasting fresh and delicious:
-
Wrap it well: Once the cake is fully frozen and decorated, wrap it tightly with plastic wrap, then cover with foil. A freezer-safe cake box works too if you have one.
-
Prevent freezer burn: Make sure there are no air gaps. A double layer of protection keeps ice crystals from forming.
-
Shelf life: For the best flavor and texture, serve your cake within 2 weeks of making it. (Though honestly, it’s so good it rarely lasts that long!)
Bonus Tip: If you’re storing it for more than a few days, label it so you remember the date you made it.
How to Slice and Serve Ice Cream Cake Perfectly
Cutting through a frozen cake can be tricky — but not if you know the secret!
-
Use a sharp, heavy knife and run it under hot water before slicing. Wipe it dry, then slice through the cake in a smooth motion. Rinse and re-warm the knife between cuts for the cleanest pieces.
-
Let the cake sit at room temperature for about 5 minutes before cutting. It softens just enough to make slicing easier without turning into a puddle.
-
Serving idea: Drizzle each slice with warm caramel sauce or chocolate syrup for an extra decadent touch. A sprinkle of crushed cookies on top doesn’t hurt, either!
Important Tip: Work quickly once you start slicing to keep the cake beautifully layered and intact.
Fun Flavor Variations to Try
Want to mix things up a bit? Here are some delicious twists on the classic:
-
Oreo Cookie Dough Ice Cream Cake: Swap the cookie dough for edible Oreo cookie dough and use cookies-and-cream ice cream.
-
Peanut Butter Chocolate Chip Version: Add small dollops of peanut butter between the ice cream layers, or use peanut butter cookie dough for a sweet-salty combo.
-
Mint Chocolate Chip Cookie Dough Twist: Pair mint chocolate chip ice cream with chunks of chocolate chip cookie dough for a fresh, cool flavor.
-
Brownie Base Instead of Cookie Crust: Start your cake with a rich, fudgy brownie layer — it adds an irresistible chewiness that pairs perfectly with the ice cream.
There’s no wrong way to customize your cake — just follow your cravings!
FAQs About Chocolate Chip Cookie Dough Ice Cream Cake
Here are some quick answers to the most common questions people have when making this cake:
Can I make chocolate chip cookie dough ice cream cake ahead of time?
Yes! In fact, making it 2–3 days ahead gives it plenty of time to set perfectly. Just keep it tightly wrapped and frozen until ready to serve.
What is edible cookie dough made of?
Edible cookie dough is designed to be safe to eat raw. It’s made without eggs and uses heat-treated flour to eliminate bacteria risks.
How do I keep the ice cream cake from melting too quickly?
Work quickly when assembling, freeze between layers, and always serve it straight from the freezer. Keeping your decorations chilled also helps slow down melting during serving.
Can I use different types of ice cream for this cake?
Absolutely! Mix and match flavors like cookie dough, chocolate chip, caramel swirl, or even mocha fudge to create your own signature cake.
Can I make it gluten-free?
Yes, you can easily make a gluten-free version! Just use gluten-free edible cookie dough and make sure your ice cream is labeled gluten-free as well.
Final Tips for the Best Chocolate Chip Cookie Dough Ice Cream Cake
Before you start scooping and layering, here’s a quick final checklist for success:
-
Soften the ice cream slightly for easier layering (but don’t let it melt!).
-
Spread the layers evenly so every slice is packed with cookie dough goodness.
-
Decorate right before serving or freeze decorated for no last-minute stress.
Most importantly, have fun with it! Even if your cake isn’t perfectly smooth or bakery-polished, the homemade touch makes it 10 times better. After all, the best desserts are the ones made with love.
Chocolate Chip Cookie Dough Ice Cream Cake
Equipment
- 9-inch springform pan
- Mixing bowls
- Silicone spatula
- Electric mixer (optional for whipped cream)
- Parchment paper
- Offset spatula (optional for smooth layers)
Ingredients
- 2 cups chocolate chip cookie crumbs for crust
- 5 tablespoons unsalted butter melted
- 1 quart vanilla ice cream or cookie dough-flavored
- 1 –1½ cups edible chocolate chip cookie dough chunks
- 1 cup heavy whipping cream for topping
- ¾ cup semi-sweet chocolate chips for ganache
- ½ cup heavy cream for ganache
- Mini cookies sprinkles, or chocolate curls for decoration (optional)
Instructions
Prepare the crust:
- Mix the cookie crumbs and melted butter in a bowl. Press firmly into the bottom of a 9-inch springform pan lined with parchment paper. Freeze for 20 minutes.
Layer the first ice cream layer:
- Allow ice cream to soften slightly. Spread half of the ice cream evenly over the frozen crust.
Add cookie dough chunks:
- Press chunks of edible cookie dough into the ice cream layer.
Freeze:
- Place the pan back into the freezer for 30–45 minutes, or until firm.
Add second ice cream layer:
- Spread the remaining ice cream on top. Smooth with a spatula for an even surface.
Ganache topping (optional):
- Heat heavy cream until just simmering, then pour over chocolate chips. Stir until smooth. Let cool slightly, then drizzle over the top of the cake.
Decorate:
- Pipe whipped cream around the edges and add mini cookies, sprinkles, or chocolate curls.
Final freeze:
- Freeze cake for at least 4–6 more hours or overnight before slicing and serving.
Notes
- Softening the ice cream: Leave ice cream at room temperature for about 10 minutes to make spreading easier.
- Working quickly: If the ice cream softens too much during layering, freeze between steps to maintain firm layers.
- Ganache tip: Let the ganache cool slightly before drizzling to avoid melting the ice cream.
- Make-ahead: You can make this cake up to 3 days in advance — just keep it well wrapped in the freezer!
- Gluten-free version: Use gluten-free cookie dough and certified gluten-free ice cream for a celiac-safe dessert.
Nutrition